Notion is one of the most powerful apps for building solid systems and workflows, but it also comes with a steep learning curve. Whether you’re a total Notion newb or you’re well on your way to becoming a Notion power user, these tips and tricks are sure to come in handy! We’ve covered basic functions, like linking back to pages, as well as advanced tips, like nesting columns within columns.
Looking for more productivity tips and tools? Subscribe to The Flow — our quick, snappy, value-packed focus and recharge newsletter. Also, don’t miss our several other Notion template round-ups and guides!
 Get the all-in-one Life OS template, the only Notion template you’ll ever need — with over 25 integrated templates built in.
Save yourself some keystrokes with Notion’s template buttons
If you find yourself constantly creating the same blocks or lists over and over, consider setting up a template button. Template buttons let you automatically insert several blocks into a Notion page whenever you click the button.
Template buttons are not the same thing as page templates or database templates. To create a template button in Notion, type the slash key on your keyboard (/) to open Notion’s block menu. Then, choose “Template button”.
The “Configure template button” block will appear. You can change the name of the button and drag and drop blocks you’d like to duplicate whenever you click the button. You can add blocks of all types to a template button, and you can also add as many blocks as you like.
Whenever you click the button to automatically insert the blocks in the template, be advised that they may take a moment to appear.
 Template buttons in action, generating pre-set blocks in the click of a button – from our Ultimate Travel Dashboard for Notion Template
Use LaTeX blocks to change text colors and formatting
At the time of writing, Notion doesn’t let you choose your own fonts or colors for text and backgrounds. Bummer! Luckily, some super smart Notion wizards figured out how to set custom text and background colors in Notion using LaTeX equations. With this handy Notion tip, you can even add borders to your text blocks. Neat!
To change text colors, fonts, sizes, and backgrounds using this method, you’ll need to create a new LaTeX block in Notion. To do that, type the slash key (/) on your keyboard, then select “Block equation” from the list of blocks.
To change text color, use this simple LaTeX equation:
\color{color}{text}
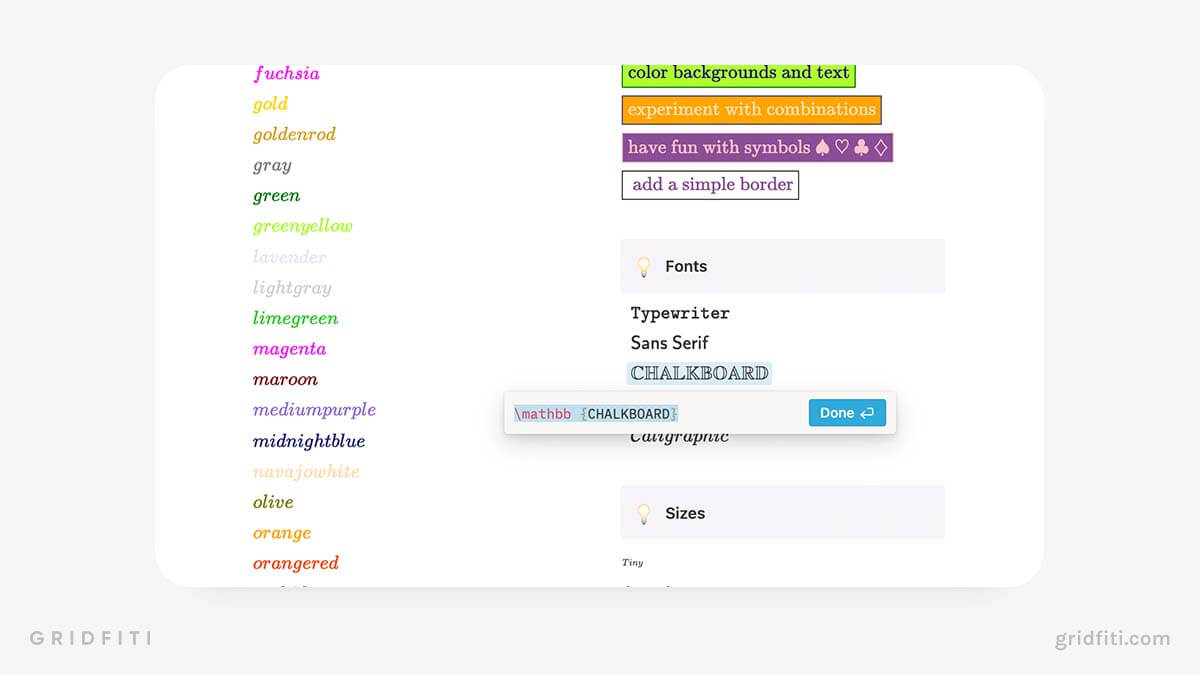
So for example, if you wanted to add turquoise text, your equation would be: “\color{turquoise}{your text here}”:

As you can see, the color values in brackets are not HEX codes — they’re actually predefined colors. Instead of listing all the color options here, we suggest duplicating this handy LaTeX formatting cheat sheet to your Notion workspace!
Nest columns within columns with this handy hack
Ever wished you could create columns inside other columns in Notion? We know we have! Luckily, there’s a sneaky way to do this by making a new page with columns and then turning it back into a text block. Here’s how to do it.
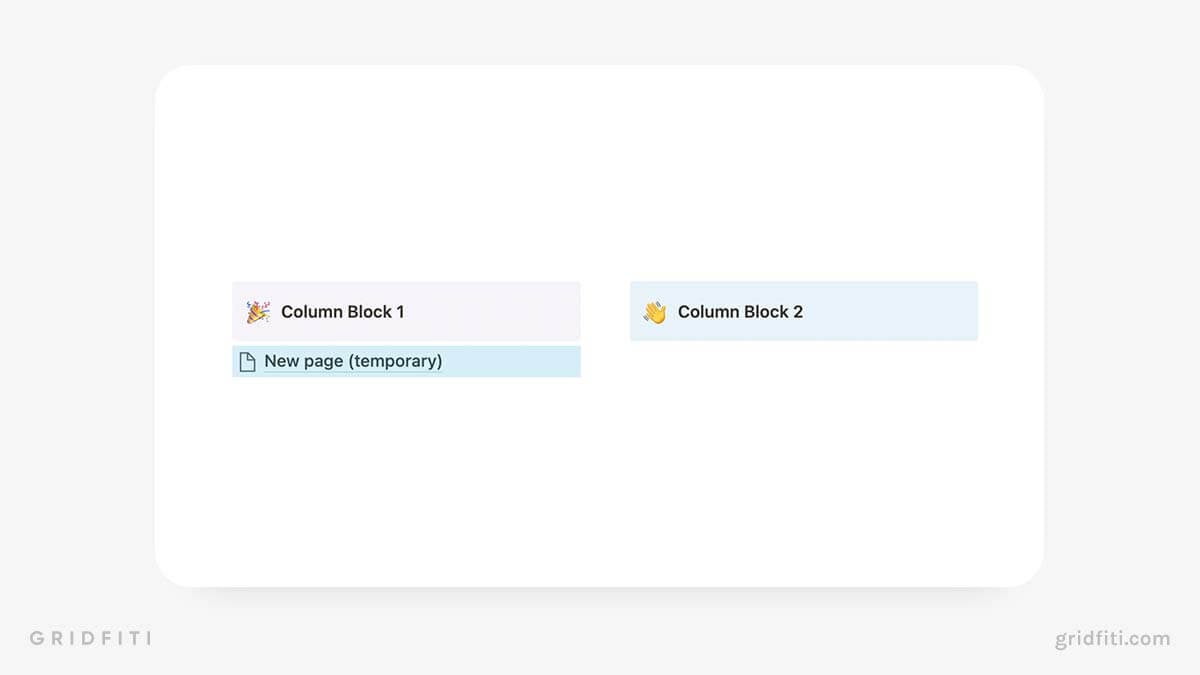
Step 1: Create 2 new columns on a Notion page. We recommend using Heading blocks for this first step.
 Step 2: Within one of the columns, create a new text block and convert it into a subpage. (This new page is only temporary, don’t worry.)
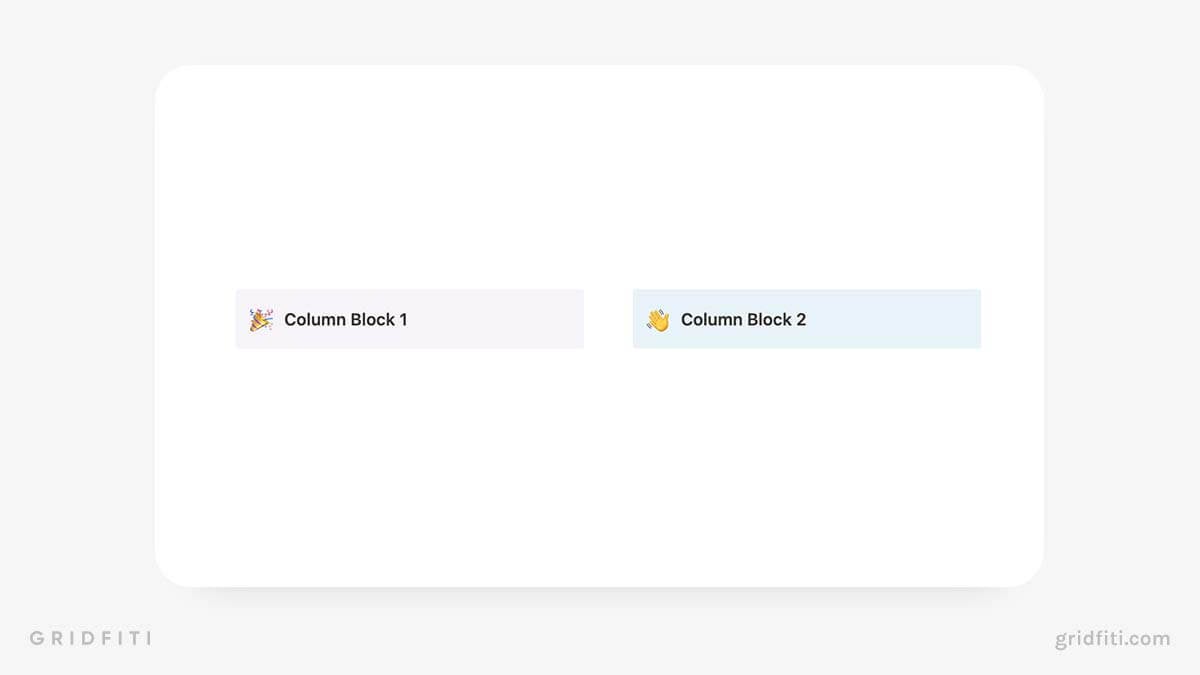
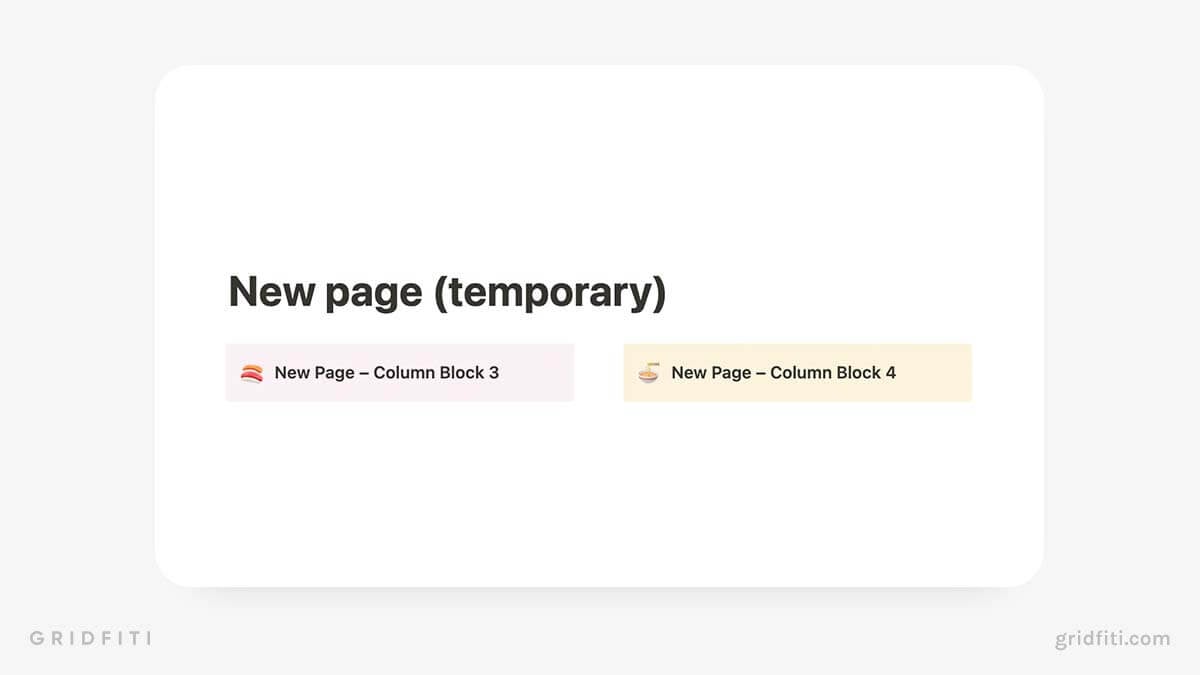
 Step 3: Open this new page. In the body, add the blocks you’d like to nest within columns. Be sure to format them as columns:
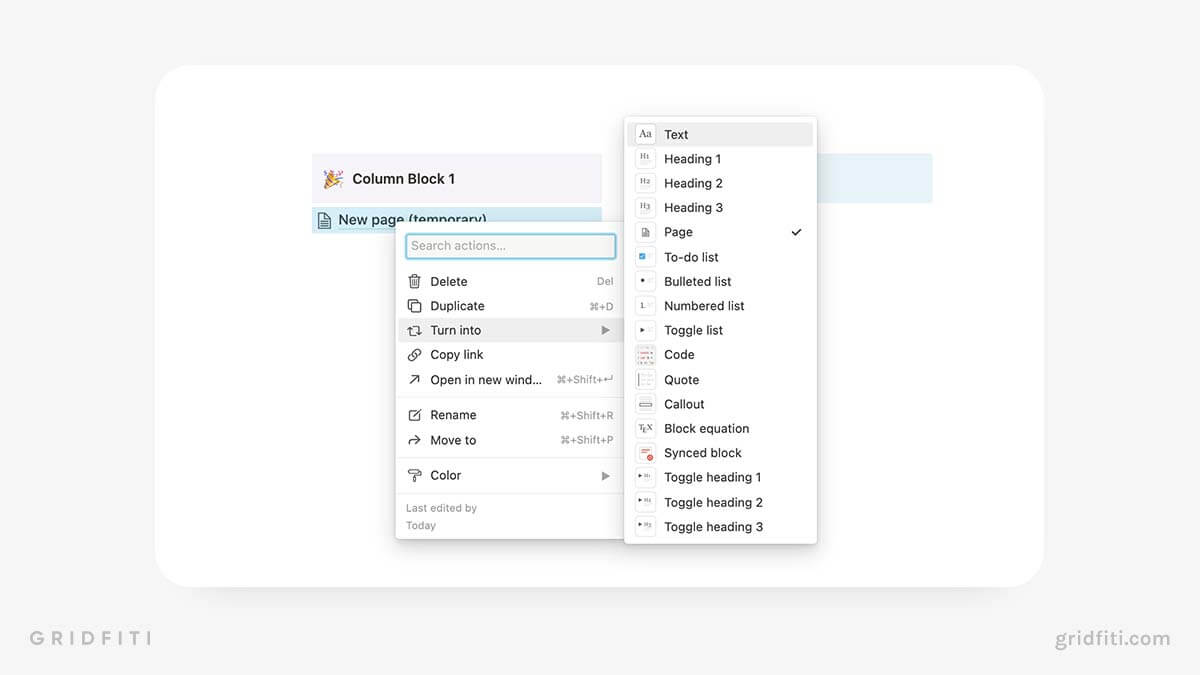
Step 4: Go back to the page where you made your 2 heading blocks.
Step 5: Click the block handles [⋮⋮] to the left of the new subpage where you just added your nested column blocks. Then hover over “Turn into”, then click “Text”.
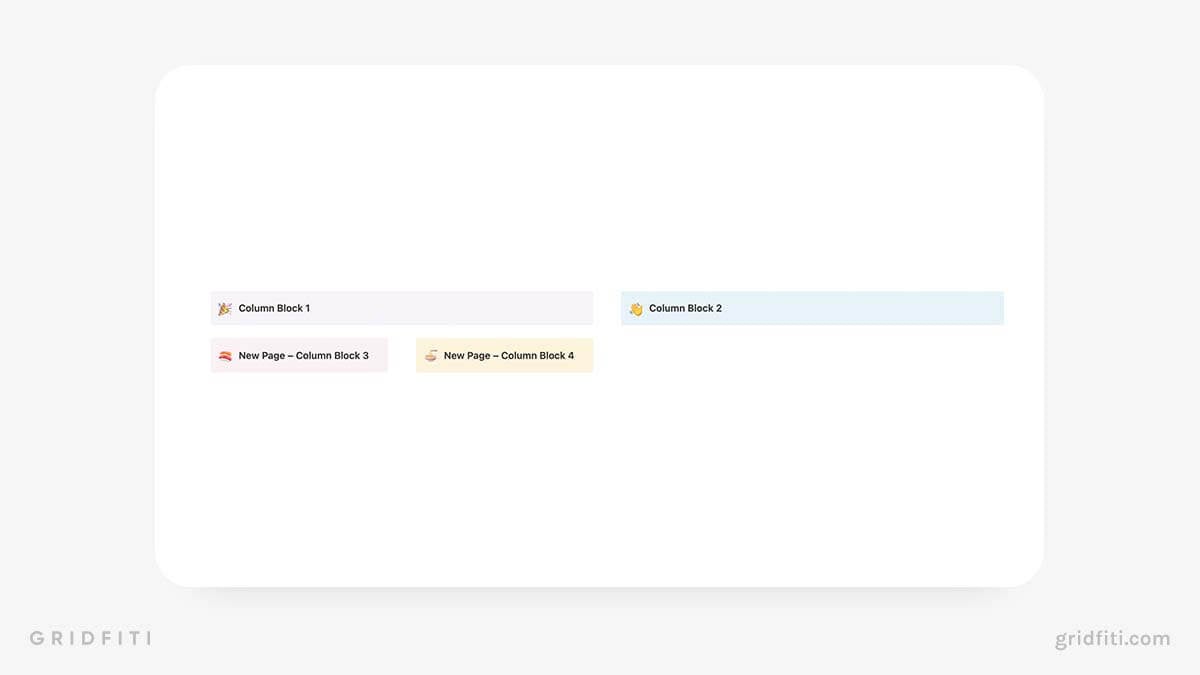 Voila! Your columns should now show up.
Link other pages anywhere in Notion
Notion’s sidebar is a functional and minimalist navigation pane — but when you create a lot of pages in Notion, it can be hard to find things quickly using the sidebar.
That’s why Notion’s backlink feature is so handy. You can add a link to (aka “mention”) any page in Notion by typing the “at” symbol (@) on your keyboard, followed by the title of the page:
Going back to the sidebar, you may have wondered why some Notion icons have arrows next to them and others don’t:
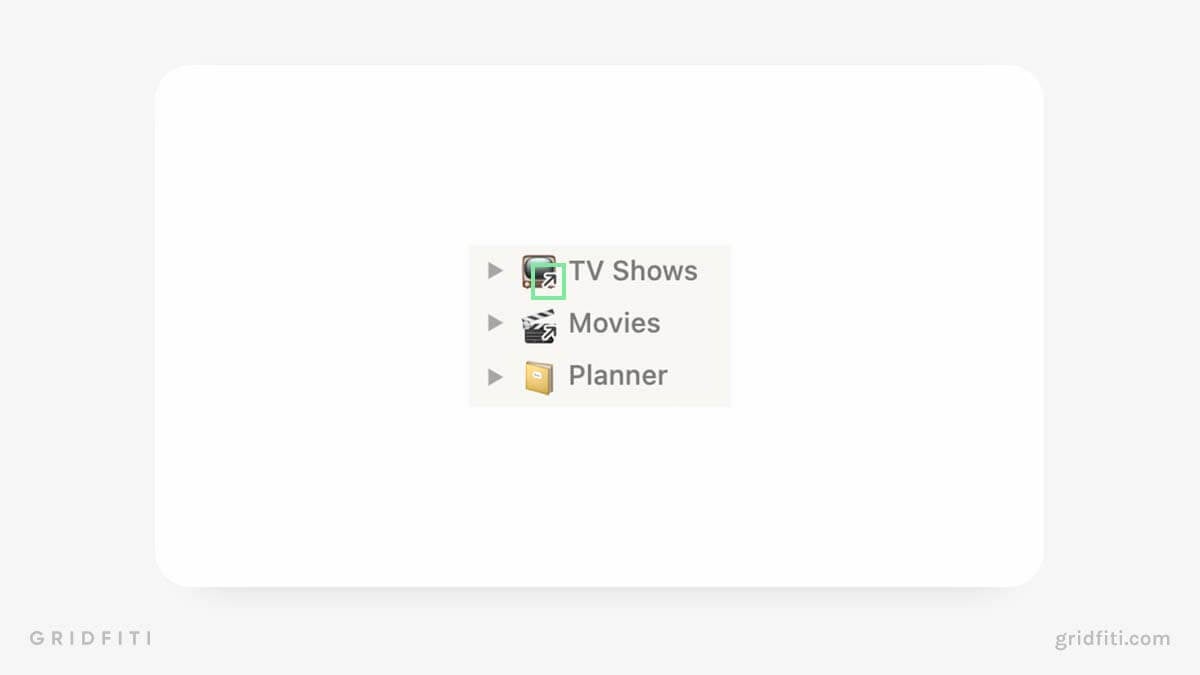 If you see a black arrow next to a page icon in the sidebar, this indicates it’s a backlink to the original page. The page itself is stored elsewhere within your Notion workspace.
Save web content to a Notion database in seconds with this browser extension
Notion databases are perfect for storing resources and content you find across the web. The Notion Web Clipper browser extension lets you save articles and webpages to Notion in just a few clicks. Just install the browser extension (available for Chrome, Firefox, and Safari), sign in with your Notion account, and you’re ready to go!
We recommend keeping this browser extension in your browser toolbar for quick access. Once you’ve installed and set up the extension, here’s what you need to do to save webpages to Notion.
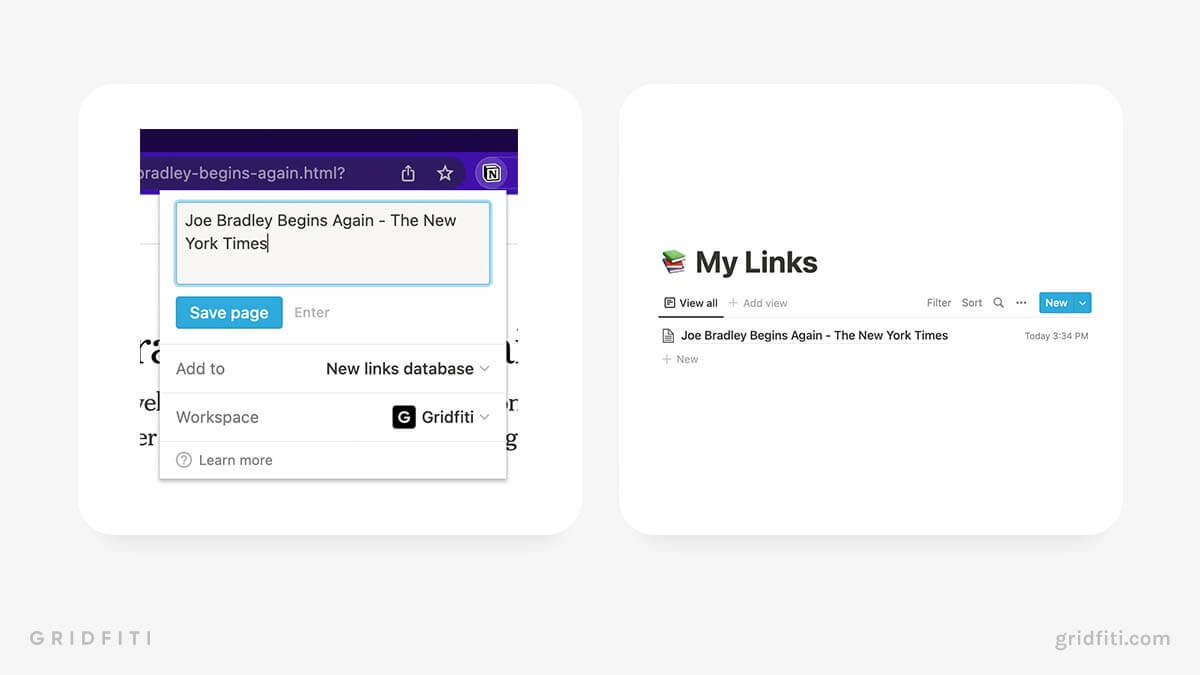
Step 1: Click the Notion icon in your browser toolbar to access Notion Web Clipper. (You may need to agree to the privacy policy if you haven’t already.)
Step 2: Enter the text you’d like to appear as the title of your new Notion page. (This should automatically display the title of the webpage, but you can change it to whatever you want.)
Step 3: Select the database you’d like to save the new page to.
Step 4: Select the workspace you’d like to save the new page to.
Step 5: Click “Save”.
Voila! Now that article is saved in Notion. If you have a URL property in your database, the URL of the original article will automatically populate there. However, you’ll need to update the other properties manually (unless you apply a database template after saving the page).
Pro tip: Notion Web Clipper may automatically extract text, links, images, and other elements from the webpage and add them to the body of each new Notion page. We’ve found it doesn’t work for all articles, but it works for most of them.
Use widgets to level up your workspace
If you’re a newbie who’s searching for Notion tips and tricks to conquer the learning curve, this is a good one to know! Particularly if you’re keen on building an aesthetic Notion dashboard.
Indify is one of the most user-friendly (and free!) widget makers for Notion, but it’s certainly not the only option out there. Check out some of our favorite Notion widgets to get an idea of what you can create!
Indify currently offers 9 widgets (but more widgets are on the roadmap):
- Button: Add a button with a link or text.
- Clock: Embed different types of clocks in Notion.
- Countdown: Count down to a specific date.
- Counter: Keep tallies of whatever you like (for example, number of books read, number of workouts completed, etc.).
- Google Calendar: See your Google Calendar in Notion (this is not the same as a two-way sync between Notion and Google Calendar).
- Image Gallery: Create an interactive carousel of images.
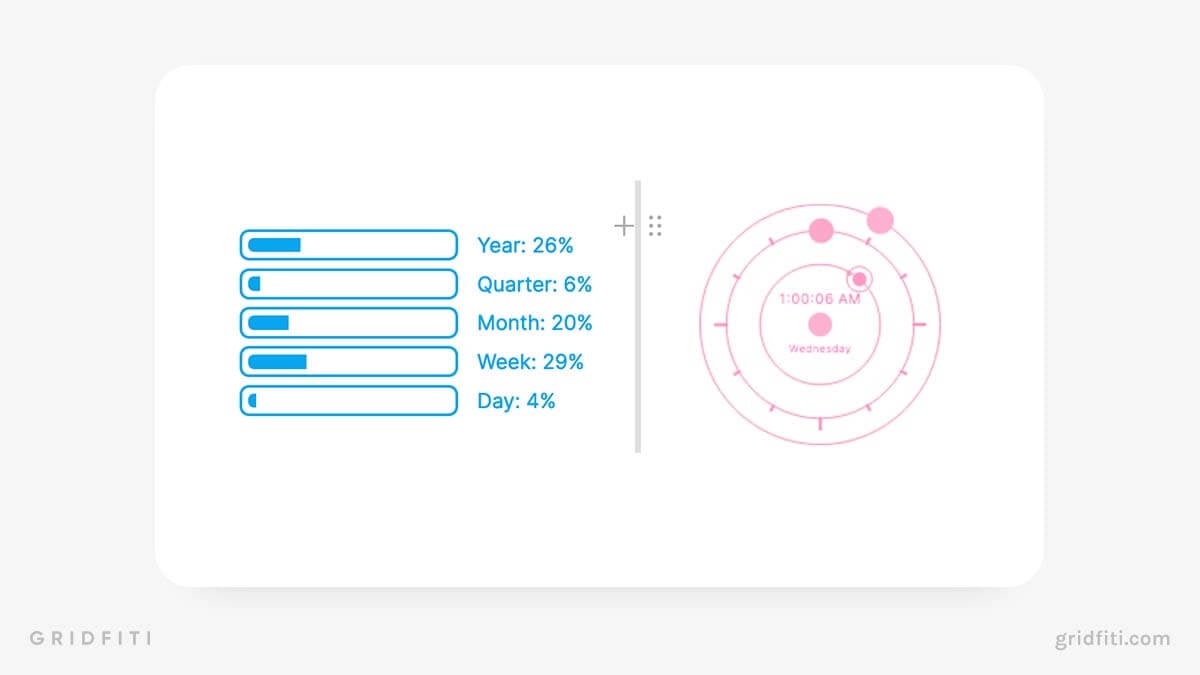
- Life Progress Bar: See how much time is left in the year, quarter, month, week, and day, and even your lifetime (yikes!).
- Quotes: Curate aesthetically pleasing quotes from popular Instagram accounts like @positivemindsetdaily.
- Weather: See weather conditions in real time.
How do you insert a widget in Notion? It’s super simple!
How to create a new widget using Indify and embed it in Notion:
Step 1: Create an Indify account (or sign in to an existing one).
Step 2: Click the “Add new widget” button.
Step 3: Select the type of widget you want to create.
Step 4: Customize each field according to your preferences. Many Indify widgets let you customize the appearance and colors of your widget.
Step 5: Copy the link at the bottom of the Indify widget editing page.
Step 6: Navigate back to Notion.
Step 7: Open the page where you’d like to view the widget.
Step 8: Create a new Embed block and paste the Indify widget link.
And that’s it! Indify saves your widgets, so you can edit or update them as often as you like.
How to place widgets side by side in Notion
Now that you know how to create your own widgets and embed them in Notion, you might be wondering, “Can I place widgets side by side in Notion?” The answer is a resounding yes! Here’s how:
Step 1: Click and hold the block handle [⋮⋮] to the left side of the widget.
Step 2: Drag the widget to the left or right side of another embedded widgets until you see a long, vertical blue bar.
Step 3: Release the click and enjoy!
To resize your columns, hover over the Notion column divider until you see a vertical gray bar and your cursor displays a pair of arrows:
 Then, just click and drag to the left or right to adjust the width.
See analytics with embedded Google Data Studio reports
Notion is one of the best tools available for bloggers and content marketers. The app’s robust database features make it easier than ever to get a big-picture overview of all your content, tasks, campaigns, and so much more.
We’ll show you how to embed Google Analytics in Notion using Google Data Studio. However, we won’t cover what Google Data Studio is, how it works, or how to create your first report. if you’re new to this GSuite tool, check out the Google Data Studio Help Center.
How to embed Google Analytics and other reports in Notion in 10 easy steps:
Step 1: Sign in to Google Data Studio.
Step 2: Open the report you’d like to embed.
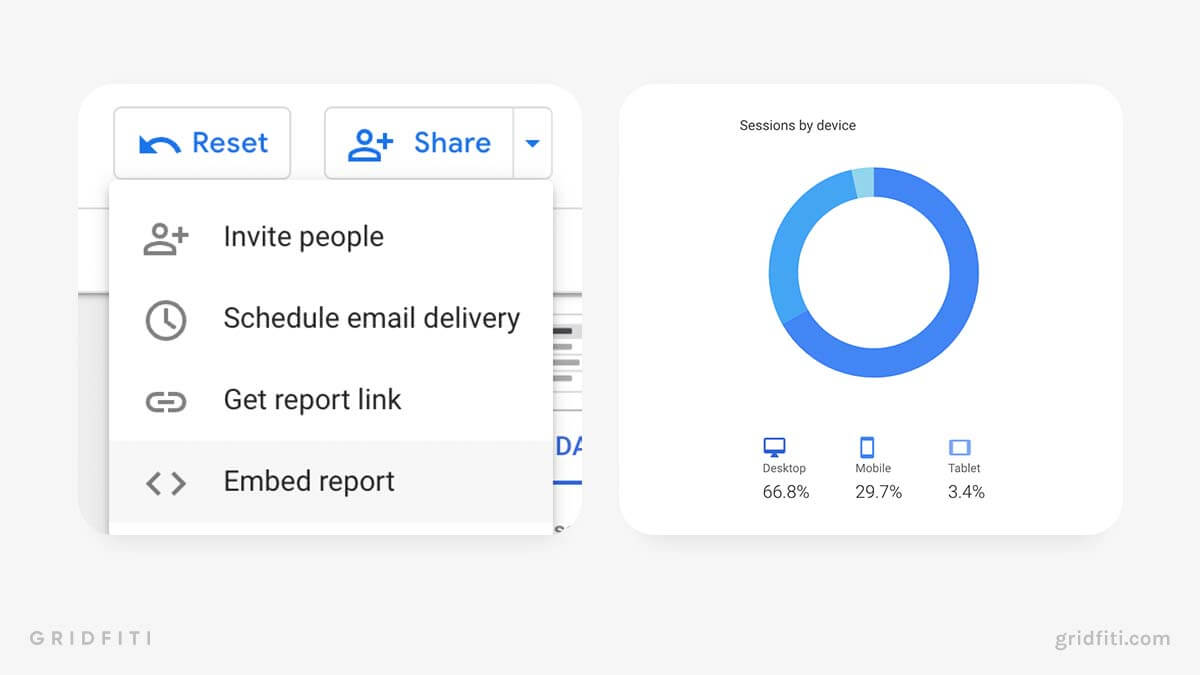
Step 3: In the top right-hand corner of the page, click the drop-down arrow next to “Share”.
Step 4: Click “Embed report”.
Step 5: Select “Embed URL” (not “Embed Code”).
Step 6: Copy the Embed URL.
Step 7: Navigate back to Notion.
Step 8: Create a new Embed block in the Notion page where you’d like to embed the report.
Step 9: Paste the URL in the Embed block.
Step 10: Wait for the page to load, then resize the block and interact with the embedded report however you like.
That’s it! With this method, you’ll always see up-to-date reports in Notion — no more tab switching. Blogger Mel Lee-Smith has embedded Google Data Studio reports for her Pinterest, YouTube, Google Search Console, and Google Analytics accounts in Notion, right alongside all her content, goals, and plans!
Embed mindmaps and wireframes right in Notion
“Can you create mindmaps in Notion?” is a common question Notion newbies have. The answer is, sadly, no — you can’t create mindmaps within Notion. (At least, not yet! While mindmaps aren’t on Notion’s official roadmap, Notion accepts feature requests. So if you’d like to see mindmaps added to Notion, be sure to let the team know!)
While you can’t create mindmaps in Notion, you can view mindmaps from other apps, like Figma and Whimsical, right in Notion. While you won’t be able to edit Figma or Whimsical files in a Notion embed, you can quickly open the file from the block.
Here’s a quick primer on how to embed Figma, Whimsical, and other mindmapping and wireframe apps in Notion:
 Step 1: Open your Figma or Whimsical file.
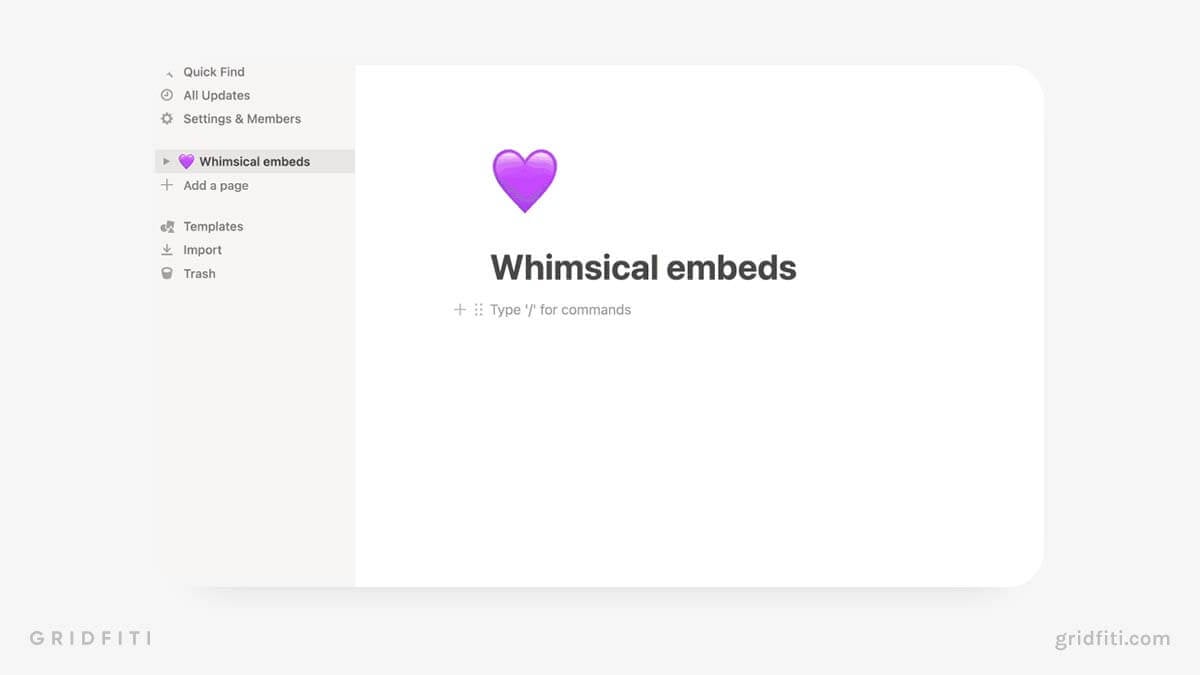
Step 2: Navigate to the Notion page where you’d like to embed the file.
Step 3: Create a new embed block by hitting the slash key (“/”) and typing “embed”.
Step 4: Copy the link to your Figma or Whimsical file.
Step 5: Paste the link in the Notion embed block.
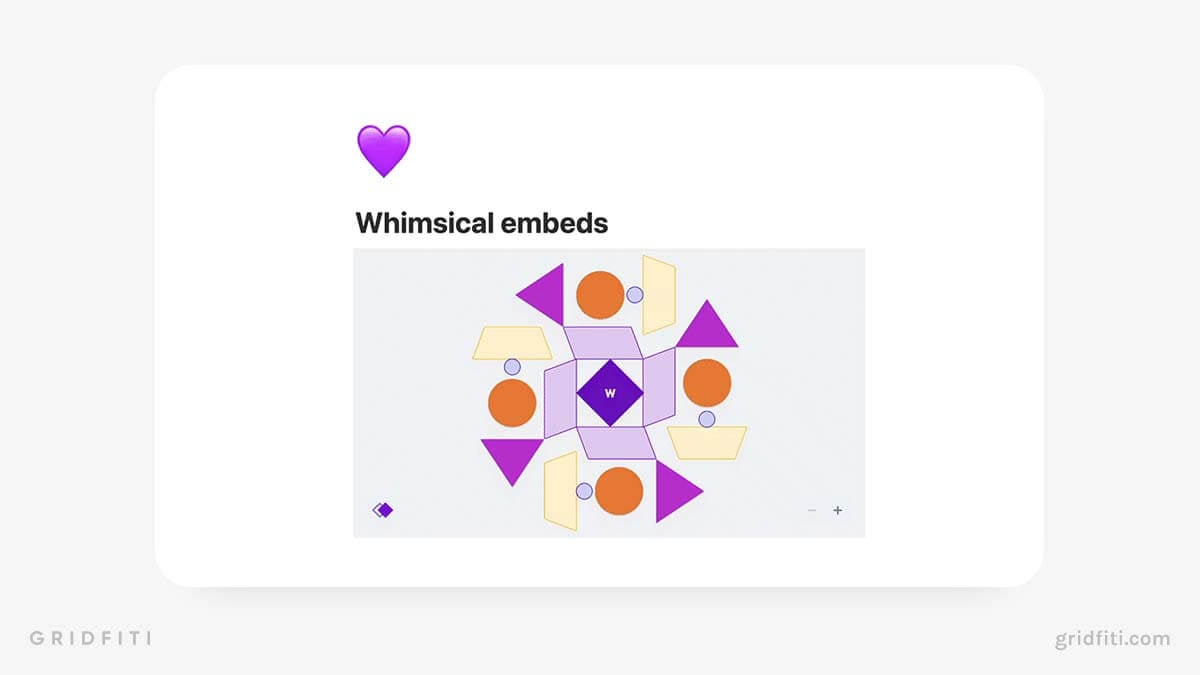
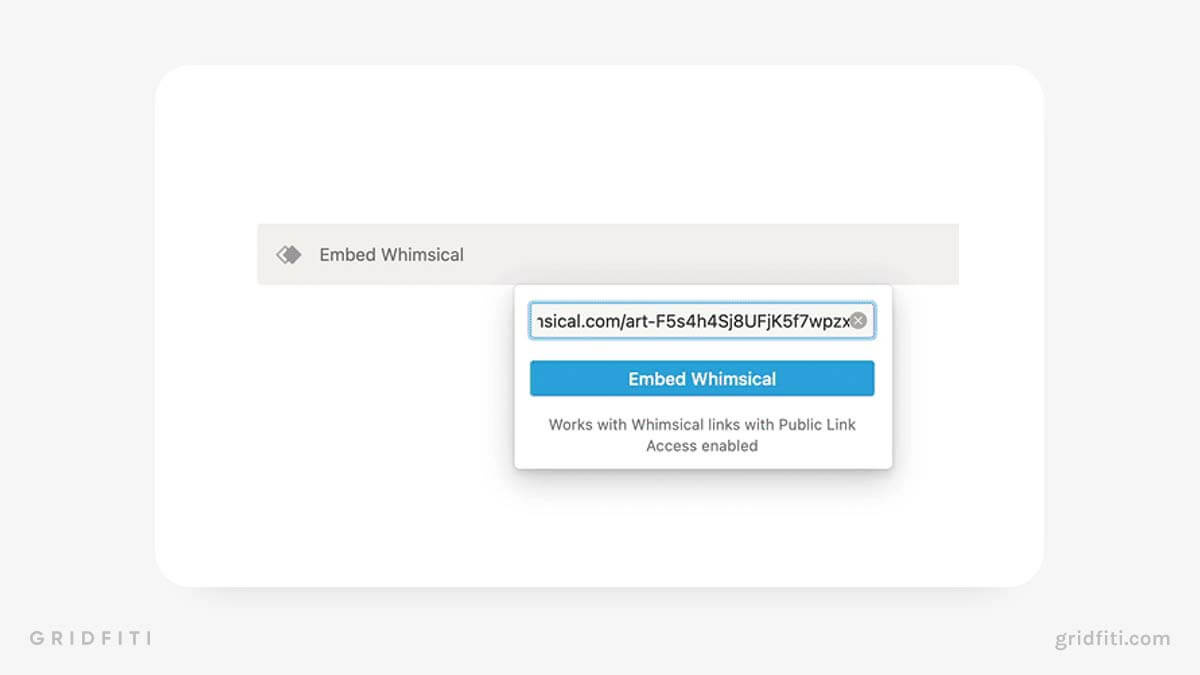 Step 6: Wait for the page to load, then resize and move around as you see fit.
Super duper simple!
Delete or edit multiple database rows
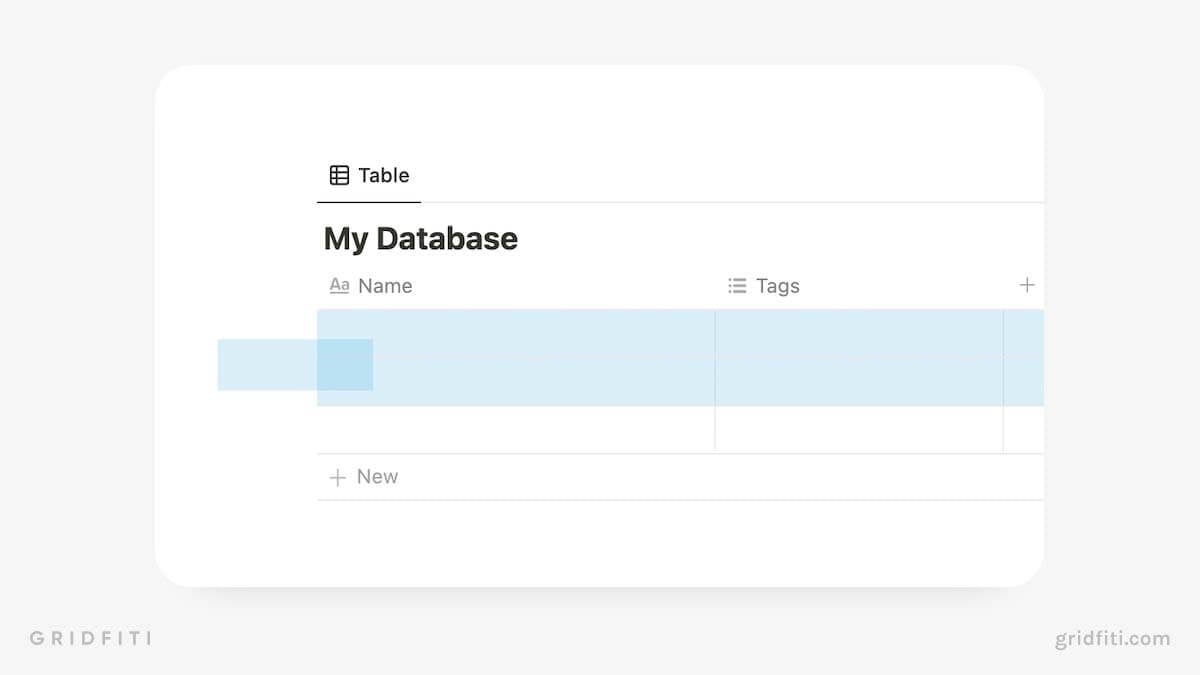
Ever wanted to update a property in all your database pages quickly? Notion’s Table view is the best way to delete multiple pages from a database or update properties for multiple cells in a few keystrokes.
How to delete multiple pages from your database at one time in Table view
Quick note before we get to the walkthrough: Make sure the entire row, and not just all the properties within the row, is selected before deleting. If you don’t select the whole row when using this method, you’ll end up clearing the contents of all the properties, not deleting the pages themselves from the database.
- Click the block handle [⋮⋮] to the left of the database page you want to select (not the database itself) so the whole row is highlighted.
- Hold down the “Shift” key and tap the “Up” or “Down” arrow buttons to highlight rows.
- Click the block handle again and click “Delete”.
Alternatively, you can click on the empty space to the left of your database, hold and drag your mouse over the rows you wish to delete! From there, hit the delete key on your keyboard (this works for deleting multiple blocks of all kinds, too.)
How to copy and paste values in multiple Notion database rows at one time in Table view
- Click the cell you’d like to update. (This is not the same thing as the database property. For example, if you have a “Tag” property in your Notion resources database, you should click the Tag cell of an individual page in your database, not the “Tag” property at the top of the table.)
- If the cell is a Select or Multi-select property, choose which tag you’d like to set.
- Click out of the menu if needed. Ensure the cell is highlighted in blue.
- Copy the value by right-clicking or using a keyboard shortcut.
- Hold down the “Shift” key on your keyboard, then tap the “Up” or “Down” arrow keys to highlight cells above and below.
- Paste the value by right-clicking or using a keyboard shortcut.
Voila! Now you don’t have to update the properties of each page individually.
Embed GIFs to create aesthetic Notion dashboards
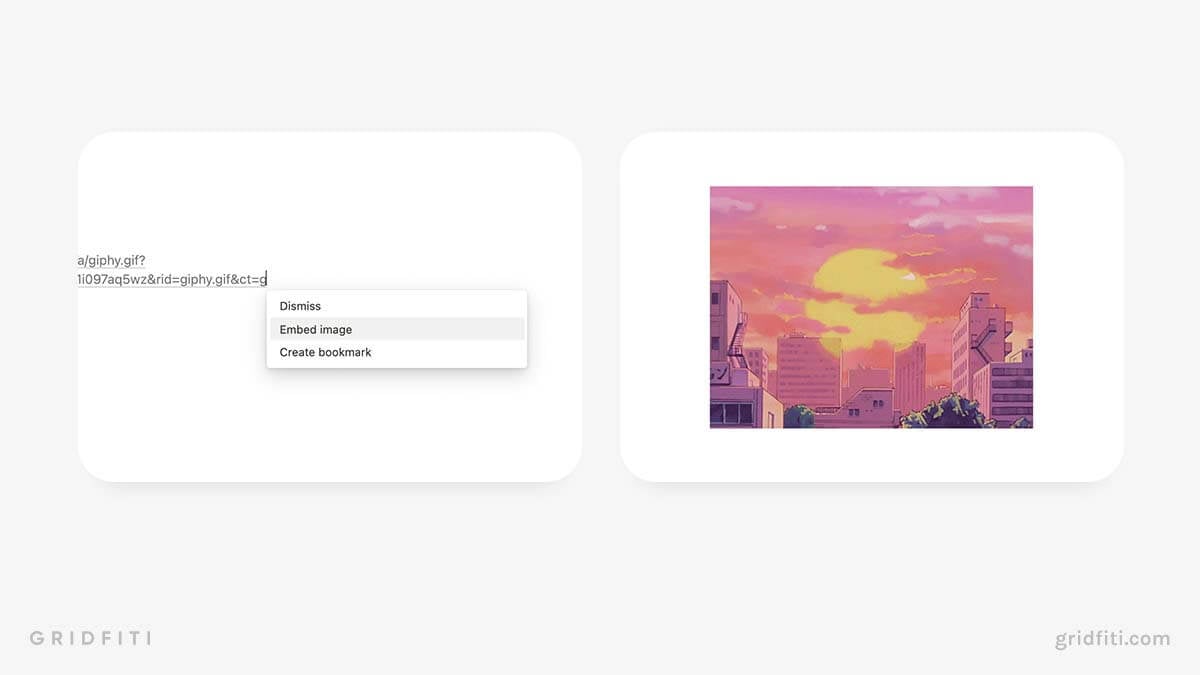
If you’re active in Notion communities online, you’ve undoubtedly seen some aesthetic Notion layouts complete with soothing anime GIFs. Ever wondered how to add GIFs to Notion? It’s super easy!
All you need to do is create a new embed block. Then, hop on over to GIPHY (or whichever GIF service you prefer) and find the GIF you want to embed. If you’re using GIPHY, click “Share”, then click “Copy link”. Then paste the link into your embed block. Now all that’s left to do is resize the GIF and place it wherever you like on the page.
Alternatively, you can upload GIF files from your computer. Uploading it (versus embedding a GIF via a link) will ensure the GIF won’t disappear if the link ever breaks.
Create aesthetically pleasing shortcuts to individual Notion pages on Android and iOS
Notion’s mobile apps for iOS and Android come complete with widgets for your phone or tablet homescreen. You can create a widget that shows a specific page or a list of your recent pages.
However, these widgets do take up a lot of room. The Notion widget for an individual page is 2×2 — or double the size of an app icon. The Notion widget that shows most recent pages is even bigger. Plus, the widgets aren’t exactly aesthethically pleasing, which isn’t ideal for anyone who likes to customize their phone homescreen.
There’s an easier way to create shortcuts to individual Notion pages using third-party apps. Using this method, you can even set custom app icons to create an aesthetic iOS homescreen. (Don’t forget to check out our app icon packs for a cohesive look!)
How to create shortcuts to Notion pages on iOS with custom icons
Note: Any shortcut you create in iOS should also work in macOS. For this to work, you’ll need to have the Notion mobile app installed.
Step 1: Copy the link of the Notion page you’d like to create a shortcut for.
Step 2: Open the Shortcuts app on your iPhone or iPad.
Step 3: Tap the blue plus sign (+) in the top left-hand corner of the app.
Step 4: From the list of apps and actions on the right-hand side, select “Open URLs”
Step 5: In the “Open URLs” box to the left, paste the link to the Notion page you’d like to create a shortcut for.
Step 6: Important! In the URL, replace “https” with “notion”. Your URL should look like this: “notion://www.notion.so/[notionusername]/[page ID]”.
Step 7: On the right-hand side, click the slider menu button, then tap “Add to Home Screen”.
Step 8: In the window that pops up, upload a custom icon and update the title of your shortcut if you like.
Step 9: Tap “Add” to add the shortcut to your homescreen.
How to create shortcuts to Notion pages on Android with custom icons
Step 1: Download the Shortcut Maker app for Android from the Play Store.
Step 2: Copy the link of the Notion page you’d like to create a shortcut for.
Step 3: Long-press your home screen to add a new widget.
Step 4: Select “Shortcut Maker” from the list.
Step 5: When the app opens, click “Website”.
Step 6: In the “Website Link” box, paste the link to your Notion page.
Step 7: Update the “Shortcut Name” box. This will appear underneath the new app icon.
Step 8: Tap “Place on Home Screen”
Step 9: On the next Screen, click “Open With”, then select “Notion”.
Step 10: Tap “Icon” to select the icon you’d like to appear as the page icon.
Step 11: Tap “Create shortcut”.
And that’s it! These shortcuts also work with Siri. For example, you can have a shortcut set up for a meal planning page in Notion. All you have to do is say, “Hey Siri, open ‘Meal Plan’”, and the page will open automatically in the app.
Track time and view work hours right in Notion with these sites and apps
How do you track time using Notion? Chances are, if you use Notion for work or scheduling, you’ve had this question. Notion’s databases don’t currently offer a Time or Hours property — however, you can add start and end times to Date properties and set up formulas to show hours and minutes.
Luckily, integrations with third-party apps offer a handy workaround for this problem! (And remember, if you want to see time tracking capabilities added to Notion, submit your feature request using the Help feature in your Notion account!)
3 best Notion time tracking integrations and apps
Clockify
Clockify is one of the most popular time tracking apps that integrate with Notion. Although you can’t embed a webpage version of your Clockify dashboard in Notion, you can install the Clockify browser extension, which integrates with Notion. This lets you start tracking time right from your Notion pages.
Learn more about the Clockify-Notion integration here.
TrackingTime
This is our Notion-friendly time tracker of choice. Not only can you embed your TrackingTime dashboard and interact with it right in Notion, but you can also configure the app to track time right in your Notion pages!
See how TrackingTime integrates with Notion here.
Pomodoro Timer
This isn’t a time tracking app — it’s actually our very own Notion widget and template!
Our free anime-themed Pomodoro timer widget is the perfect addition to Studio Ghibli Notion dashboards and lofi-themed Notion pages. Or, grab our free Pomodoro timer Notion template, complete with automatic productivity ratings and summaries for each Pomodoro session!

Go granular in Board views with Subgroups
If you use Notion databases frequently, you’ve likely experimented with the different types of database views on offer. But the Board view has a feature others don’t: Subgroups.
You can add Groups to all database views in Notion. This lets you add an extra layer of organization to your Notion pages. But Subgroups let you get a little more granular. To create a Subgroup, you’ll first need to create a Group. Here’s how to do it.
Step 1: Create or embed a new Board view of a Notion database.
Step 2: In the upper right-hand corner of the database, click the 3 dots [⋯] to open the menu.
Step 3: Click “Group”, then choose the criteria you’d like to group by.
Step 4: Repeat Step 2, then choose “Subgroup”.
Step 5: Choose the criteria you’d like to subgroup by.
Here’s how Mel uses Groups and Subgroups to view her goals by quarter and area:
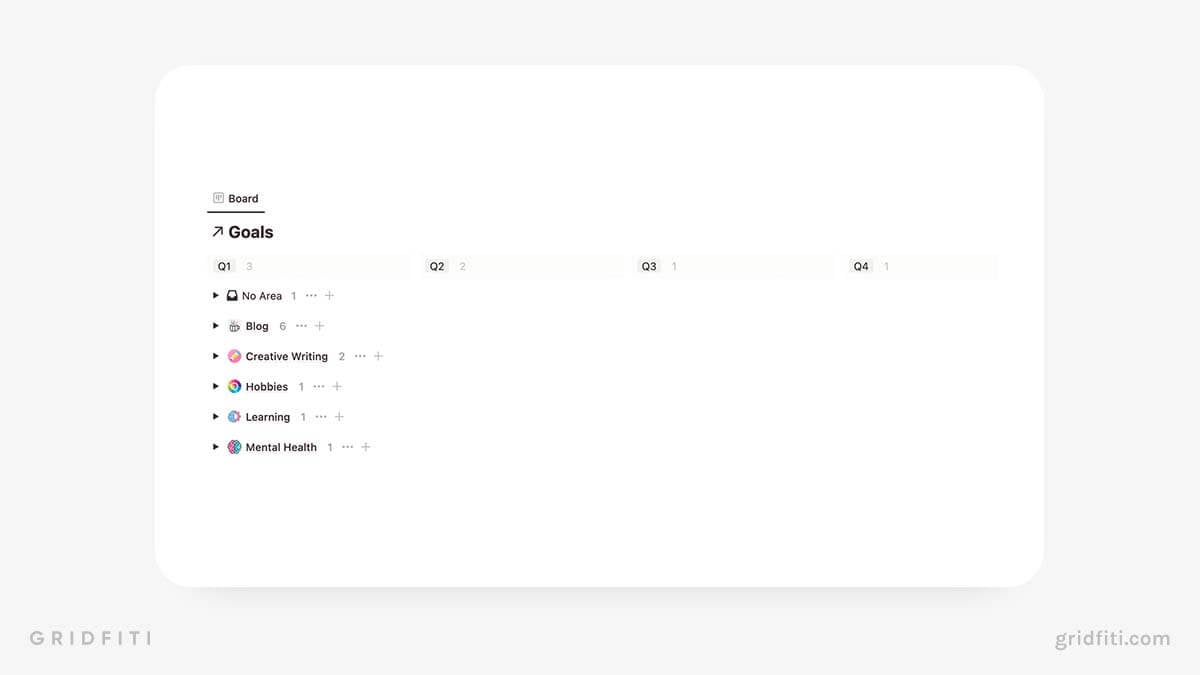
As you can see in the screenshot above, she’s grouped her goals by the “Quarter” property and subgrouped them by the “Area” property (which is a Relation property).
You can toggle visible groups to show and hide them. You can also hide group and subgroup items using Notion’s database menu.
Store all your Notion page icon and cover image files in a new Notion page
Many Notion users have noted that some page icons disappear after a while and simply display an empty white box. This typically happens with page icons uploaded via a link instead of from a file.
Why does this happen? We’re not sure, but we think it has something to do with the link to the image breaking. We haven’t seen this issue with page icons or covers uploaded from an image file.
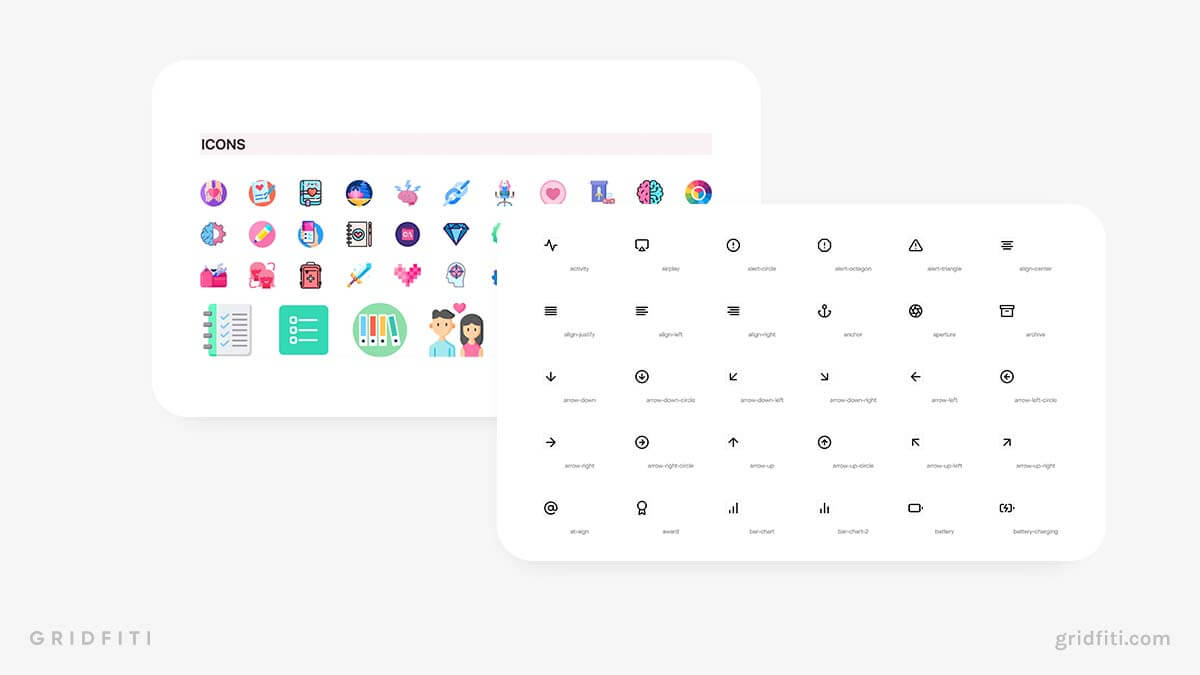
Fortunately, there’s an easy way to avoid this bug: by creating a designated Notion page to store all your page icons and covers. This way, if you ever notice a broken page icon, you can reupload it quickly without having to hunt down the icon file again. This is something Mel personally does, since she uses a lot of images from Flaticons for her Notion page icons and the links to those images often break.
All you need to do is drag and drop your image files from your computer into a new page in Notion. They should automatically appear as image blocks (although they may take a moment to load, especially if you upload a lot of files). This page doesn’t need to be pretty, but to conserve space, you may want to consider organizing your icons in columns:
Set reminders and add dates quickly with this handy Notion command
You’ve probably figured out by now that you can add dates to a Notion database. But did you know you can set reminders and tag dates in text and heading blocks too? This is super handy if you need to remind yourself to look back at a specific section of your notes or documents in Notion.
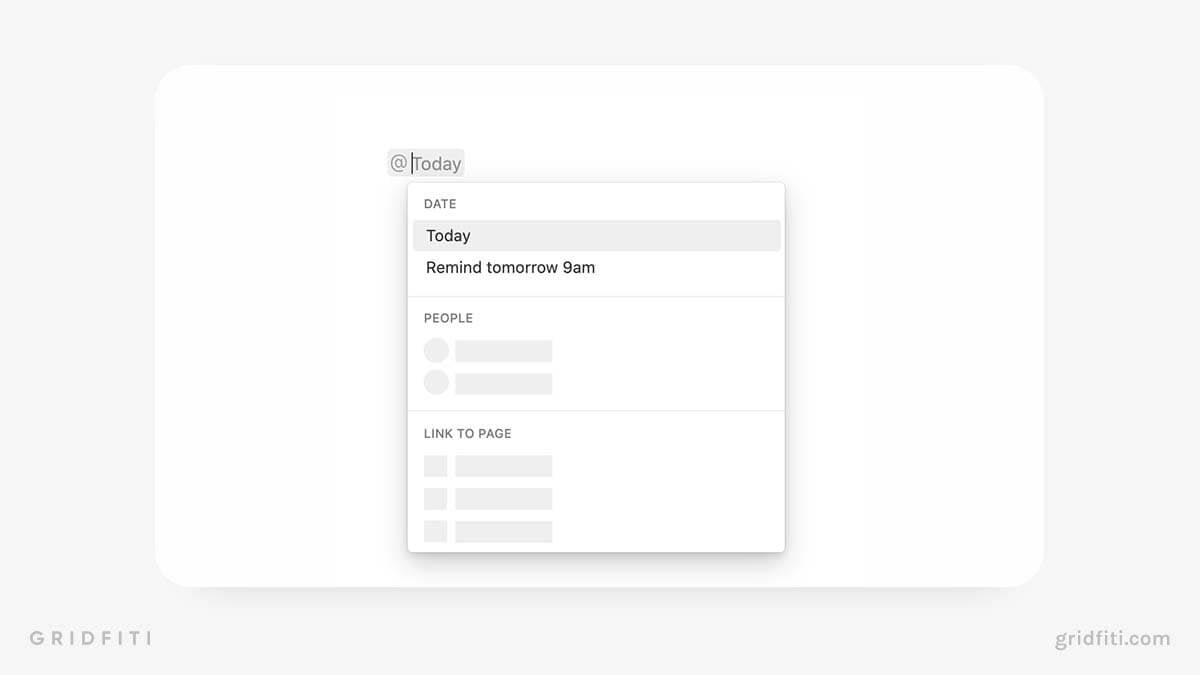
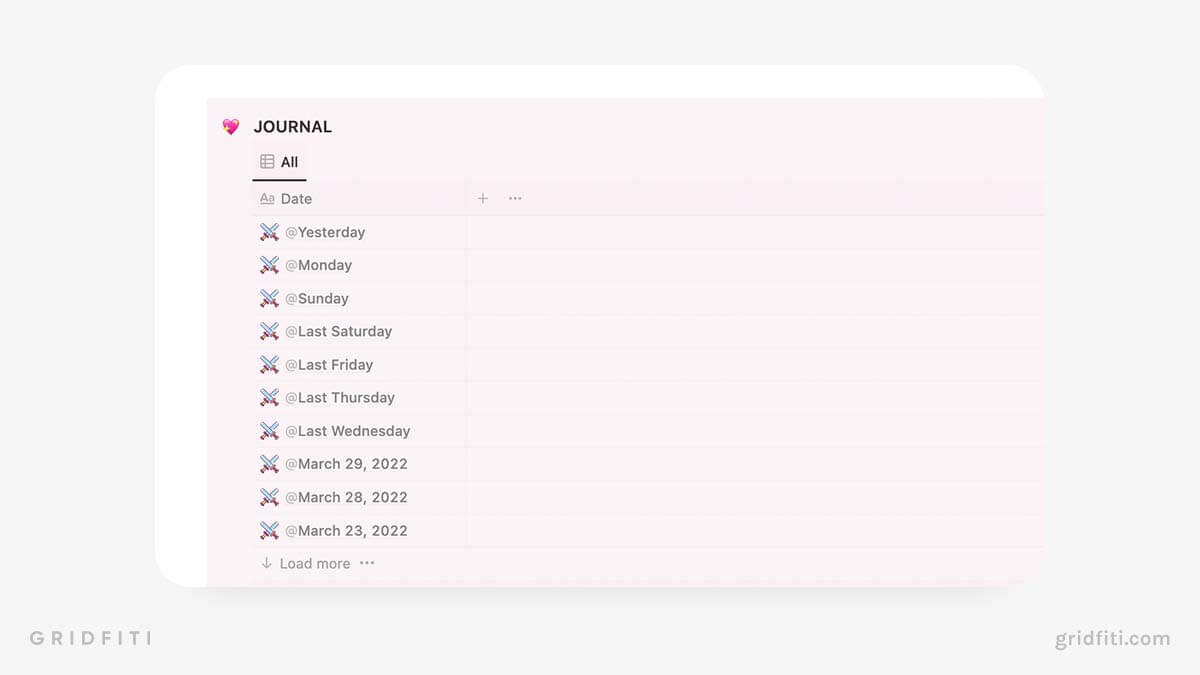
To mention a date or set a reminder, just type the “at” symbol (@) in any text or heading block, followed by the date. Then, in the pop-up box that appears, select the date from the list.
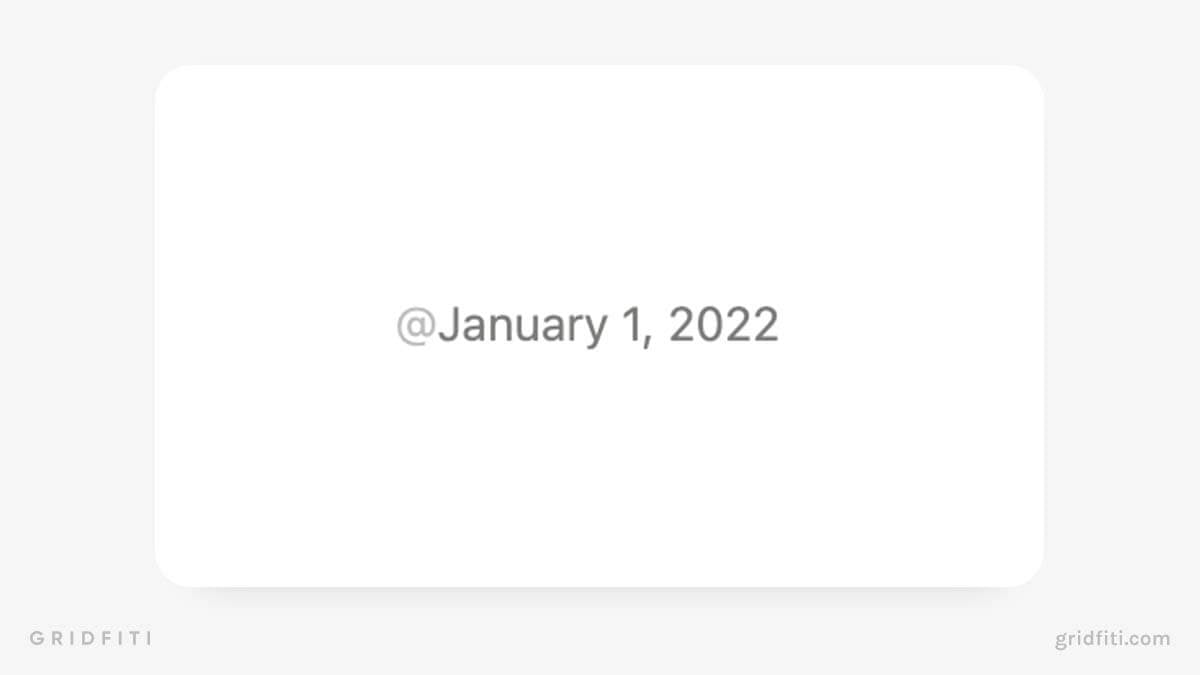
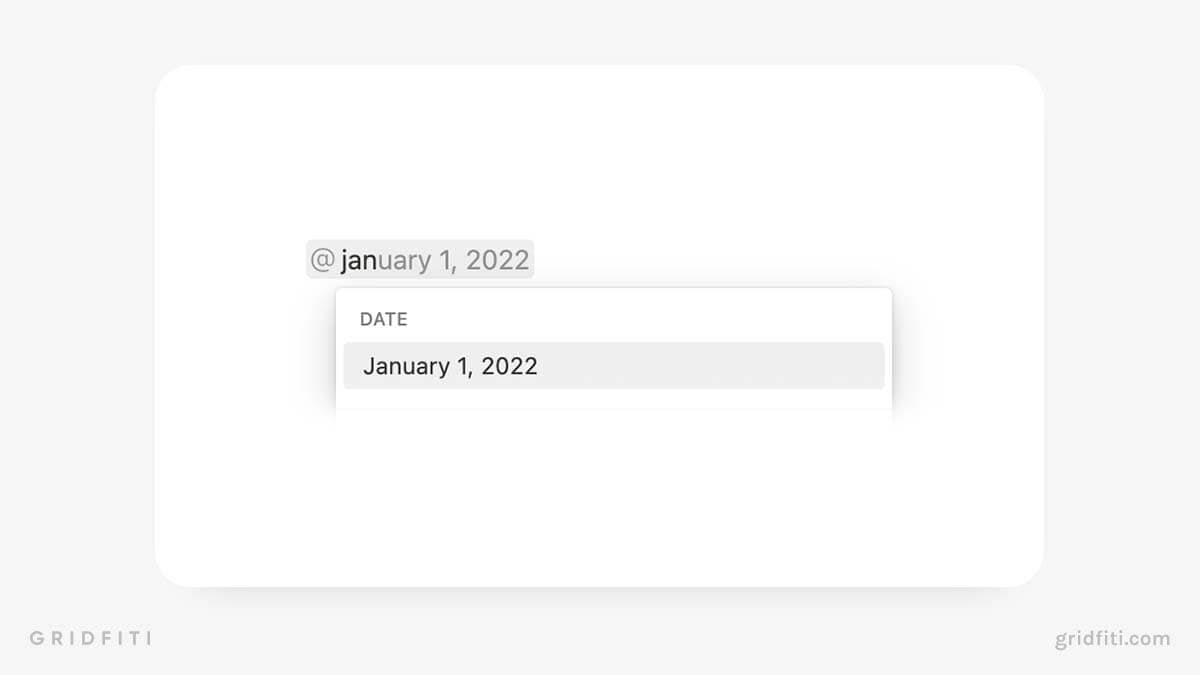 Once you’ve done that, the link should turn gray:
 To edit the reminder, click the gray date link to open the calendar pop-up:
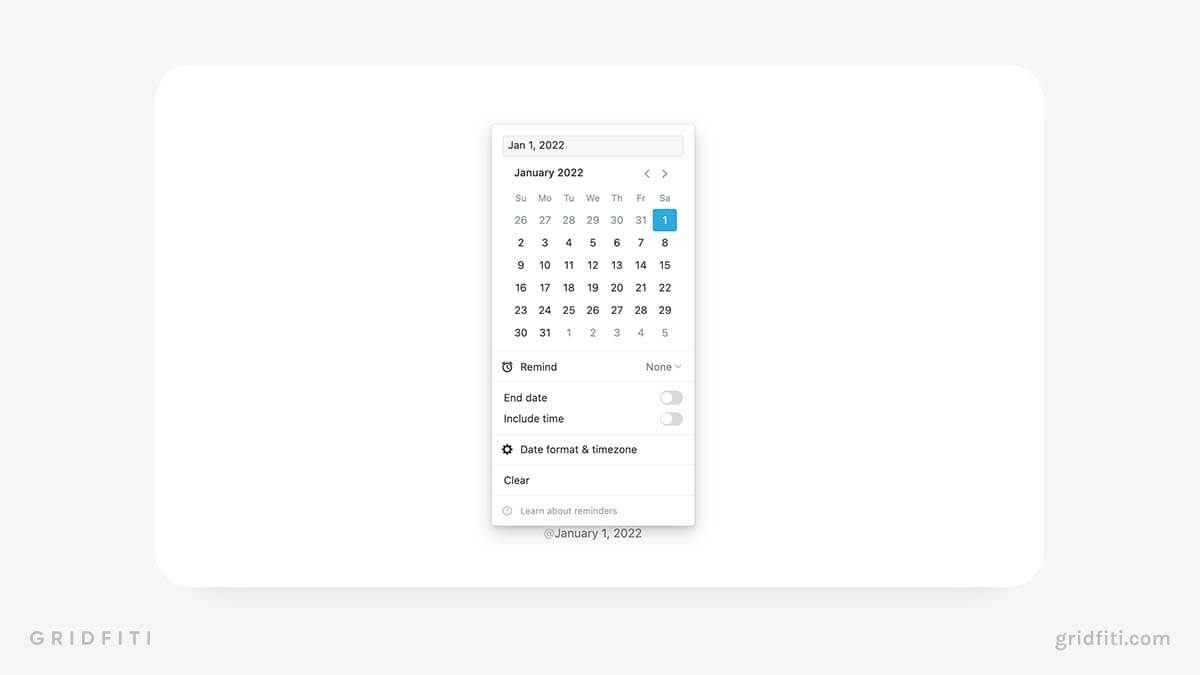 Here, you can change the date, set up reminders, add start and end times, and customize the date format and timezone. If you choose to set up a reminder, you’ll receive a notification on the date and time you specified.
Pro tip: You don’t necessarily need to type the full month, day, and year to tag a date or set up a reminder this way. Here are a few other handy date mentions you can use:
- @Today
- @Tomorrow
- @Last [Monday/Tuesday/Wednesday, etc.]
- @Next [Monday/Tuesday/Wednesday, etc.]
Place linked views of databases in columns
This is an obscure Notion trick that every user should know. If you’ve worked a lot with Notion databases, you’ve undoubtedly tried to place two databases side by side at some point. You may have been frustrated to find that, when you click and drag one database block to the left or right of another one, the vertical blue bar that indicates a new column doesn’t appear.
Fortunately, there’s a handy workaround! Here’s a step-by-step guide for adding linked views of databases to 2 or more columns in Notion:
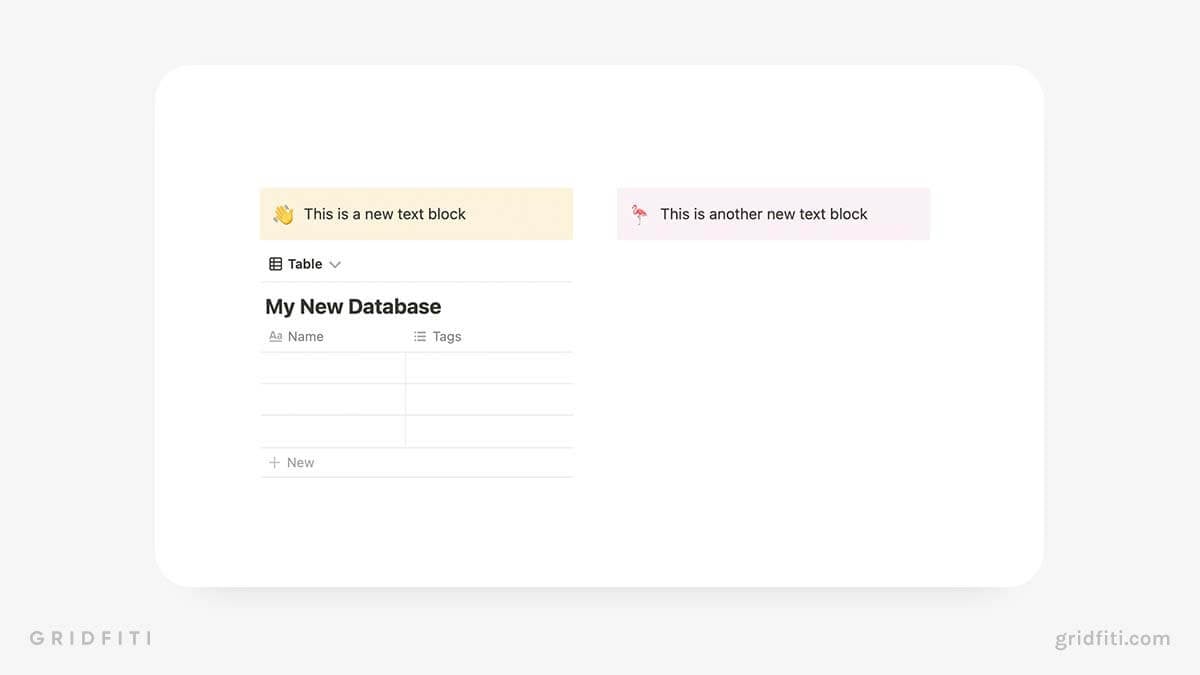
Step 1: Create a new text block in Notion. (No need to write anything in the text block, but we recommend adding something so the column is easy to see.)
Step 2: Create another new text block.
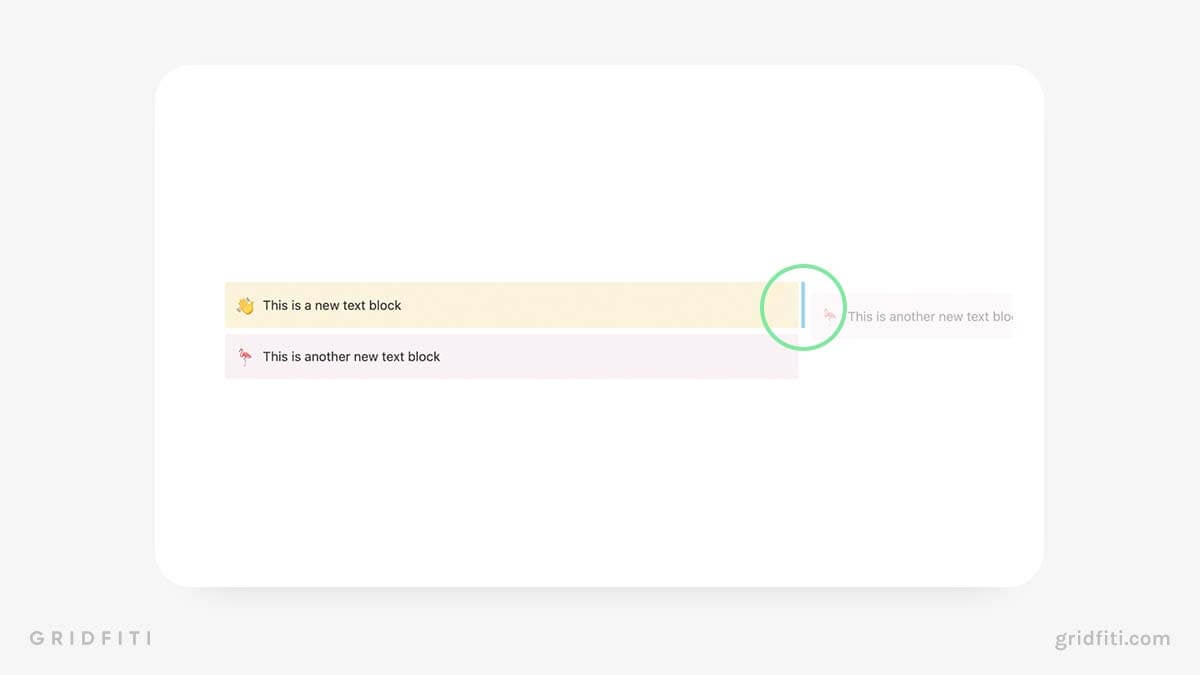
Step 3: Click and hold the block handle [⋮⋮] to the left of one of the text blocks:
 Step 4: Drag the block to the left or right side of the other text block you created. (You should see a short vertical blue bar.)
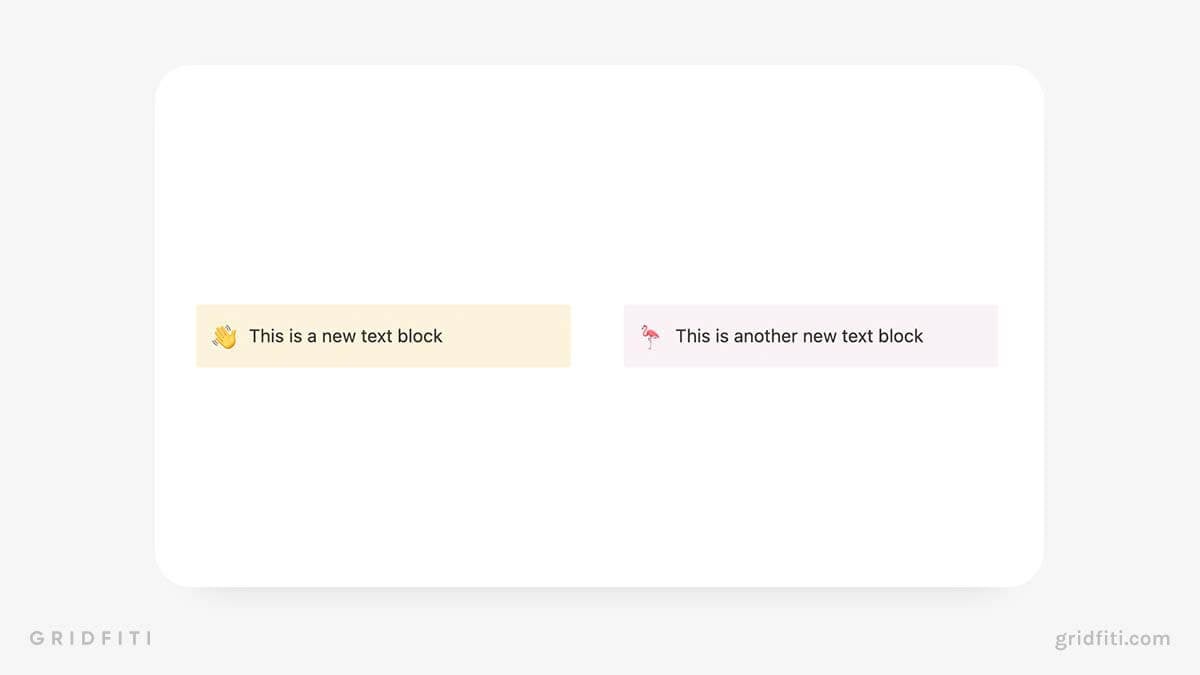
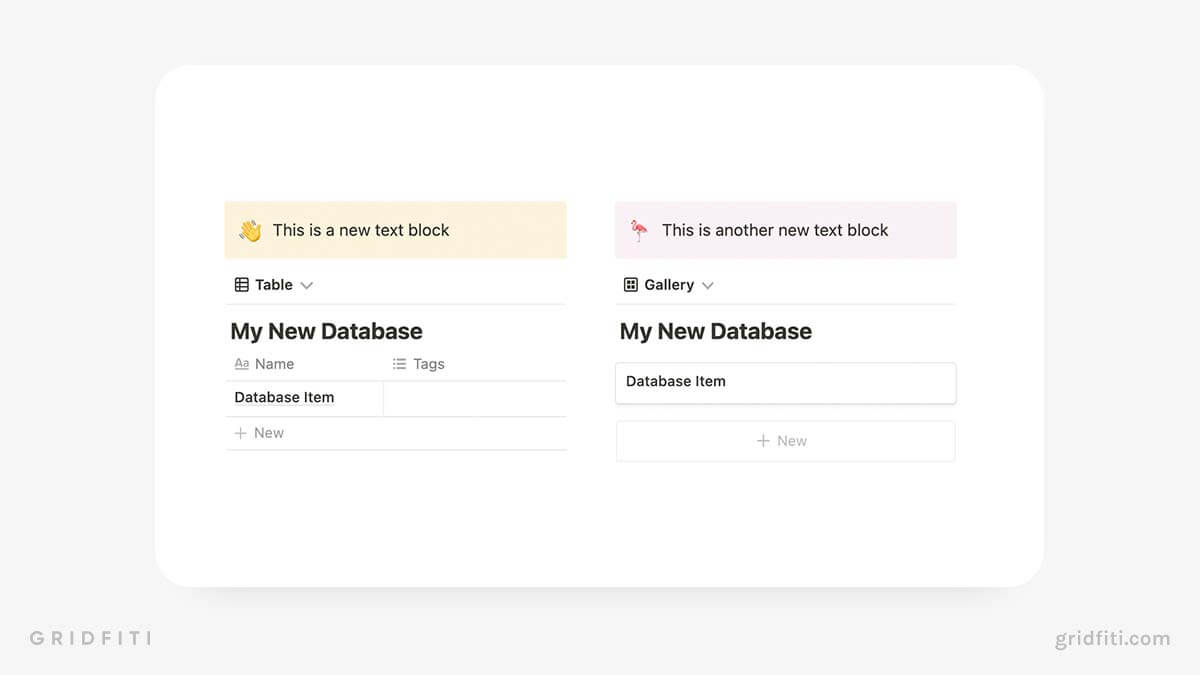
 You should now have two columns:
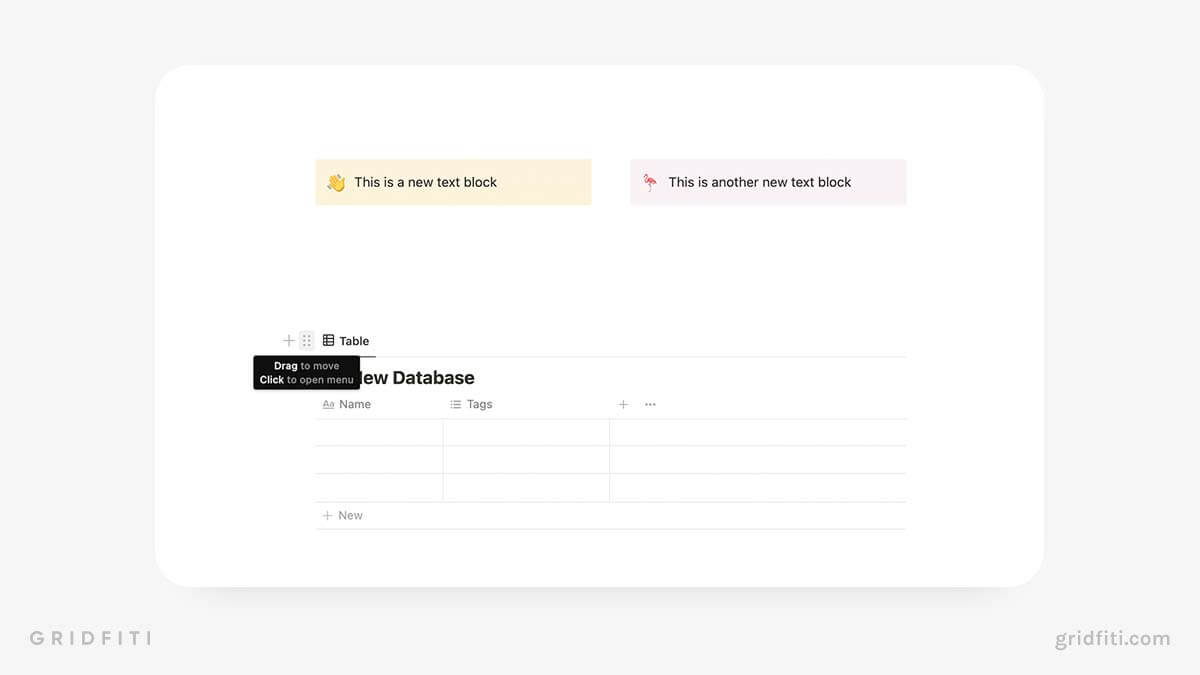
 Step 5: Below your text blocks, create a linked view of a database if you haven’t already.
Step 6: Click and hold the block handle [⋮⋮] to the left of the linked database.
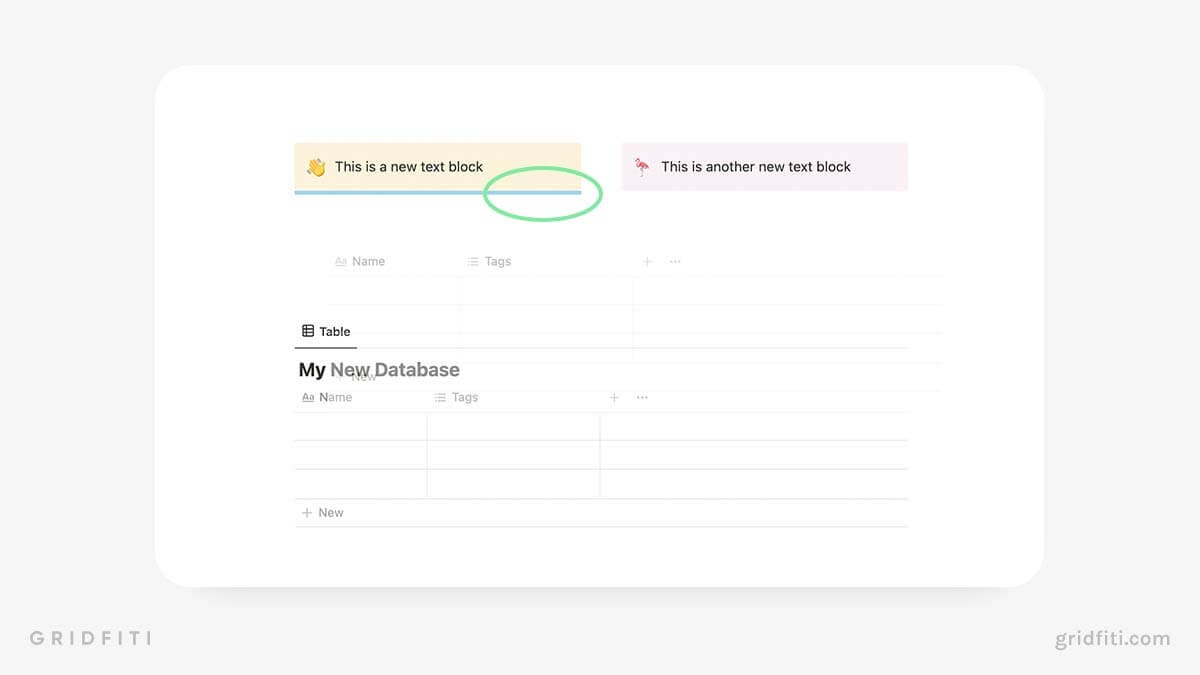
 Step 7: Drag and drop the database block underneath one of the text block columns. Below the text block, you should see a horizontal blue bar that’s about half the width of the page. (It may be longer or shorter depending on whether you resized the column before moving the database.)
 Step 8: Repeat steps 6 and 7 with the other database block.
Step 9: Resize your columns and customize your databases to your liking.
Presto! Now your databases are side by side. You can also delete your text block(s) above at any time.
Make your content stand out with callouts
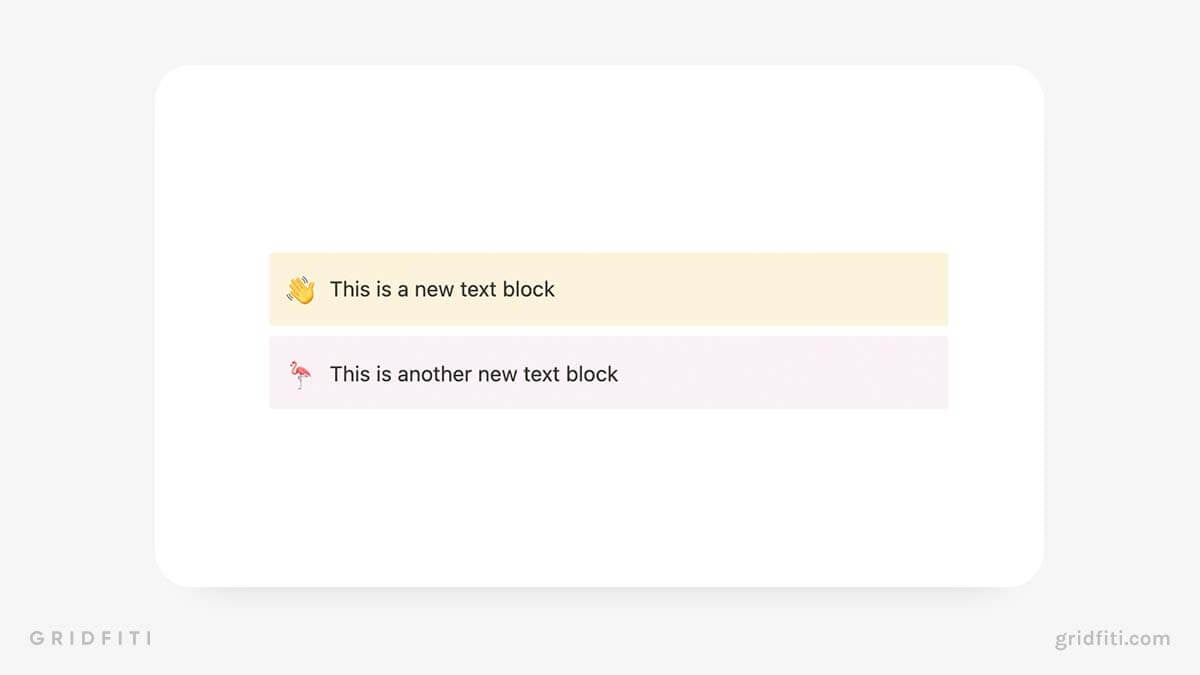
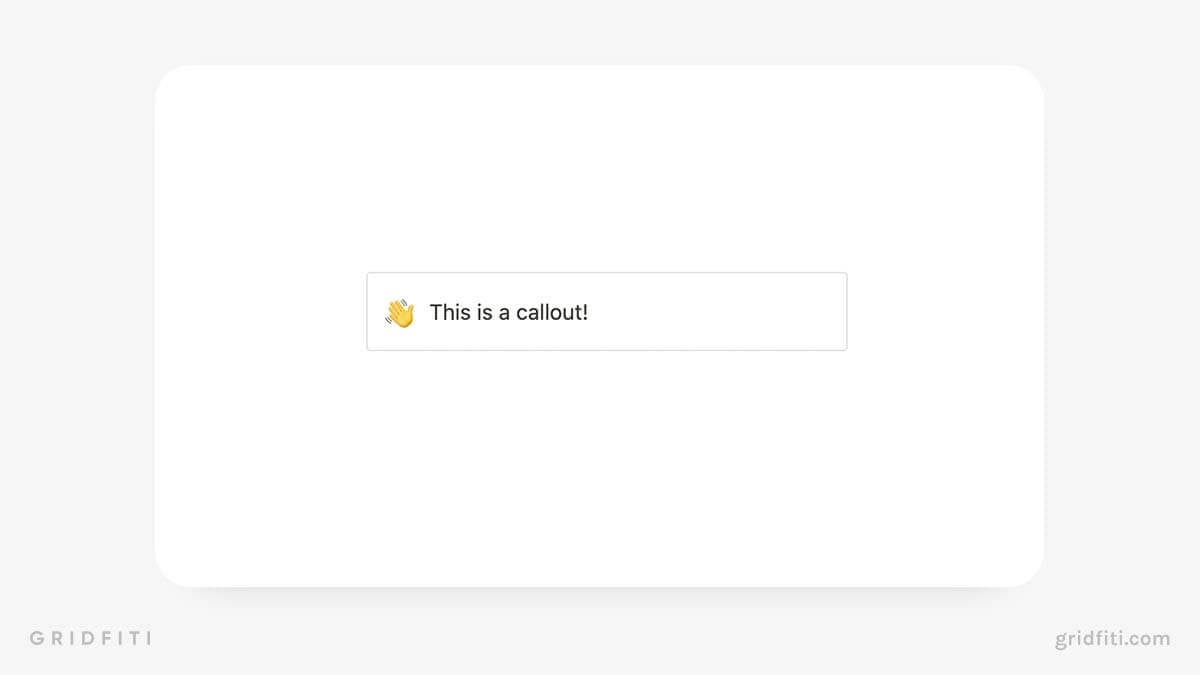
There are a few ways to make your content pop in Notion. In addition to changing text and background colors, you can also create a callout block that lets you add an emoji or icon to the left of the text.
To create a callout block in Notion, type the slash key (”/”) on your keyboard to open Notion’s command menu. Type “callout” or scroll down to select the callout block.
Click the block handle (⋮⋮) to the left of the block to change the text and background colors. If “Default” is selected for the background color, a gray border will appear around the callout:
 You can add and create new blocks within a callout block. To do that, just press “Enter” after the text of your callout block. Or, drag and drop other blocks below the text of the callout using Notion’s block handles.
Create new subpages in seconds with this keyboard shortcut
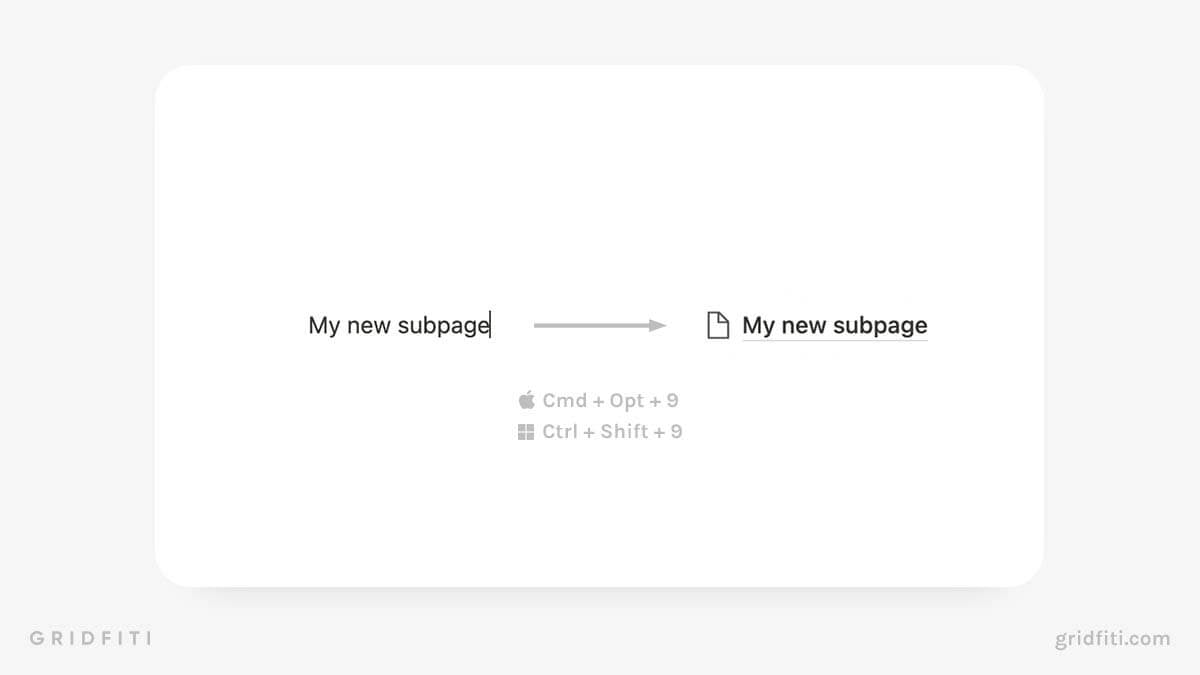
You can use 5 different methods to create new subpages in Notion (and we covered them in depth in our Notion for beginners post!). Using the keyboard shortcut Cmd ⌘ + Opt ⌥ + 9 (macOS) or Ctrl + Shift + 9 (Windows) is by far the quickest way to create new subpages in Notion.
To create a new subpage using the keyboard shortcut, add a new text block in Notion. If you want, you can type the name of the page as plain text. Then, just type your keyboard shortcut, and voila! The text block is now its own page.
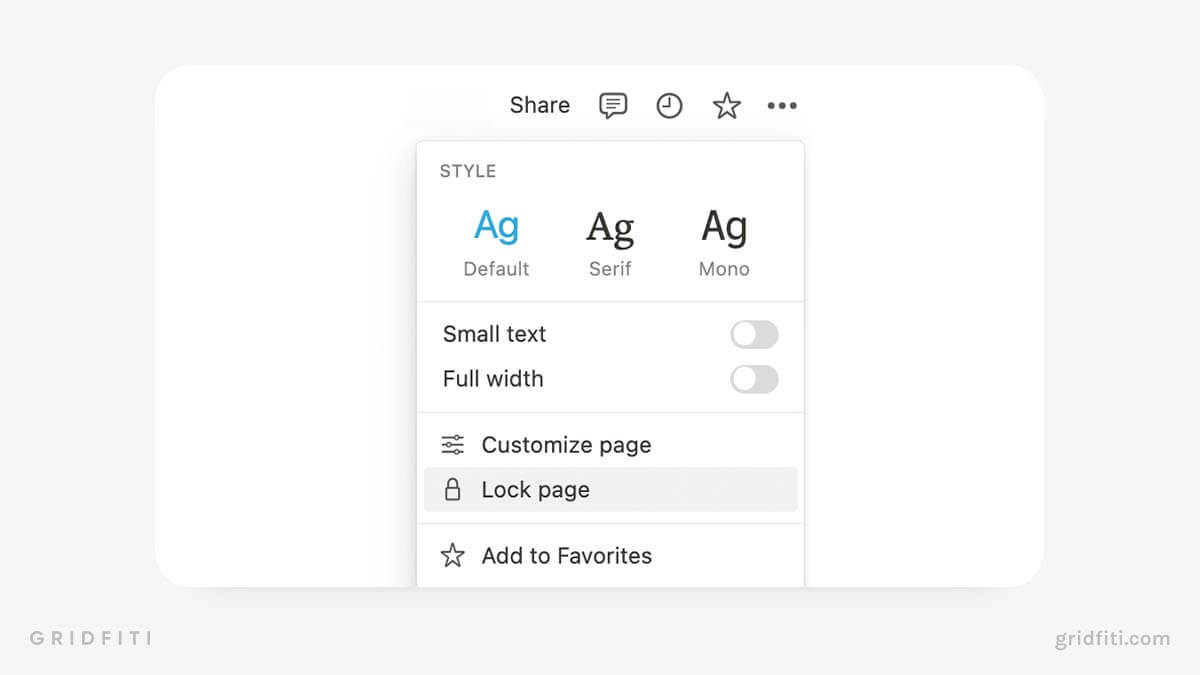
Lock pages to create a “read-only” view
Can you view Notion pages without editing them? Yep! That’s exactly what the “Lock page” feature in Notion is for.
If you want to prevent guests, viewers, or yourself from editing a Notion page, click the 3-dot menu [⋯] in the top right-hand corner of the page, then click “Lock page”. When a page is locked, you can’t click or move any blocks on the page. To unlock your page, simply click “Unlock page” from the same menu.
Quick note: Locking a page is not the same thing as adding a password to a Notion page. Notion doesn’t currently offer password-protected pages, although it’s a popular feature request among users.
Export content from Notion
Need to download your Notion content? Notion currently lets you export individual pages, as well as your entire workspace, in the following formats:
- HTML
- Markdown & CSV
To export a page, click the 3-dot menu [⋯] in the upper right-hand corner of the page you’d like to export. Then, scroll down and click “Export”.
When you export a page, you can choose whether you want to export everything or just plain text without images and files.
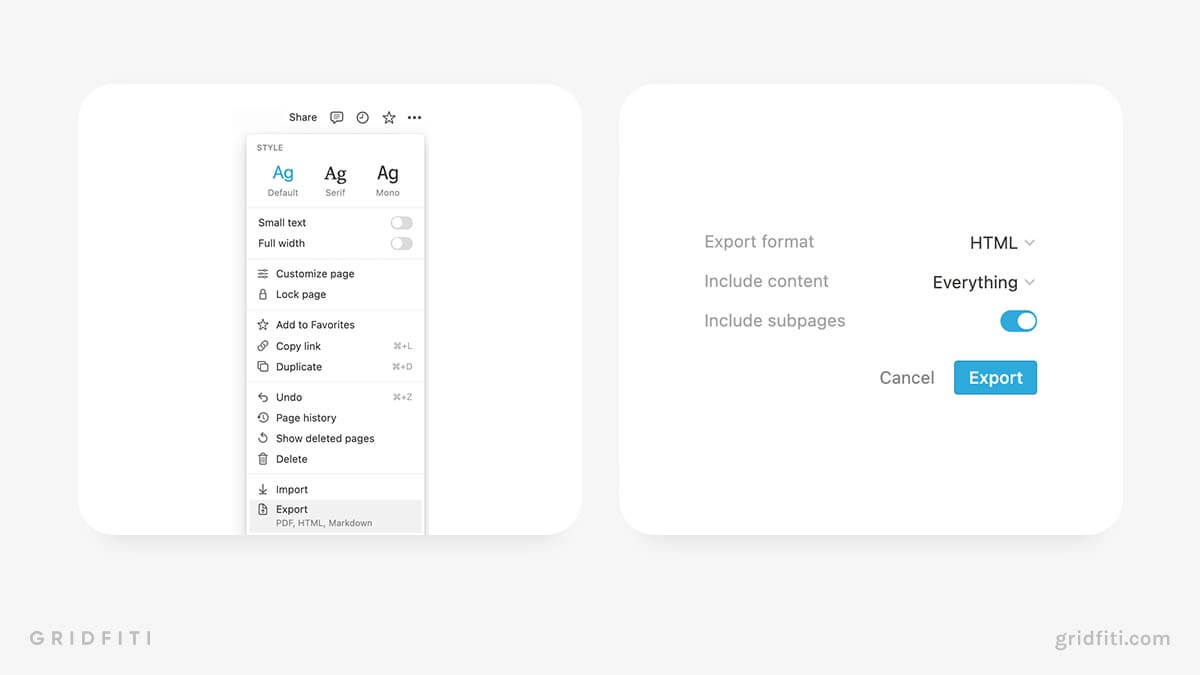 If you export your Notion page to a PDF, you’ll get to choose the page format and scale percent. If you have an Enterprise account, you can also include subpages in your export.
If you’re exporting a database, you can also choose whether you want to include the current selected view or all views. You can also export subpages from databases without an Enterprise account.
Be aware that your export may take awhile. When your export is ready, you’ll receive an email from Notion at the email address linked to your account. The link in the email will expire within 30 days, so don’t forget to download your data!
Some users have encountered formatting issues with Notion exports. Check out this walkthrough on preventing and resolving formatting problems with exported Notion content.
Add a background color to your database
There are a few different ways you can add a background color to a database. We’ll walk you through each one!
Method #1: Add a database to a callout block.
 First, create a new callout block. To set the background color, click the block handle [⋮⋮] to the left of the block and hover over “Color”. Then, choose your background color from the list.
Once you’ve done that, create a new linked view of a database. Click the block handles [⋮⋮] to the left of the database block, then drag and drop the database into the callout block. Ta-da! Now you’ve got a nice background for your database.
Method #2: Add a database to a Toggle block.
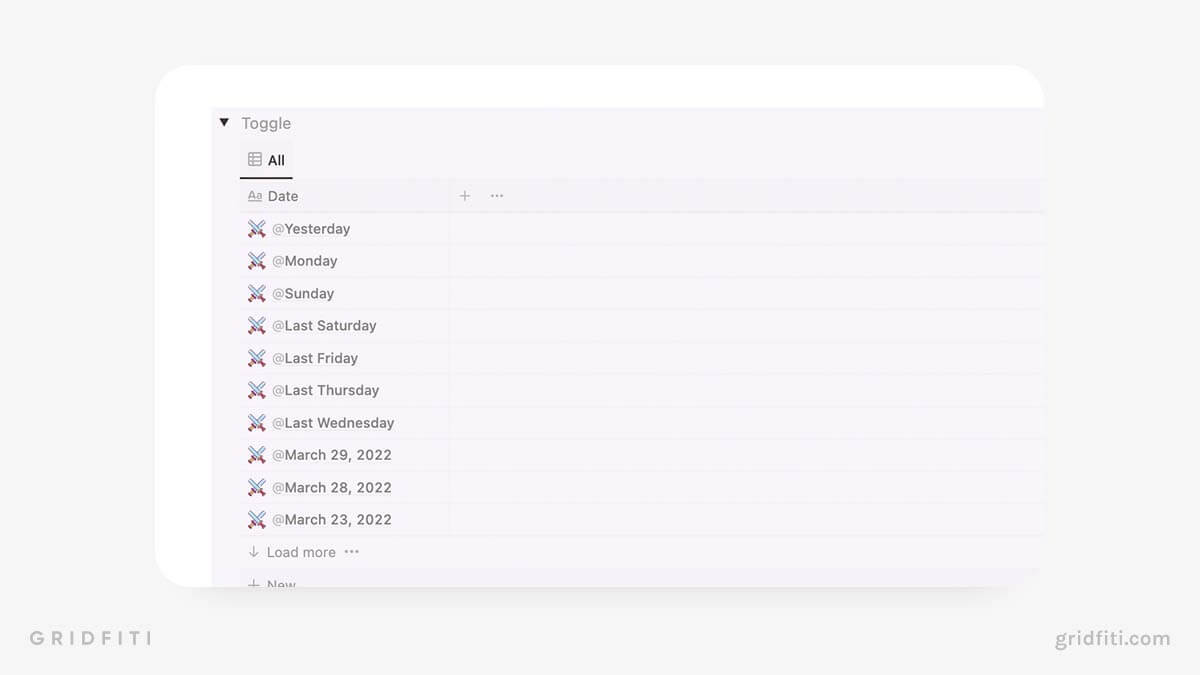 First, create a new Toggle block in Notion. (This can be normal text or a Toggle Heading.) Click the block handles [⋮⋮] to the left-hand side of the Toggle block, then hover over “Color” to set the background color.
Once that’s done, create a new linked view of a database. Open the toggle. Click the block handles [⋮⋮] to the left of the database block, then drag and drop the database into the Toggle block. Ta-da! Now you’ve got a nice background for your database.
Method #3: Add a background color to a Board view.
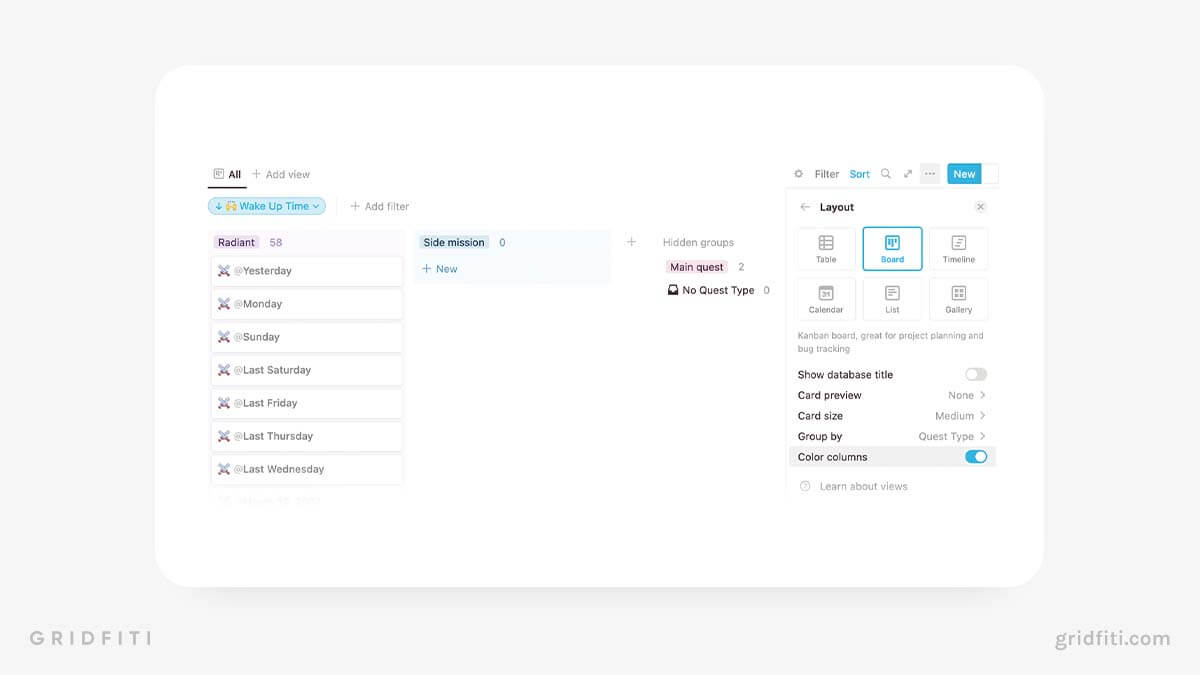 Note: This method will only work if you’re grouping your Board view by a Select or Multi-select property.
First, create a new Board view of a database. (This can be a linked view of an existing database or a new database altogether.) Then, click the 3-dot menu [⋯] in the top right-hand corner of the database to open the menu.
Click “Layout”, then toggle on “Color columns”. Boom! Now the background of each column matches the color of its corresponding group.
View your Google Drive files right in Notion
Although you can’t edit Google Drive files in Notion, you can embed them thanks to Notion’s native Google Drive integration. But first, you’ll need to connect your Google Drive and Notion accounts. Here’s how to do that.
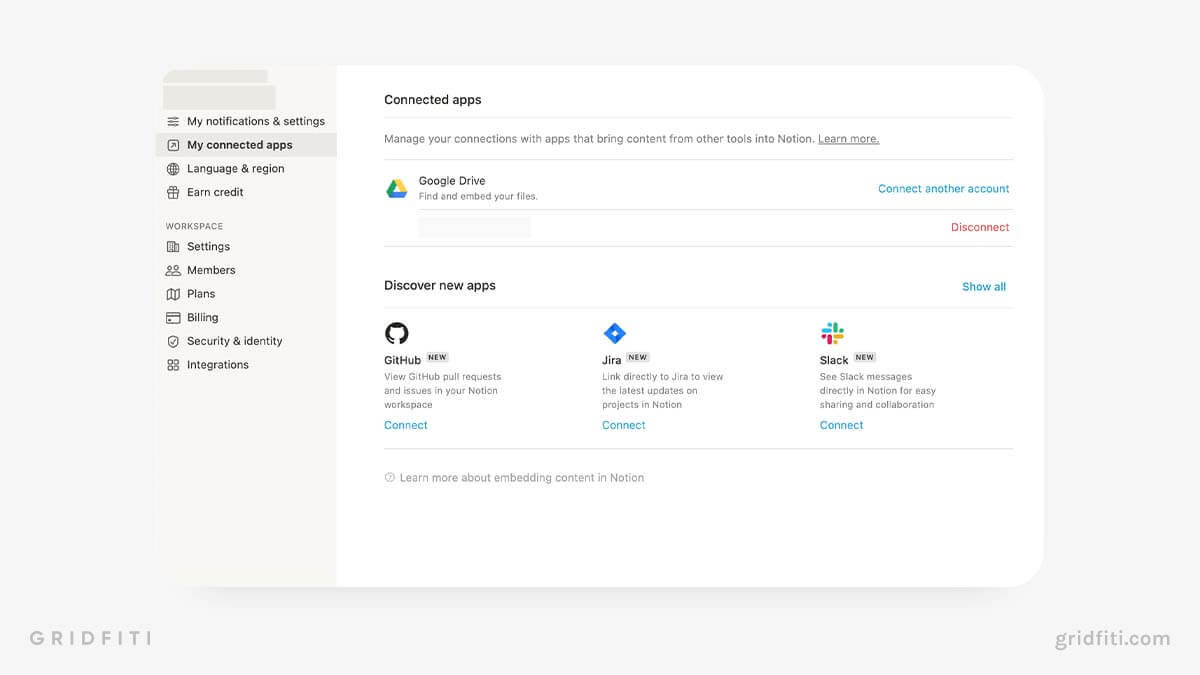
Connecting your Google Drive account with Notion
Step 1: In the Notion sidebar, click “Settings & Members”.
Step 2: In the pop-up window that appears, click “My connected apps”.
Step 3: To the right of “Discover new apps”, click “See all”.
Step 4: Under “Google Drive”, click “Connect”.
Step 5: Sign in with your Google account and grant Notion access.
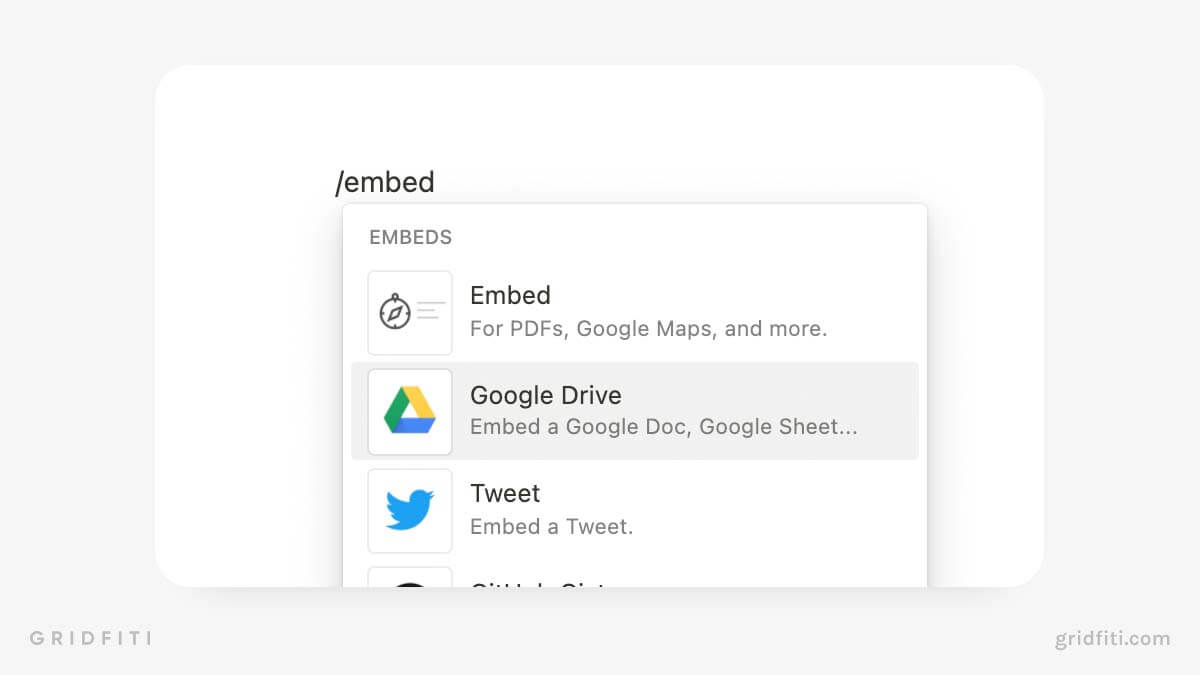
 Embedding your Google Drive files in Notion.
Step 1: Create a new block.
Step 2: Type the slash key (/) on your keyboard to open Notion’s block commands.
Step 3: Type “Google” or select Google from the list of blocks.
Step 4: Paste the link of the file you’d like to embed, or browse your connected Google Drive account.
Simply click anywhere in the block to open the original Google Drive file in a new tab.
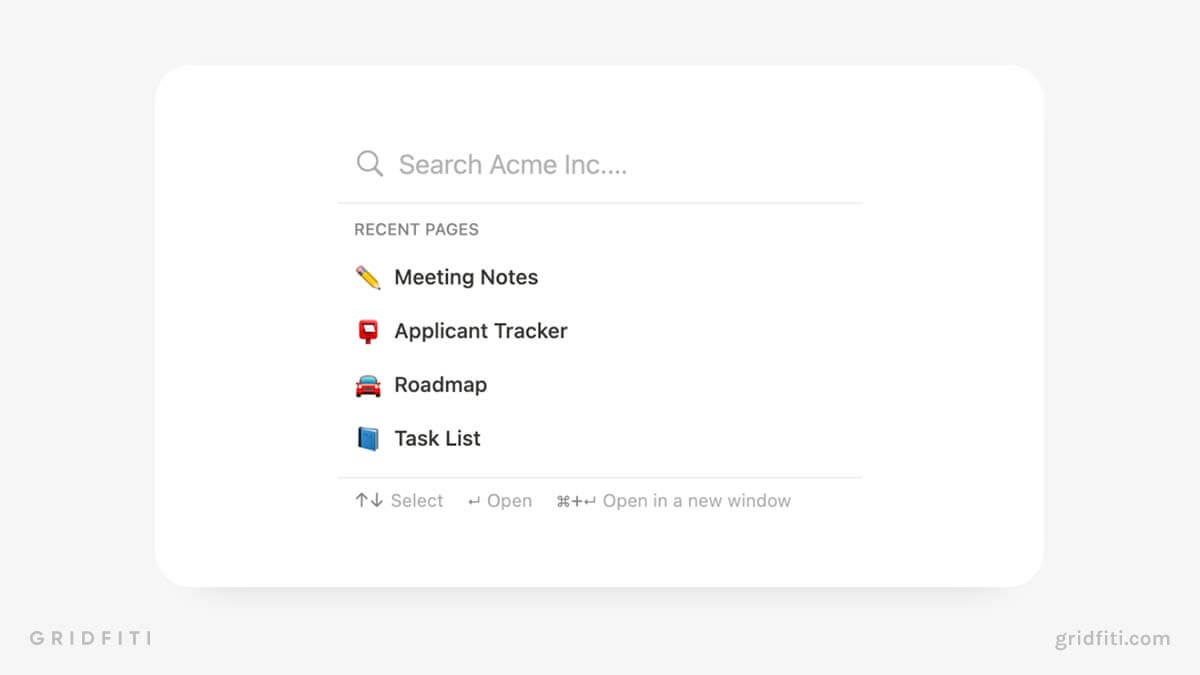
Find pages quicker with this keyboard shortcut
While Notion’s sidebar is a handy way to keep your pages organized, it can get busy once you’ve got a lot of pages created. Luckily, there’s a much easier way to search your workspace using this keyboard shortcut:
Cmd ⌘ + P (macOS)
Ctrl + P (Windows)
This will open the search window, which will display your recently visited and searched-for pages. Then, just use the search bar to find what you need! Much easier than toggling pages off and on in the sidebar.
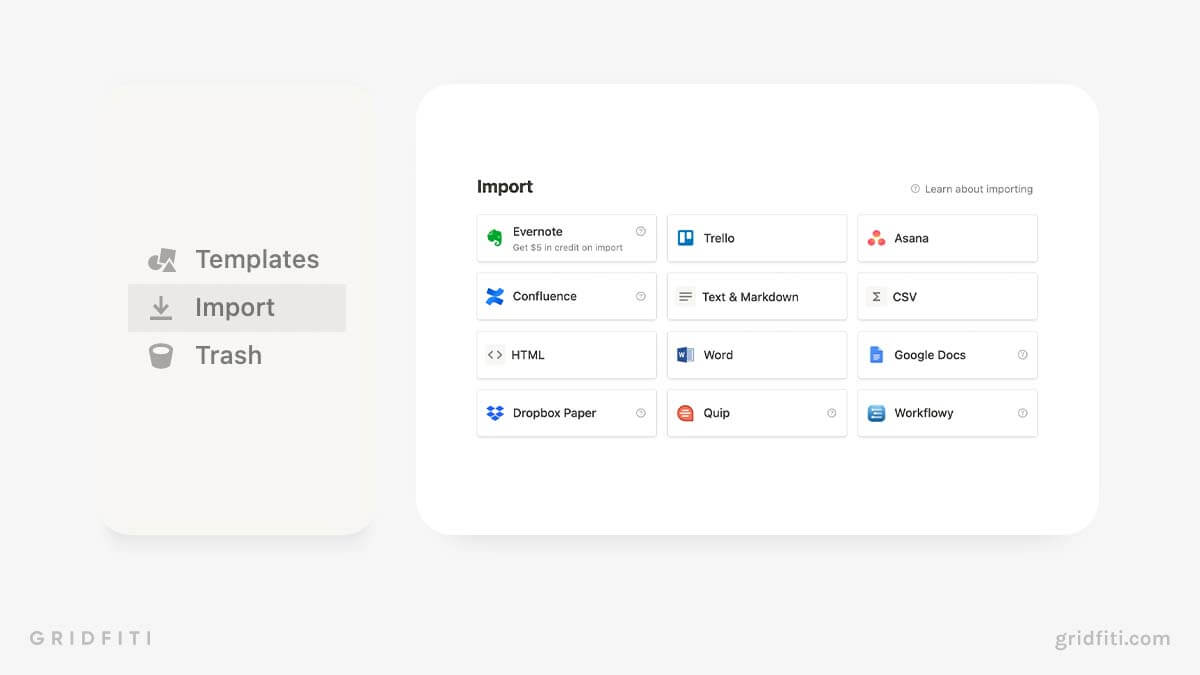
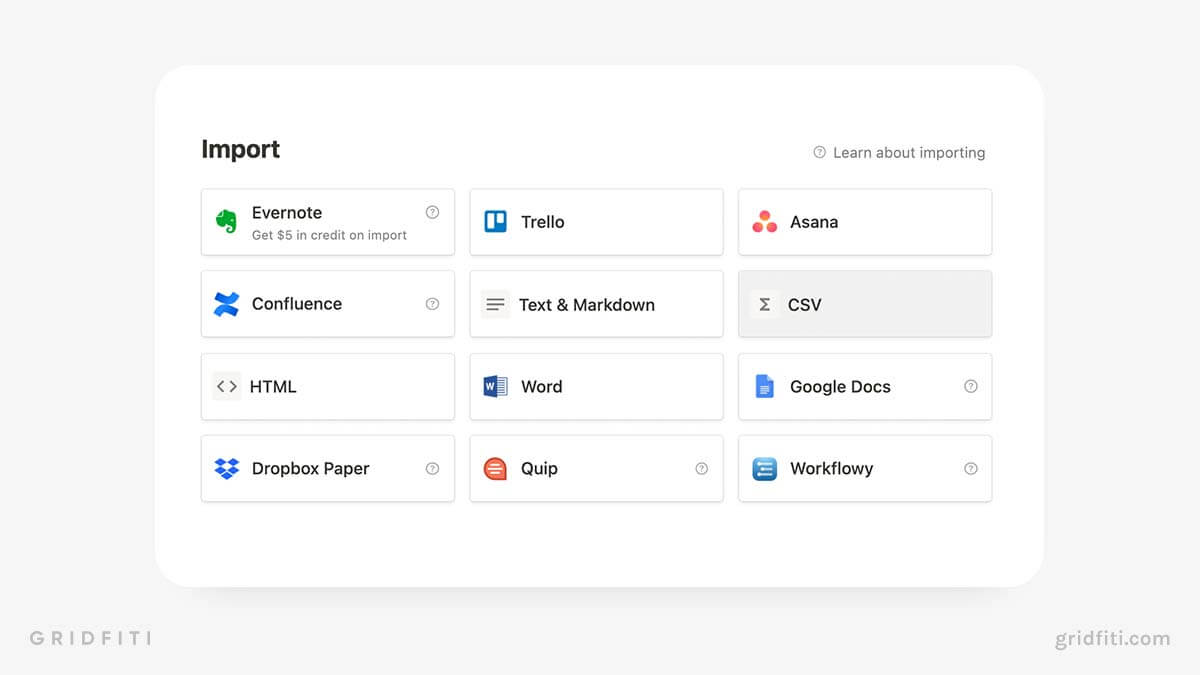
Import content from other apps
Notion lets you import content from other apps, including Evernote, Asana, Trello, and more. To import your content, you’ll first need to connect your other accounts with Notion. Here’s how to do that.
Connecting other apps to your Notion account
Step 1: In the Notion sidebar, select “Settings & Members”.
Step 2: In the pop-up window, click “My connected apps”.
Step 3: To the right of “Discover new apps”, click “See all”.
Step 4: Choose which app you’d like to connect (GitHub, Jira, Slack, Asana, Trello, Evernote)
Step 5: Sign in with your account and grant Notion access.
How to import content from other apps in Notion
Step 1: In the Notion sidebar, scroll down to “Import”.
Step 2: Select the app you’d like to import content from.
Step 3: Choose which pages or boards you’d like to import.
Notion will create a new page for each notebook and board you import. Be aware that some you may experience some formatting issues when importing from other apps.
Automate workflows with database templates
Database templates are a gamechanger for Notion newbies. Database templates let you create new pages with properties already filled out and page icons and covers already uploaded. You can also add content to the body of your template so you don’t have to type the same items over and over! Database templates are especially handy for people who use the same headings or checklists in notes or tasks.
Here’s how to create a new database template in Notion.
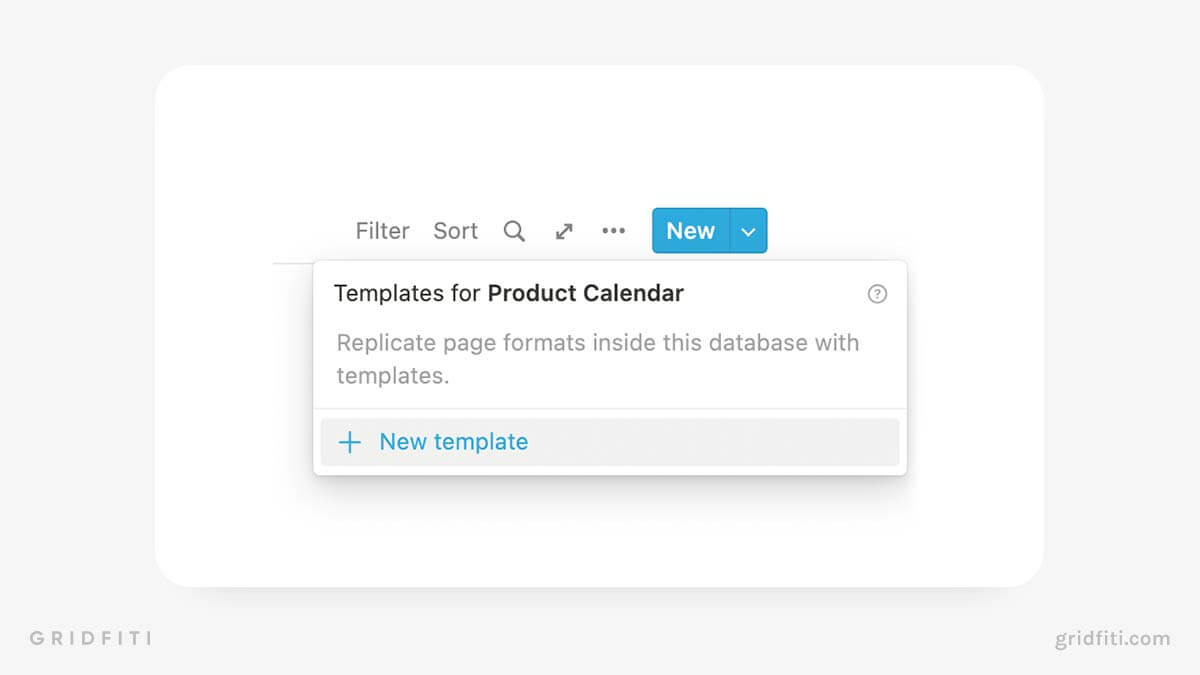
Step 1: Open the database where you’d like to create a new template.
Step 2: In the top right-hand corner of the database, click the drop-down arrow next to “New” and click “New template”.
Step 3: Customize your template however you like. Fill out properties, set a page icon and cover, and add blocks to the body of the page.
To create a new page within a database from a template, click the drop-down arrow next to “New”, then select the template you’d like to create. Then, all the elements you updated in the template will populate automatically in your new page.
All templates save automatically. To exit a template, simply navigate to another page in Notion. You can update your template anytime by going back into the Template menu, click the 3-dot menu [⋯] to the right of the template you’d like to edit, and selecting “Edit template”.
Add a new database filter view only you can see
In March 2022, Notion completely overhauled the look and feel of its databases with the launch of Better Databases. This update allows Notion users to apply filters to databases without affecting anyone else’s view.
When you apply a new filter to a database view, you’ll see an orange button in the right-hand corner that says “Save for everyone”. This ensures only you can see the filter unless you save the filter for everyone.
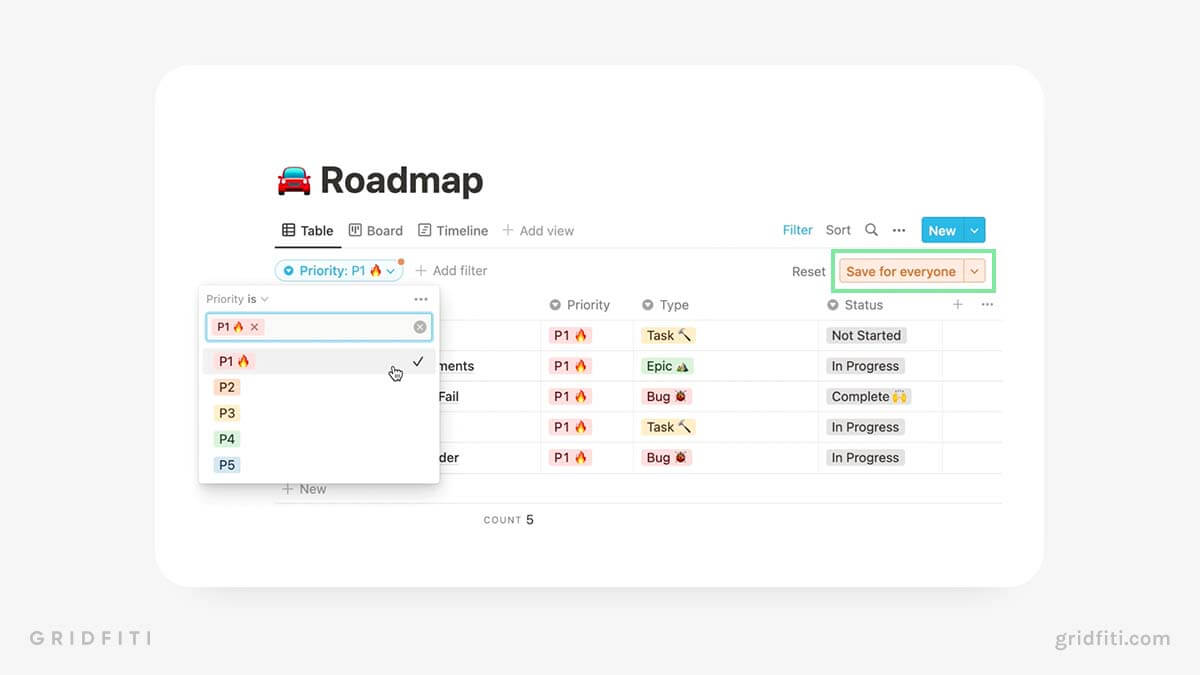 How does this work in practice? Let’s say, for example, you work on a social media management team, and you store all your company’s content in one database. Let’s say you need to quickly see all Facebook content, so you filter the database to show only Facebook content. You’ll now be able to see only Facebook content, but your colleagues working in this database won’t see those changes unless you save them.
To apply the changes to the entire database view, click “Save for everyone”. Now when other users in your Notion workspace open this specific database view, they’ll only see Facebook content.
Import content from a spreadsheet into a Notion database
Notion makes it easy to upload content from a spreadsheet to a database. The import process retains the formatting of the original spreadsheet, for the most part. So for example, if you have a column of dates in a spreadsheet, Notion will import that column as a new Date property.
But before you import content from a spreadsheet, CSV, or similar file, there are a few things you should do to save yourself a headache.
Make sure the column headers of your spreadsheet or CSV file match the titles of your Notion properties.
Let’s say the Notion database where you’d like to upload your spreadsheet has 3 existing properties called Title, Tags, and Date. The column headings of the spreadsheet you plan to import should also be Title, Tags, and Date.
If the titles of your Notion database properties don’t match the column headings of your spreadsheet, Notion will create new properties when importing. That means, instead of importing the content of your spreadsheet into your 3 existing Title, Tags, and Date properties, Notion will create 3 new properties and import the content into those instead. Not exactly ideal!
This is a mistake we’ve made more times than we’d like, so please heed our advice and make sure your database properties and spreadsheet column headings match!
Be aware that importing a spreadsheet may take some time.
This goes double for spreadsheets with column headings that don’t match the database’s existing properties. We’ve seen some imports — particularly of sheets with hundreds of rows — take as long as 5 full minutes. Be patient, and resist the temptation to reload the page.
If your import is taking an exceptionally long time, check your spreadsheet file to ensure there aren’t any errors. We’ve found that Notion sometimes gets “stuck” on the import screen for files with errors. Updating the file and reuploading it to Notion usually resolves this problem.
How to import a spreadsheet into Notion
There are 2 different ways to import a spreadsheet into Notion: upload your data to a new page or an existing database. We’ll walk you through both methods below!
Method #1: Import a spreadsheet to a new page in Notion
Step 1: In the Notion sidebar, scroll down and click on “Import”.
Step 2: In the pop-up window, click “CSV”.
Step 3: Select the CSV file you’d like to upload.
Step 4: Wait while the spreadsheet uploads (this may take a minute).
Method #2: Import a spreadsheet into an existing Notion database
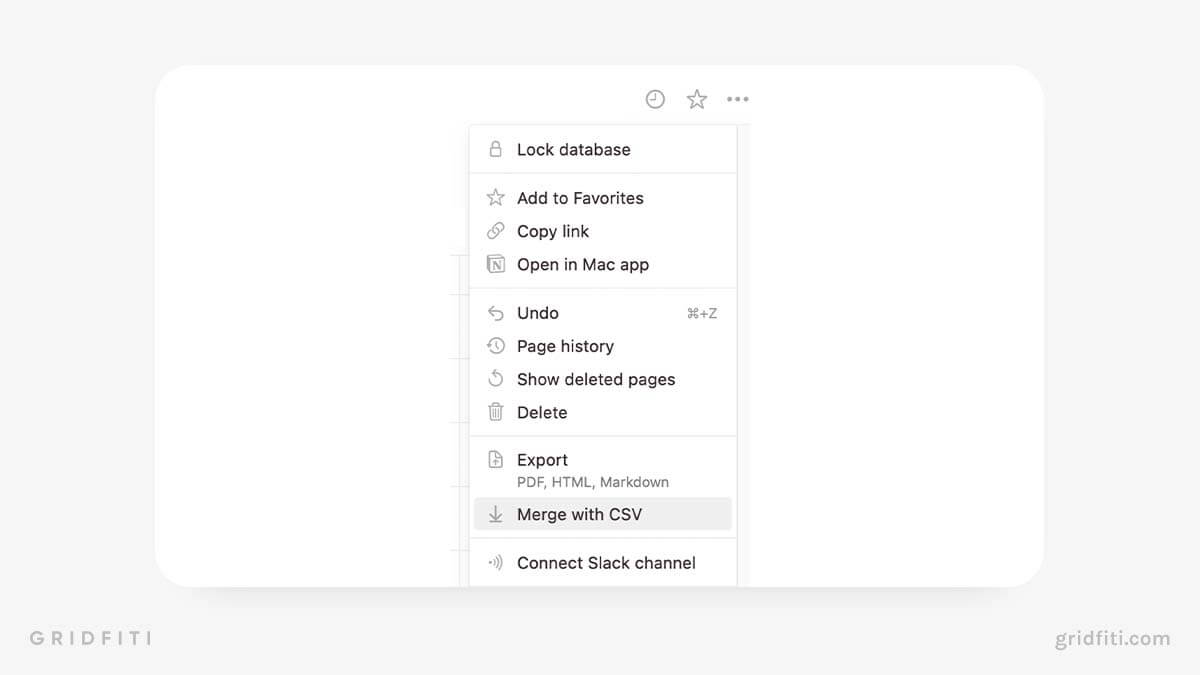
Step 1: Open the Notion database where you’d like to import your spreadsheet.
Step 2: In the top right-hand corner of the page (not the database), click the 3-dot menu and click “Merge with CSV”:
Step 3: From the pop-up window, select the CSV file you’d like to upload.
Step 4: Wait while the spreadsheet uploads (this may take a minute).
That wraps up our guide to Notion tips and tricks every user should know. (We didn’t even know some of these tricks when we started writing this post, and we’ve been using Notion for many years!)
 Did you find any of these tips helpful? Want to share a few of your own? Meet us in the comments!
Gridfiti is supported by its audience – when you buy something using the retail links in our posts, we may earn a small commission at no additional cost to you. Read more about our affiliate disclaimer.