Designing an aesthetic Notion dashboard complete with covers, widgets, and images is a fun way to add a pop of color to your life. But you’ve undoubtedly noticed that Notion’s default divider is, well, a little boring. It’s thin, gray, and not customizable, which isn’t exactly ideal for a pastel Studio Ghibli setup or a vibrant neon-themed Notion page.
Luckily, there are a few ways to spruce up your workspace with fully customizable dividers — and we’ve covered them all in this post! Read on to learn how to DIY colorful horizontal dividers, plus 2 hacks for creating vertical dividers in Notion.
Looking for more productivity tips and tools? Subscribe to The Flow — our quick, snappy, value-packed focus and recharge newsletter. Also, don’t miss our several other Notion template round-ups and guides!
 Get the all-in-one Life OS template, the only Notion template you’ll ever need — with over 25 integrated templates built in.
Notion Dividers Tutorial
There are 4 ways to create both horizontal and vertical dividers in Notion (listed in order of user-friendliness):
- using Notion’s native Divider block
- adding a divider using an Image block
- creating columns on either side of an empty Quote block to create a basic vertical divider
- pasting a small line of code into your page to create a customizable vertical divider
We’ll cover horizontal dividers first, then vertical dividers. Let’s get to it!
Notion Horizontal Dividers
As we mentioned, there are 2 ways to create horizontal blocks in Notion: use the default Divider block, or upload and resize an image. Let’s break each method down step by step.
Method 1: Use Notion’s default divider block
To create a new Divider block in Notion:
- Create a new block in Notion.
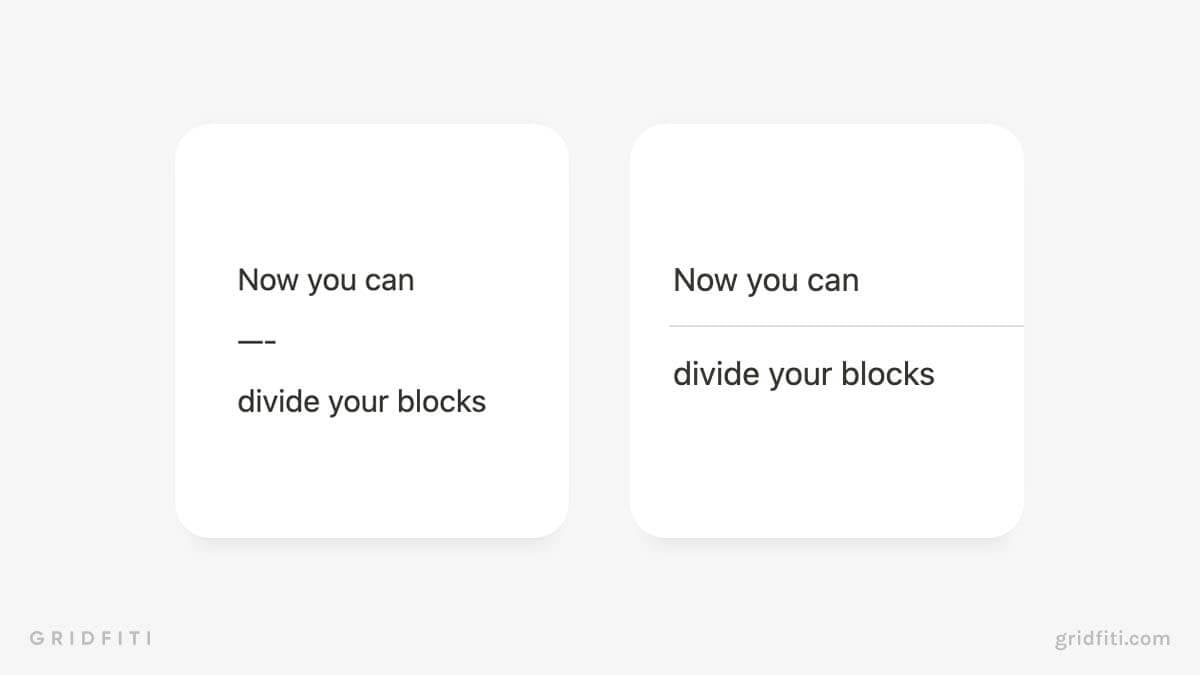
- Press the hyphen key [-] 3 times to automatically create a new divider block.
Easy peasy, right? Not so fast! Notion’s “Divider” block is currently only available in one style: a thin, horizontal gray line. It’s not possible to change the color or thickness of the default Notion divider.
While this is undoubtedly the quickest way to visually divide blocks in Notion, it’s not the best choice for anyone looking to add a splash of color to their workspace.
Luckily, the next method offers a handy workaround!
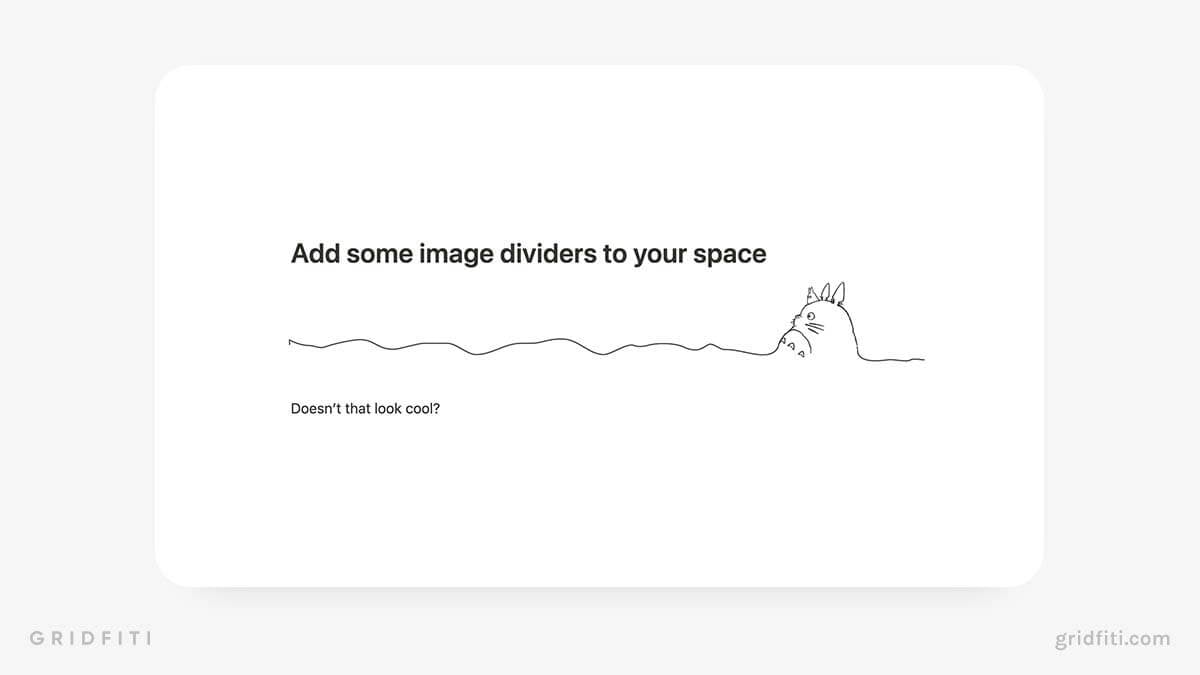
Method 2: Create a new divider using an image
Another way to jazz up your workspace is to add colorful dividers as Image blocks. Just upload the image file of your divider to Notion, then adjust the size to your liking by clicking and dragging the sizing handles of your Image block.
Keep reading for more guidance on using images as block dividers in Notion.
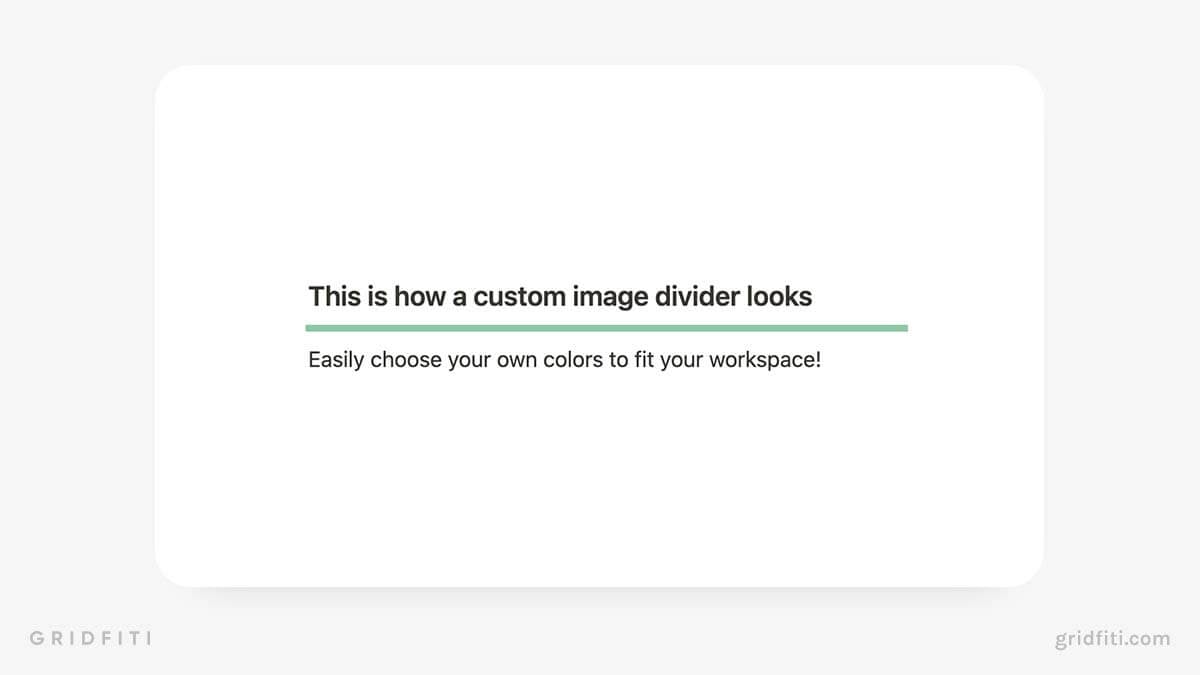
How to make custom Notion dividers
For maximum control over the style of your divider, create your own divider using a free image editing app like Canva.
The best dimensions for custom Notion dividers will vary based on your preferred style. We recommend using the following dimensions for most dividers:
- 2000 pixels x 50 pixels: Best for basic line dividers
- 2000 pixels x 100 pixels: Best for thicker dividers
- 2000 pixels x 150 pixels: Best for washi tape style dividers
Finding the right dimensions for your custom Notion divider may take a little trial and error, so play around until you find the sweet spot!
Notion Divider Packs
Don’t want to bother with creating your own dividers? Several Notion users have released divider packs complete with varying colors and thickness. Most of these packs are free or inexpensive. Check out a few of our favorite Notion divider packs:
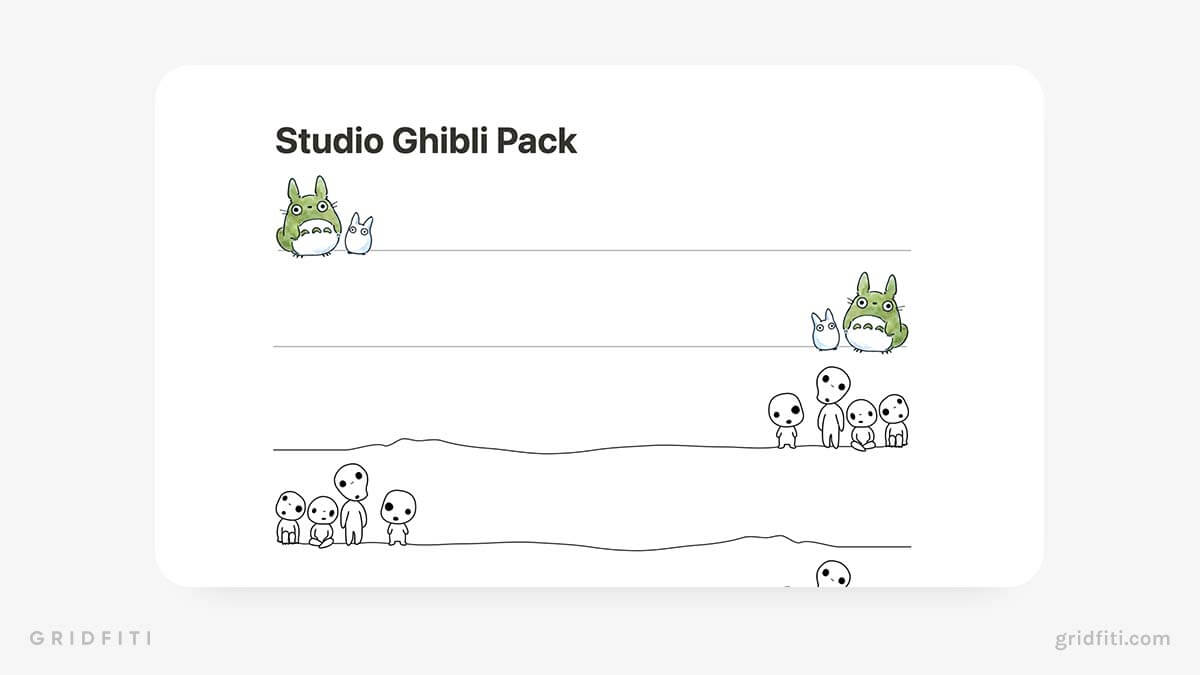
- Studio Ghibli Notion dividers
- Floral Notion dividers
- Neon Notion dividers
- Landscape pattern Notion dividers
- Royal Notion dividers
- Marble Notion dividers
- Basic solid color Notion dividers
- Assortment of Notion dividers and washi tapes
Notion Vertical Dividers
At the time of writing, Notion does not offer vertical divider blocks. But don’t despair! Some Notion power users have discovered a few nifty hacks for creating your own vertical dividers in Notion. We’ll walk you through 2 of the most user-friendly methods.
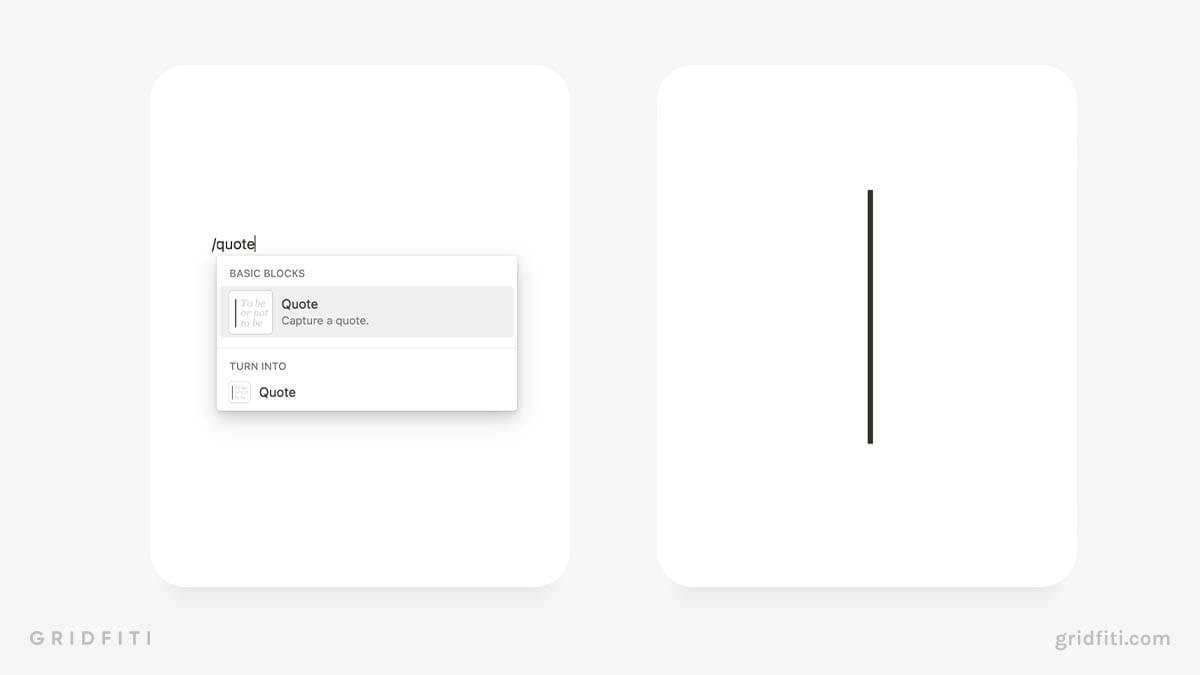
Method 1: Quote block hack
Fun fact: you can use Quote blocks to create makeshift vertical dividers in Notion! Here’s how to do it.
Step 1: Open the Notion page where you’d like to create your vertical divider.
Step 2: Create a new Quote block. (To do this quickly, create a new block, then type a quotation mark [“] followed by a space.)
Step 3: Click inside the quote block, then hold down shift and press “Enter” repeatedly to create a vertical divider.
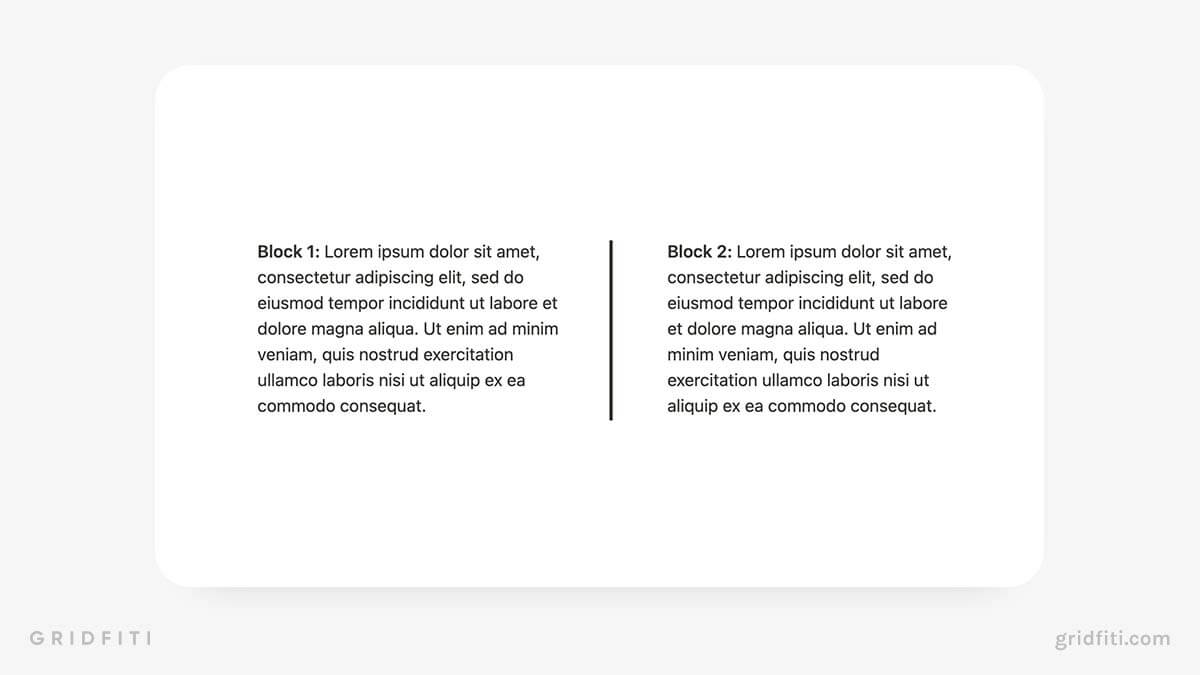
Then, create new columns on either side of the empty quote block. Voila! Now you’ve got a nice visual divider.
Note: You won’t be able to customize the color or thickness of dividers created using the Quote block hack. Luckily, there is a way to do that using the next method.
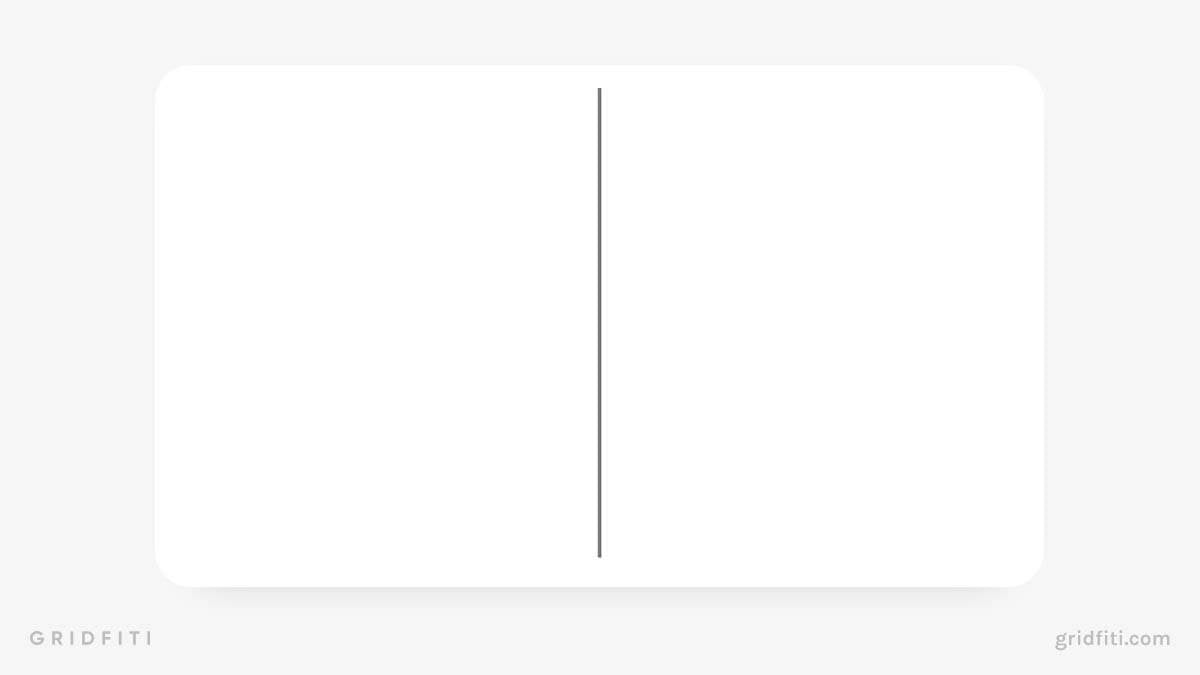
Method 2: Vertical dividers with custom color and thickness
This method requires a small amount of code, but don’t worry — it’s super simple, even for folks who have no coding skills! Here’s how to do it.
Step 1: Open the page where you’d like to add your dividers.
Step 2: Create 3 new columns in Notion and add a bit of text to each. (Not sure how to create columns in Notion? Check out our guide in our Notion Tips & Tricks post to learn how!)
Step 3: Copy the code below:
$$\color{gray}\rule{3px}{400px}$$
Step 4: Highlight the text of the second column.
Step 5: Paste your code, and watch as your vertical Notion divider appears like magic!
How to change the color and thickness of your vertical Notion divider
You can edit the color and thickness of this divider even after you’ve pasted it into your Notion workspace. Here’s how:
First, click your divider to bring up the code.
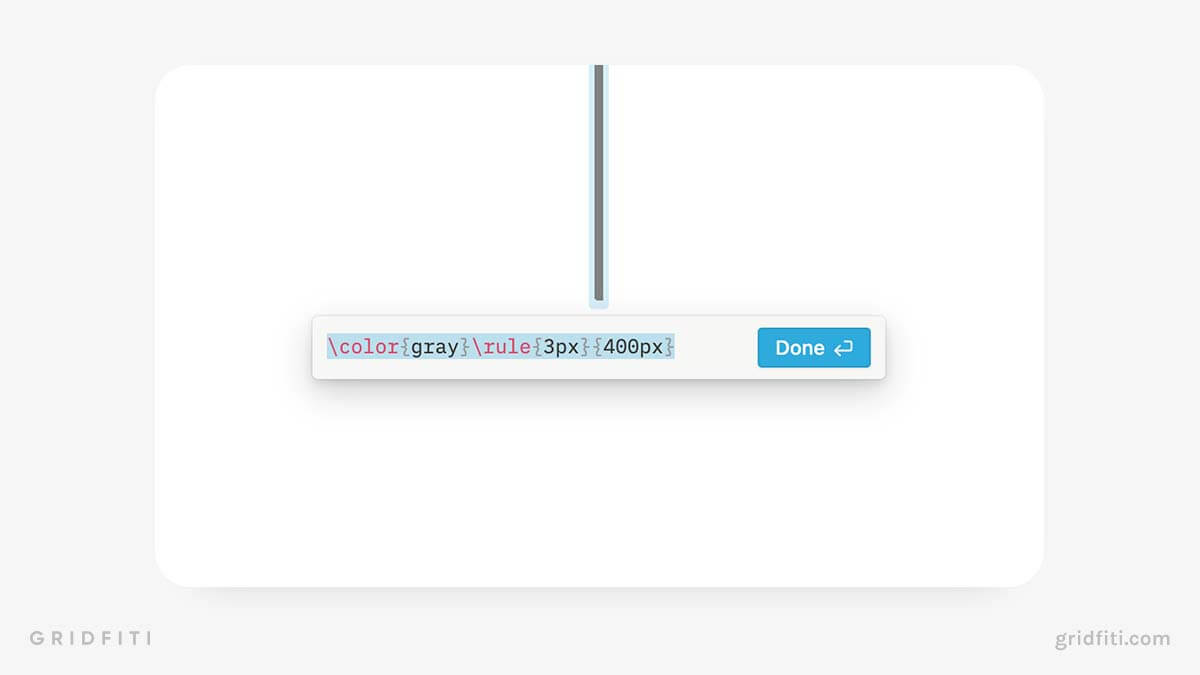
To change the color of your divider, delete the word “gray” from between the first set of curly brackets in the code above. Then, replace “gray” with the color of your choice. (Our free color formatting cheat sheet for Notion will be a big help here!) Here’s a quick peek at some of the colors you can use:

To change the thickness of your divider, delete the number “3” from the second set of curly brackets in the code above. Then, replace it with any number between 1 and 10. (Use “1” for a super thin divider, “10” for a super thick divider.) Don’t delete the “px” part of this code; otherwise, your divider will break!
To change the length of your divider, delete the number “400” from the third set of curly brackets in the code above. Then, replace it with your desired length in pixels. Don’t delete the “px” part of this code; otherwise, your divider will break!
Once you’ve entered your desired specs, don’t forget to hit the blue “Done” button to save it!
And that’s a wrap on our guide to Notion dividers! Whether you choose to stick with the default option or DIY your own dividers using images or code, this is one Notion hack you’ll want to keep in your pocket.
Created your own divider packs, or want to share your Notion divider tips and tricks? Share your wisdom in the comments below!
Gridfiti is supported by its audience – when you buy something using the retail links in our posts, we may earn a small commission at no additional cost to you. Read more about our affiliate disclaimer.