When you share a Notion page with the public, Notion will automatically generate a URL for it. You can customize the first part of this URL directly within Notion (for example, adamgreene.notion.site). But what if you want to build your website in Notion and publish it to a fully branded, custom URL, like adamgreene.com?
It is possible to use a custom domain with Notion — but be aware that you’ll either need to use a third-party website builder, or you’ll need to use a bit of code to make the magic happen. Scroll on to learn how to do it!
Looking for more productivity tips and tools? Subscribe to The Flow — our quick, snappy, value-packed focus and recharge newsletter. Also, don’t miss our several other Notion template round-ups and guides!
Table of Contents
- Pros & Cons of a Custom Notion Domain
- Where to Buy a Custom Notion URL
- How to Add a Custom Domain into Notion
- Beginner-Friendly Option: Using Website Builders
 Get the all-in-one Life OS template, the only Notion template you’ll ever need — with over 25 integrated templates built in.
Pros & Cons of a Custom Notion Domain
Why would you want to use a custom domain for a Notion page? Let’s take a closer look at the benefits and drawbacks of this approach.
Custom Notion Domain Benefits
What are the pros of using a custom domain for a Notion page?
- Easy to remember and access
- Perfect for beginners with no coding or web design skills
- More affordable than a traditional website hosting plan
A custom domain is much easier for the public to remember and access. Let’s face it — “adamgreene.com” is a lot easier to remember than “adamgreene.notion.site/[a bunch of numbers and letters]”.
Notion’s no-code blocks also make it super easy for beginners to design a website. As long as you know your way around Notion’s blocks, you can whip up a basic website in no time at all. (Check out our beginner’s guide to Notion for a full walkthrough of all the blocks!)
You can also use a custom domain with Notion’s free plan. And most third-party website builders that integrate with Notion are inexpensive, starting at just $5/month. So if you don’t need an expensive website hosting plan with all the bells and whistles, building your website in Notion is a more affordable alternative.
Custom Notion Domain Drawbacks
Now let’s take a look at why you may not want to use Notion to build your website:
- Slow loading times (reported by some users)
- Issues with search engine indexing (reported by some users)
- Data security concerns (reported by some users)
- No access to analytics data without a third-party tool
- Limited customization options
Some Notioneers posting in online forums have experienced issues with Notion pages published with custom URLs. Among the complaints were slow loading times, problems with search engine indexing, and data security concerns. However, many third-party website builders that integrate with Notion offer advanced SEO settings and site speed configurations, so your experience may be different.
Another potential drawback? Notion is not a website host or builder. Sure, you can share your pages to the web, and you can design a clean, lightweight website in Notion. But Notion doesn’t offer essential features like analytics or performance insights. And you won’t be able to access them without a third-party website builder or tool. (Which we’ll explore in just a minute.)
Of course, if you’re just publishing a resume or personal webpage, you may not need analytics or advanced SEO features. But if you’re planning to host your blog on Notion, or you want your Notion page to appear in search results, you may be better off using a platform that’s built for these purposes.
Finally, designing a website in Notion — even with a third-party website builder — may come with some customization limitations, especially if you’re not savvy with code. Some of the website builders we tested for this post only let us choose from a handful of pre-set text colors, for example. You could customize these with CSS, but this would require some coding and web design know-how.
If you’re planning to use Notion in lieu of a web hosting platform like Squarespace, be aware of these potential issues.
Where to Buy a Custom Notion URL
Where can you buy a custom URL to use with Notion? That depends on whether you’re using a third-party website builder, as well as your technical skills.
If you’re not savvy with code, you may want to use a website builder that integrates with Notion. Platforms like Potion and Notionlayer let you build a website from your public Notion page. Many of these platforms offer paid plans that come with custom domains, saving you some time and hassle. (We’ll cover those more in-depth later in this post.)
If you’re a Notion pro user who’s planning a fully custom build, you can buy a domain from any domain registrar, like Cloudflare or Google Domains, and set up a redirect from the original notion.site URL using our walkthrough below.
Now that you know where you can buy your custom URL to use with Notion, let’s explore how to set it up.
How to Add a Custom Domain into Notion: A Beginner’s Guide
One of the easiest ways to use a custom domain with Notion is to use a third-party tool called Fruition. Here’s how to set up a custom domain with Notion in 10 steps.
Step 1: Make your Notion page public
Before you start shopping around for a domain, first things first: make your Notion page public, and ensure the sharing settings are configured properly.
In the top right-hand corner of your Notion page, click Share, then toggle on Share to web. If you want your site to appear in search engine results, you should also toggle on Search engine indexing. The link expiration setting is set to Never by default, but double-check it just to make sure.
Once that’s done, click Copy web link to copy the public link to your clipboard.
Step 2: Purchase a domain
If you haven’t already, buy your custom domain from the domain registrar of your choice. Namecheap, GoDaddy, and Google Domains are a few popular ones. (For this post, we went with Namecheap.)
Note: You do not need to buy hosting services if you’re using a custom domain with Notion. In this case, Notion will essentially replace the web host. All you need is the domain.
Domains aren’t usually very expensive — you can expect to pay $10 to $20 a year on average for a .com domain. Several factors can affect the cost, including the domain suffix, aka TLD (top level domain) like .com or .net, and whether the domain was registered previously.
When we bought our domain, we were also given some extra WHOIS privacy options that we wanted to cover for those who are new to managing a website. (If this isn’t your first rodeo and you’re familiar with WHOIS, click here to skip ahead to the next section.)
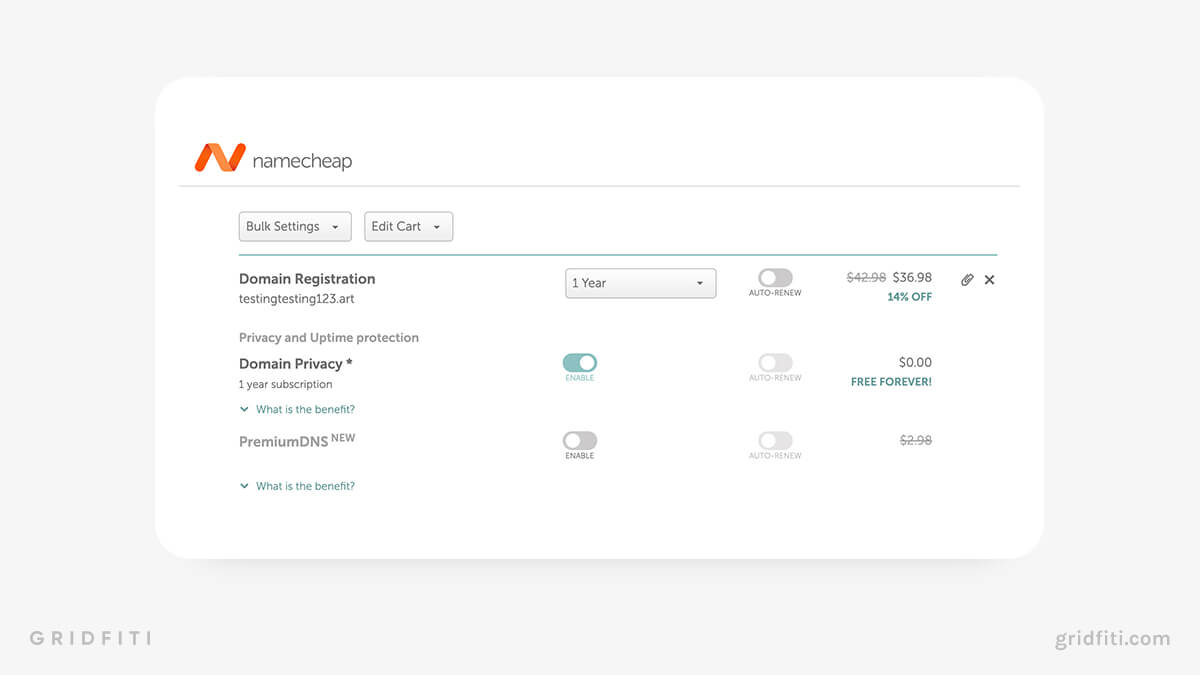
To register a domain, you’ll need to provide personal information like your full name, address, phone number, and email address. This data is housed in the WHOIS database, which is searchable and available to the public.
When purchasing your domain, it’s a good idea to add on privacy protection, which prevents your sensitive personal data from being shared to the public WHOIS database. This extra protection was free with our domain, but some domain registrars charge a small fee for it. (Note: Some TLDs like .ca do not support domain privacy.)
If you’re concerned about the privacy of your data, we highly recommend purchasing this extra protection if it’s available for peace of mind.
Step 3: Create a Cloudflare account and add your custom domain
Now that you’ve got your domain, it’s time to get technical. Cloudflare will not only facilitate the redirect, but it will also ensure your fancy new Notion site is secure and fast.
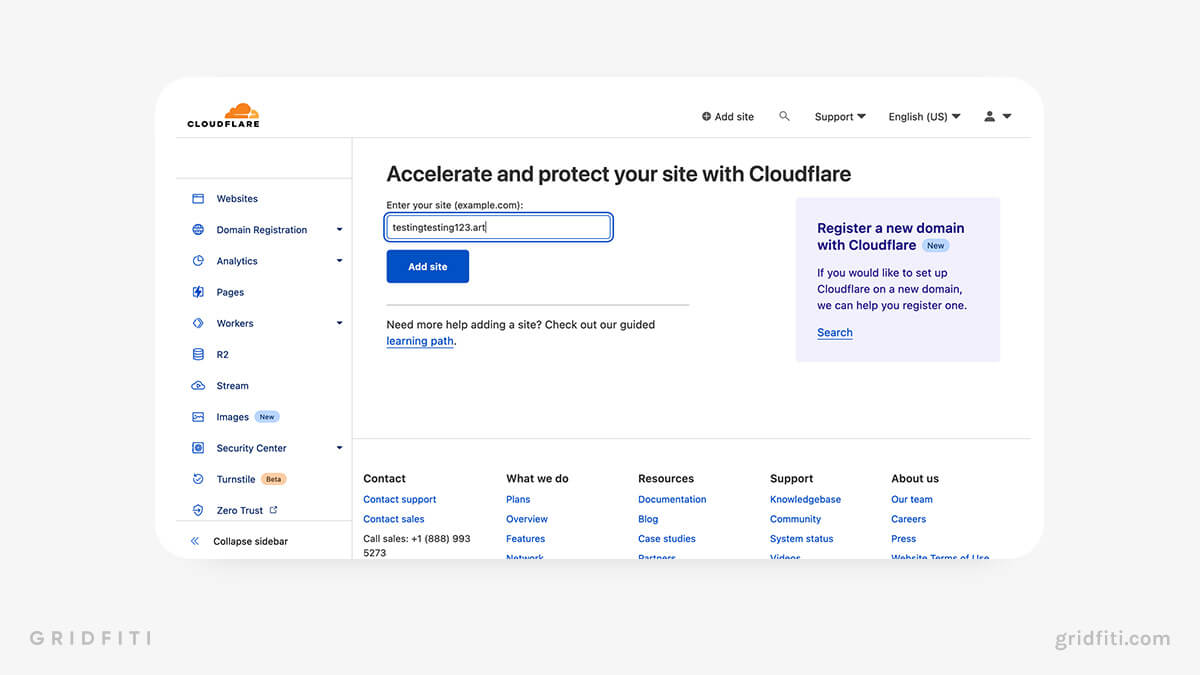
Once you’ve created your Cloudflare account, click Add site in the top right-hand corner of your dashboard. Then, paste in the custom domain you bought and click Add site.
You’ll be redirected to a pricing page, but don’t worry — you won’t need to pay for anything. Scroll down to the free option and click Continue.
You may be asked to review your DNS records on the next screen. No need to change or update anything here, unless something doesn’t match up with the DNS records in your domain registrar or they don’t automatically populate (both of which are rare). Click Continue.
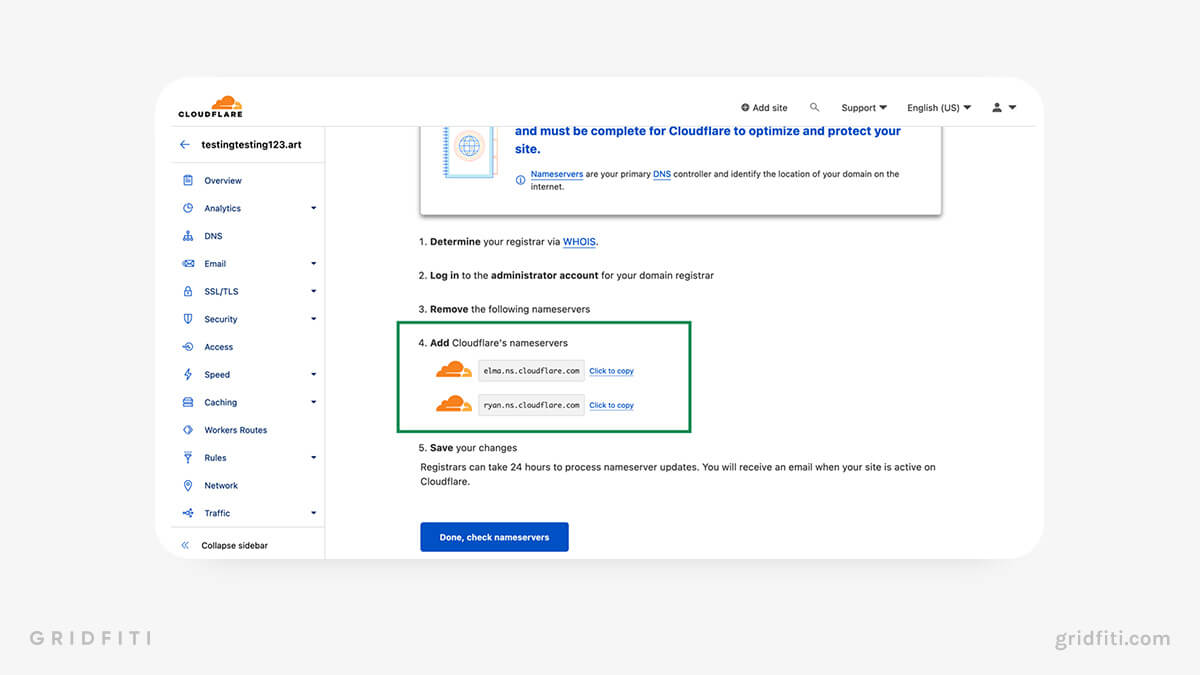
On the next screen, scroll down to Add Cloudflare’s nameservers. Copy the values in both Nameserver 1 and Nameserver 2. (Note that your values will likely be different from the ones shown below).
Step 4: Update your domain’s default nameservers
The exact process for this step will vary depending on your domain registrar.
Log in to your domain registrar account and look for your DNS or Nameserver settings. In Namecheap, you’ll find these settings under Account > Dashboard > Domains.
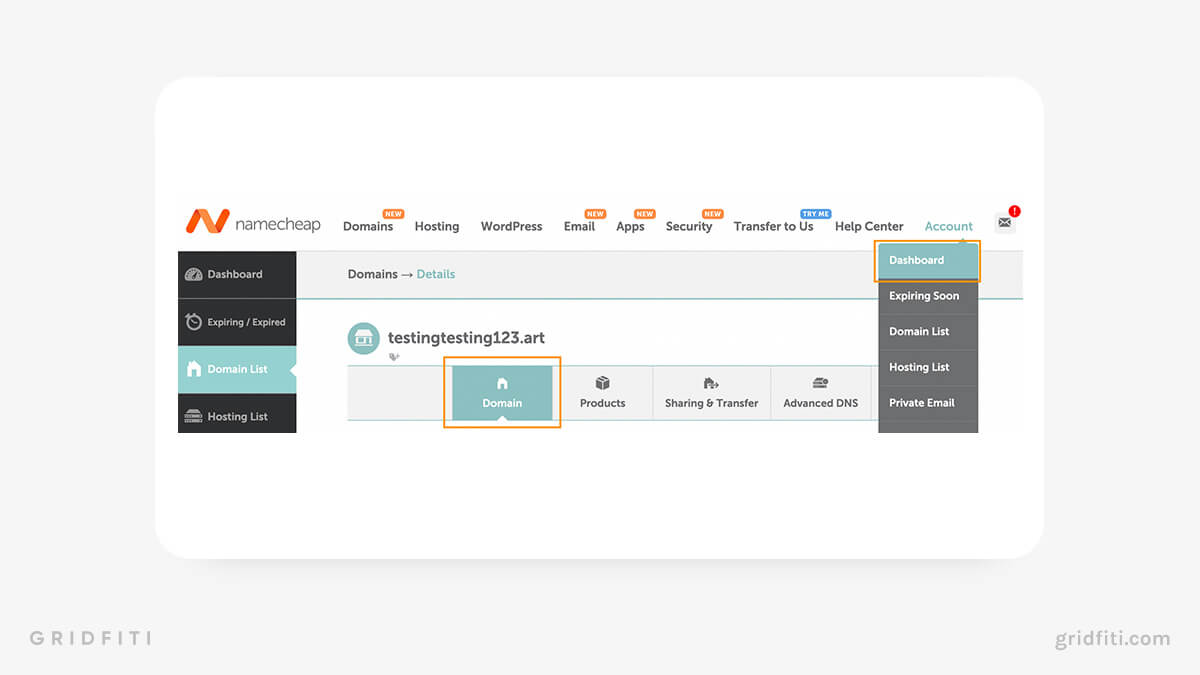
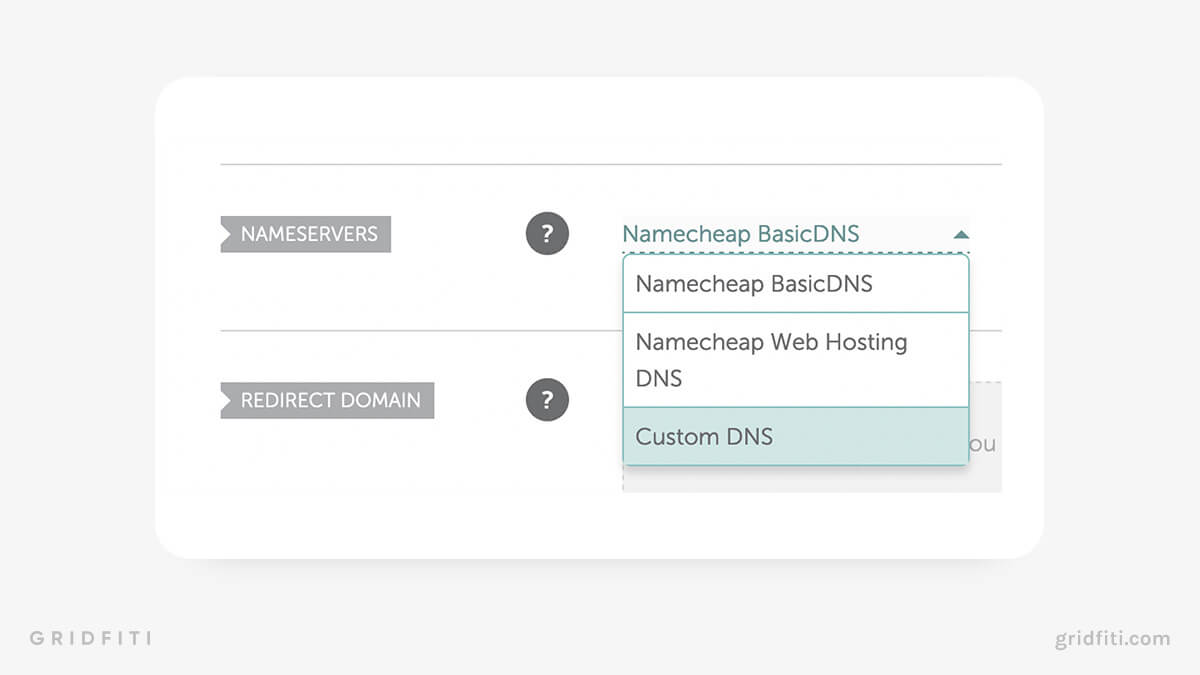
If you’re using Namecheap, scroll down to Nameservers on this page. Then, click the dropdown button and choose “Custom DNS”. (If you’re using a different domain registrar, these settings may be located somewhere else.)
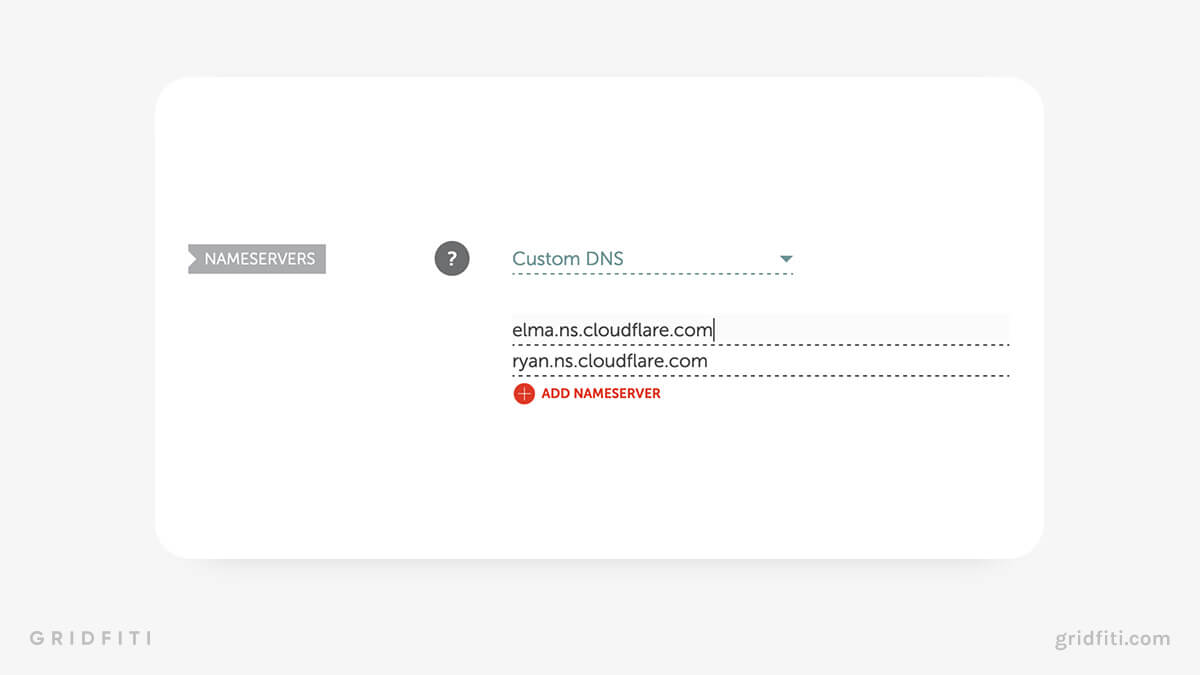
Then, paste both the nameservers you copied from Cloudflare and click the green check mark on the right-hand side to save your settings
You’ll need to wait a bit for the changes to take effect. While some nameserver updates will process in as little as one hour, it may take up to 48 hours depending on your domain registrar.
Step 5: Check your nameservers in Cloudflare and update your settings
Once you’ve added your custom nameservers to your domain registrar, go back to Cloudflare. Click Done, check nameservers to initiate the check.
On the next screen, we recommend clicking Get started on the Quick Start Guide page:
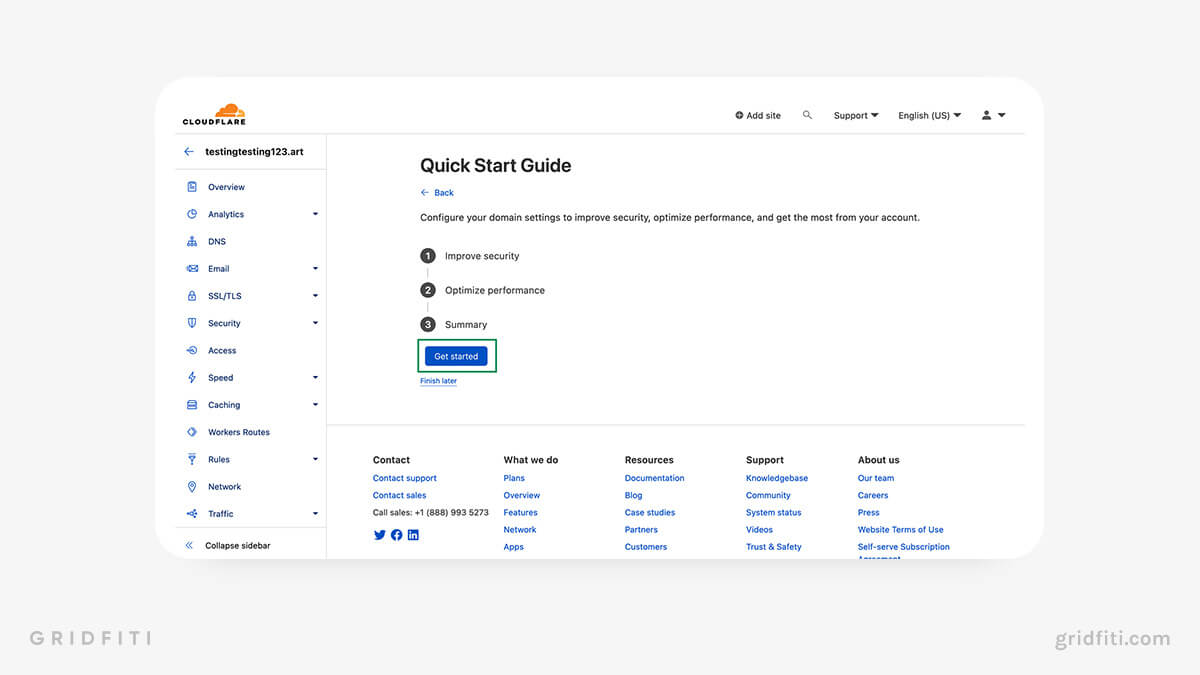
Ensure every option in all 3 steps is toggled ON (and click Save after updating each setting):
- Automatic HTTPS Rewrites
- Always use HTTPS
- Auto Minify (Tick all 3 boxes for Javascript, CSS, and HTML)
- Brotli
Once all your settings are updated, click Finish. On the next screen, click Check nameservers. You may see a message that says to check back in a few hours.
Step 6: Create a worker in Cloudflare to facilitate the redirect
Click the Cloudflare logo in the top left corner of the page to access your account settings (these are different from your domain settings).
In the left-hand sidebar, click Workers. (If you see Worker Routes instead of Workers, click the Cloudflare logo in the top left again.)
Next, click Create a Service:
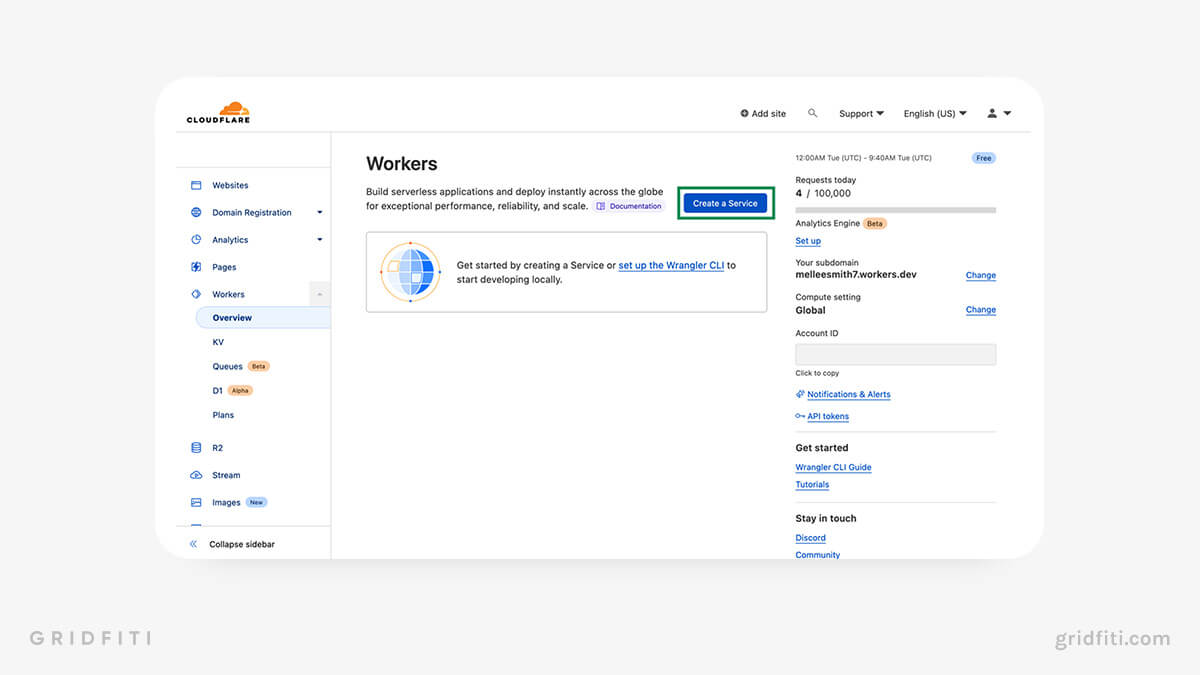
On the next screen, you can input your Service name — feel free to leave the auto-populated option. Select HTTP router, then click Create service.
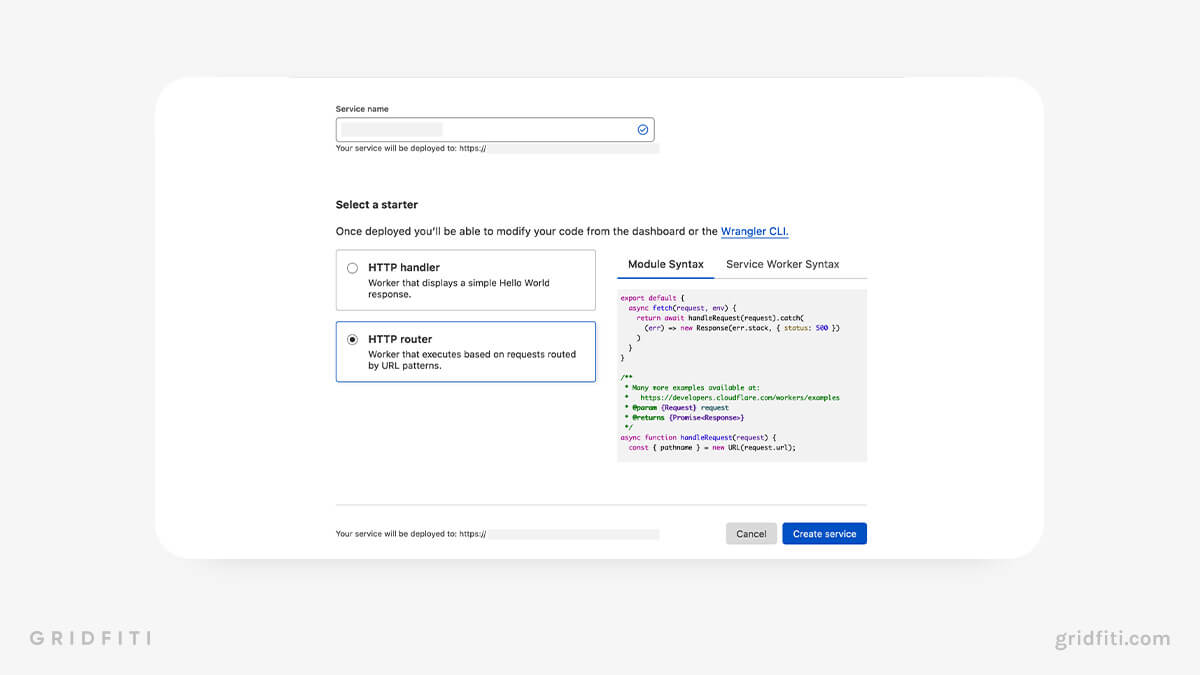
On the next screen, click Quick edit in the top right corner to edit the code.

Step 7: Generate your script in Fruition
Now it’s time to hop over to Fruition. Scroll down to the Get Started section and click the toggle next to Step 2: Customize and generate the script (2 mins).
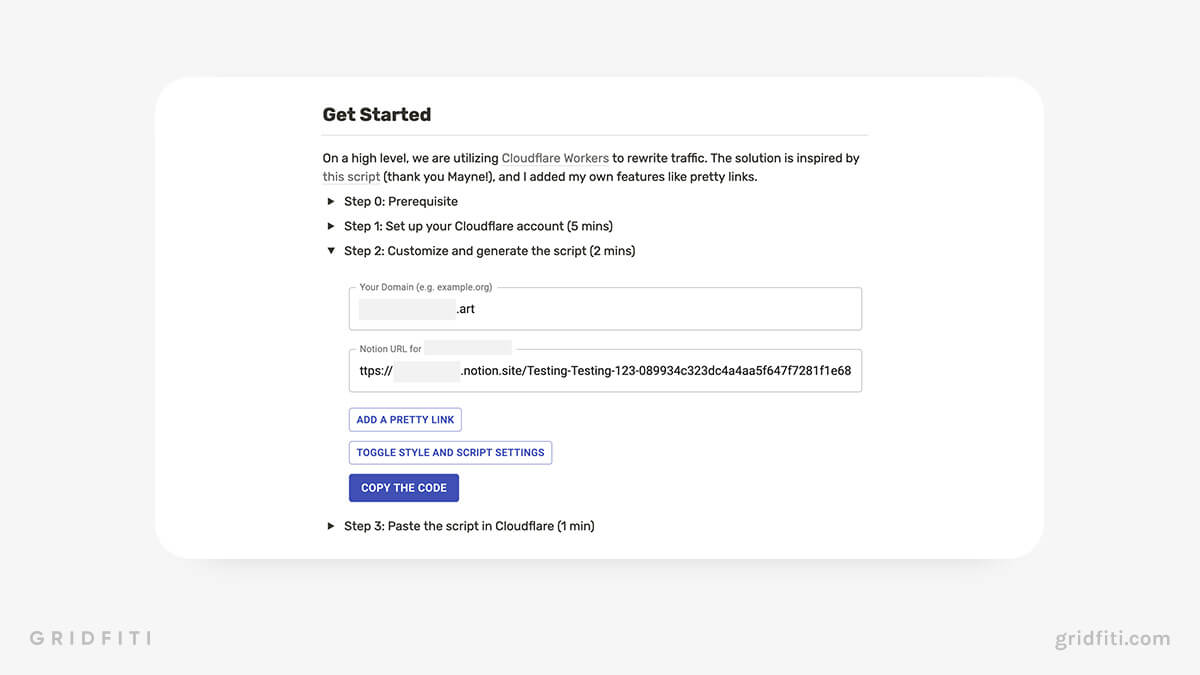
Input your custom domain in the first field, then paste the web link to your Notion page in the second field. Then, click Toggle Style and Script Settings to add your page title, page description, Google Fonts, and custom scripts. (This is an optional step, but we recommend at least updating the page title and page description, especially if you want your site to appear in search results.)
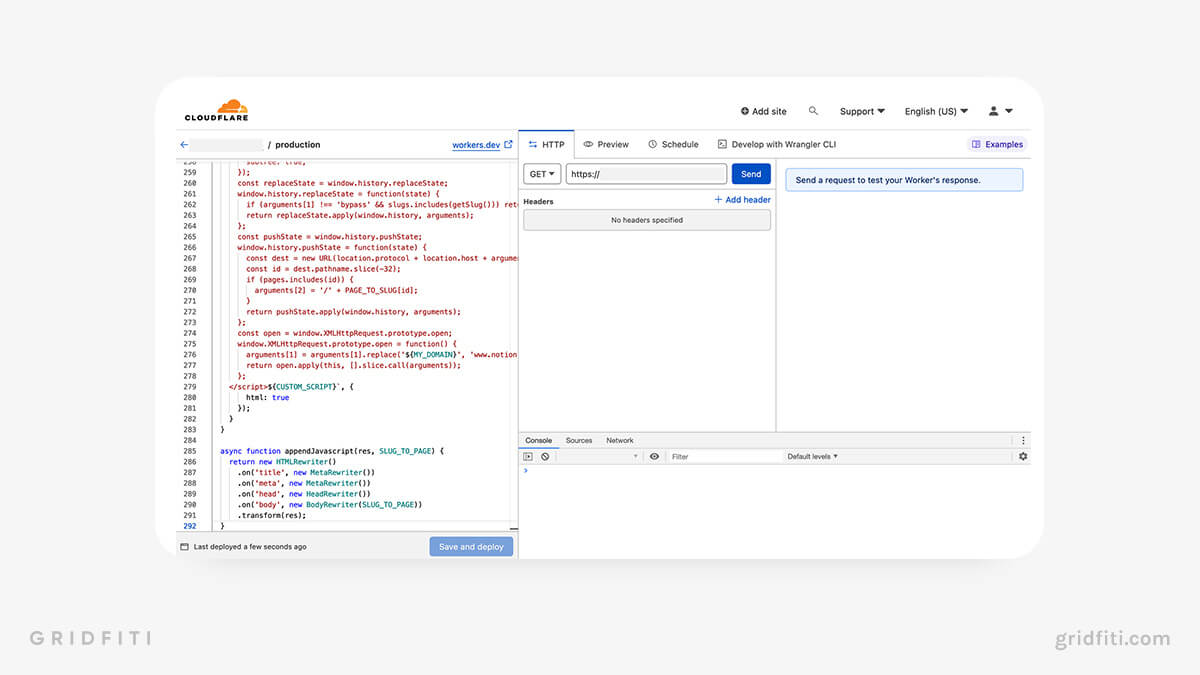
Step 8: Add your code to the Cloudflare worker
Now head back over to the Cloudflare worker editor screen from Step 6. Replace the code in the text editor on the left-hand side with the code you just copied from Fruition, then click Save and deploy at the bottom:
Step 9: Add your custom domain to the worker
Go back to your Cloudflare dashboard by clicking the Cloudflare logo in the top left corner of the screen. Then, click Workers on the left-hand sidebar. Click the worker you just set up.
On the next page, scroll down and click Triggers, then click Add Custom Domain. Input your custom domain and click Add Custom Domain again to connect it to the worker.
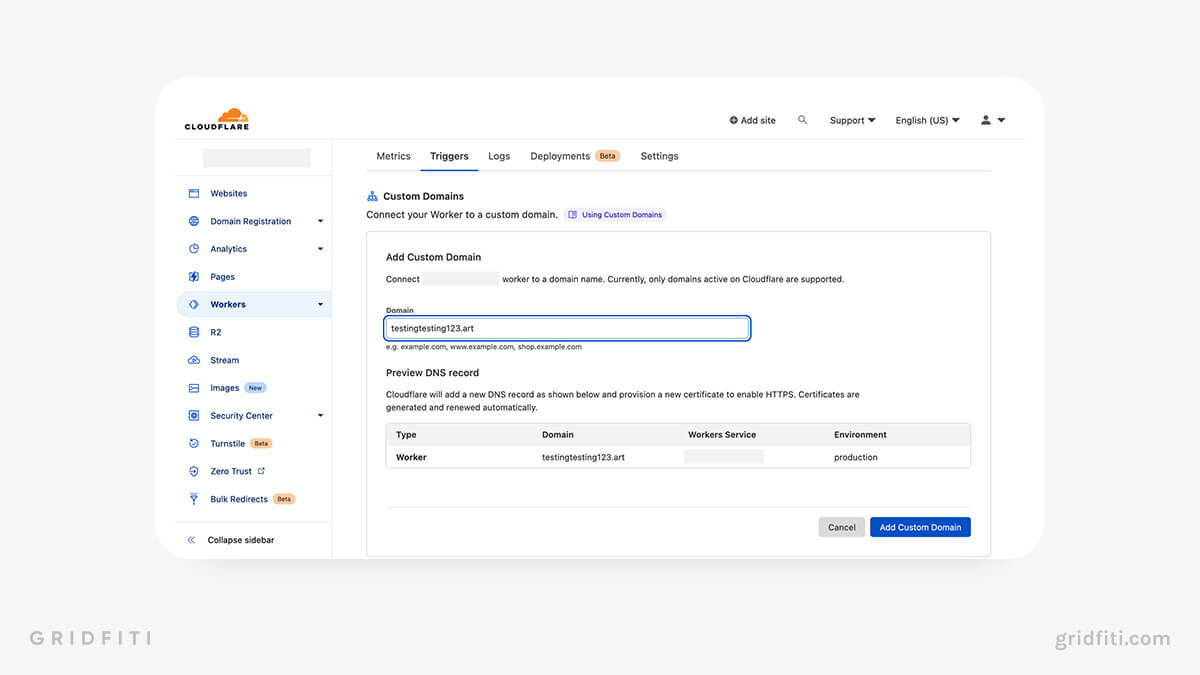
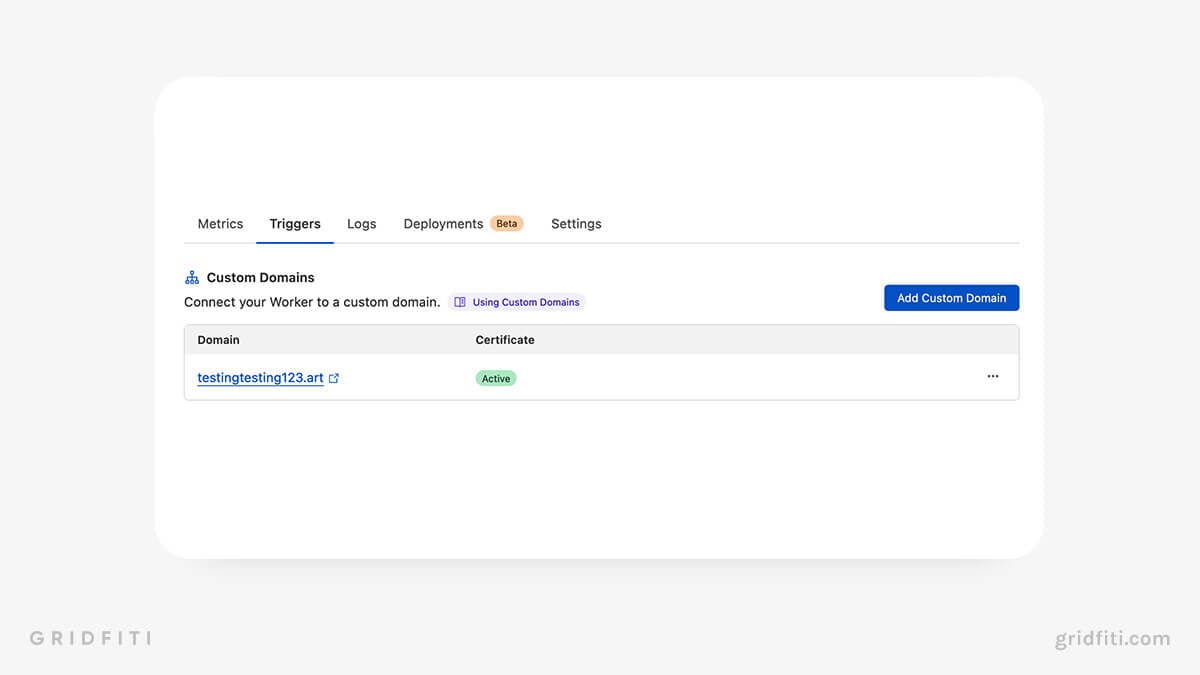
It may take some time for the custom domain trigger to update. After you add it, you’ll see Initalizing under Certificate. This will change to Active after the trigger updates.
Step 10: Visit your shiny new site!
And that’s it! Open your domain in a new page and watch as the scripts work their magic and populate your Notion page with your custom domain.
Using a Custom Notion Domain with Website Builders
If the tutorial above is a little too technical for you, don’t fret! Website builders make it easy to publish and customize a website from a Notion page. Scroll on to see a walkthrough for each of our faves.
Looking for templates to create a beautiful Notion site with these builders? Don’t miss our round-up on the best Notion website templates.
Notion Website Builder Pricing
Here’s a quick glance at the third-party website builders you can use to create a website from a Notion page, plus pricing options for each.
Note: To use a custom domain with any of these website builders, you’ll need to upgrade to a premium option. Prices range from $5 to $48 per month depending on the number of sites you’d like to build and the features you’d like included.
- Potion.so
- Free site: Basic site, no custom domain
- 1 site: $10/month (includes custom domain)
- 3 sites: $24/month
- 8 sites: $48/month
- Super.so
- Free site: Basic site, no custom domain
- Personal site: $12/month (lets you connect an existing custom domain)
- Pro site: $28/month
- Simple.ink
- Free site: Basic site, no custom domain
- Premium site: $12/month (includes custom domain)
- Notionlayer
- Free site: Basic site, no custom domain
- Starter: $5/month (1 custom site, includes custom domain)
- Advanced: $10/month (3 custom sites, includes 2 custom domains)
Potion
Potion is a super intuitive website builder that makes it easy to customize your site. Note that you’ll need to upgrade to Potion Premium to use a custom domain.
Here’s how to create a website from Notion with Potion:
- Create your free Potion account.
- Verify your email address.
- Click Add new site in the top left corner of your Potion dashboard.
- Add your page title, Notion public web link, and subdomain, then click Continue.

- On the next page, click Edit site. Or, from your Potion dashboard, click your site to open the editor.
- In the sidebar, explore the options for adding a custom menu, changing your site name, uploading a favicon (the small icons you see in your browser tabs), and customizing the look and feel of your site.
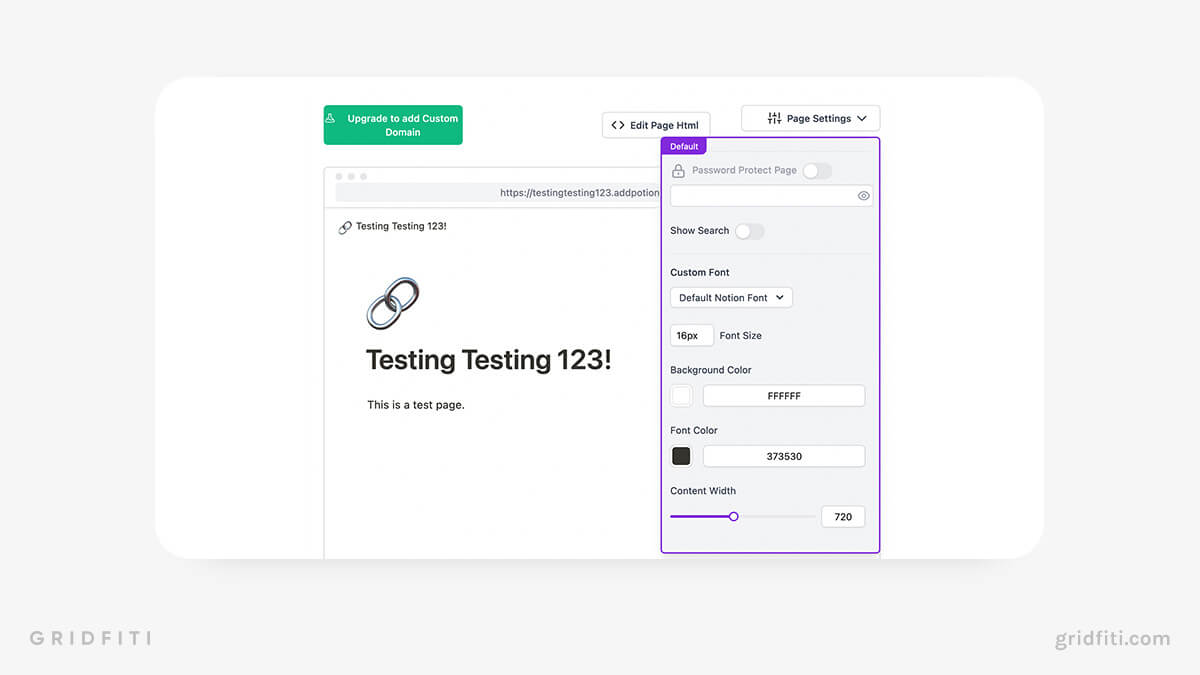
- To use a custom domain with Potion, click the gear icon in the sidebar, then toggle on Use Custom Domain. (Note: This option will only be available if you’ve upgraded to Potion Premium.)
- Once you’ve upgraded, click your site from your Potion dashboard, then click Page Settings to customize your fonts, colors, and more.
Super
Super is a freemium Notion website builder that comes complete with custom website themes, password protection, integrations with third-party apps, and more! Here’s how to create a website from Notion using Super.
- Hop over to Super.so, then click Get started free.
- Create your account.
- Click New site in the top right corner of your Super dashboard.
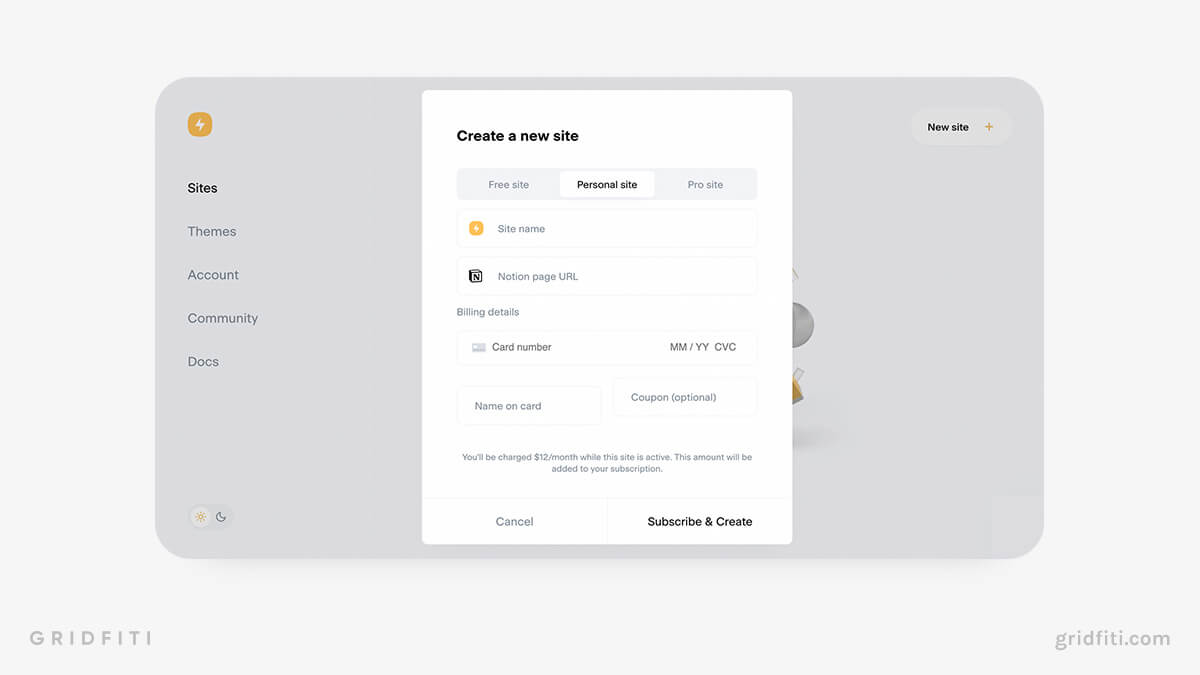
- Choose your plan: Free site, Personal site ($12/month), or Pro site ($28/month). Note that you can only get a custom domain if you choose one of the paid plans.
- Add your site name, and paste the web link to your public Notion page.
- Input your credit card details, then click Subscribe & Create.
- Start building!
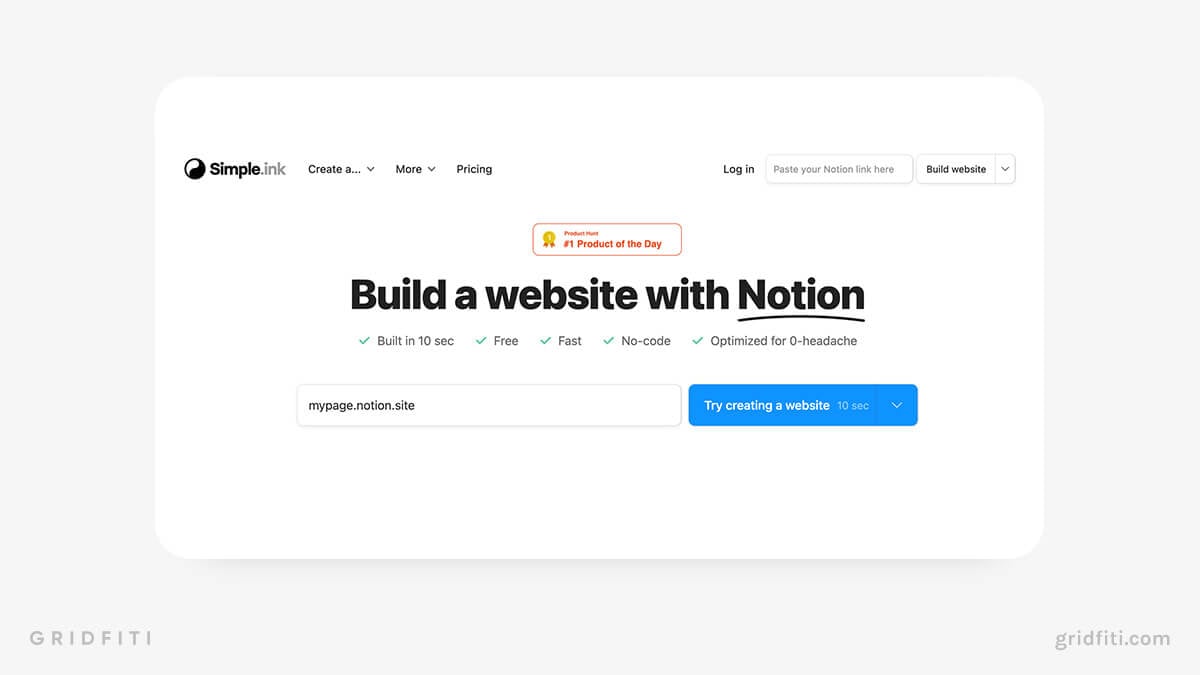
Simple.ink
Simple.ink is a minimalist website builder that integrates with Notion. You can even edit your public Notion page right from Simple.ink. If you’re looking for a no-fuss option that includes only the bare essentials, Simple.ink does what it says on the tin! Here’s how to create a custom Notion website using Simple.ink.
- Hop over to Simple.ink.
- Paste the public web link to your Notion page in the bar on the homepage, then click Try creating a website.
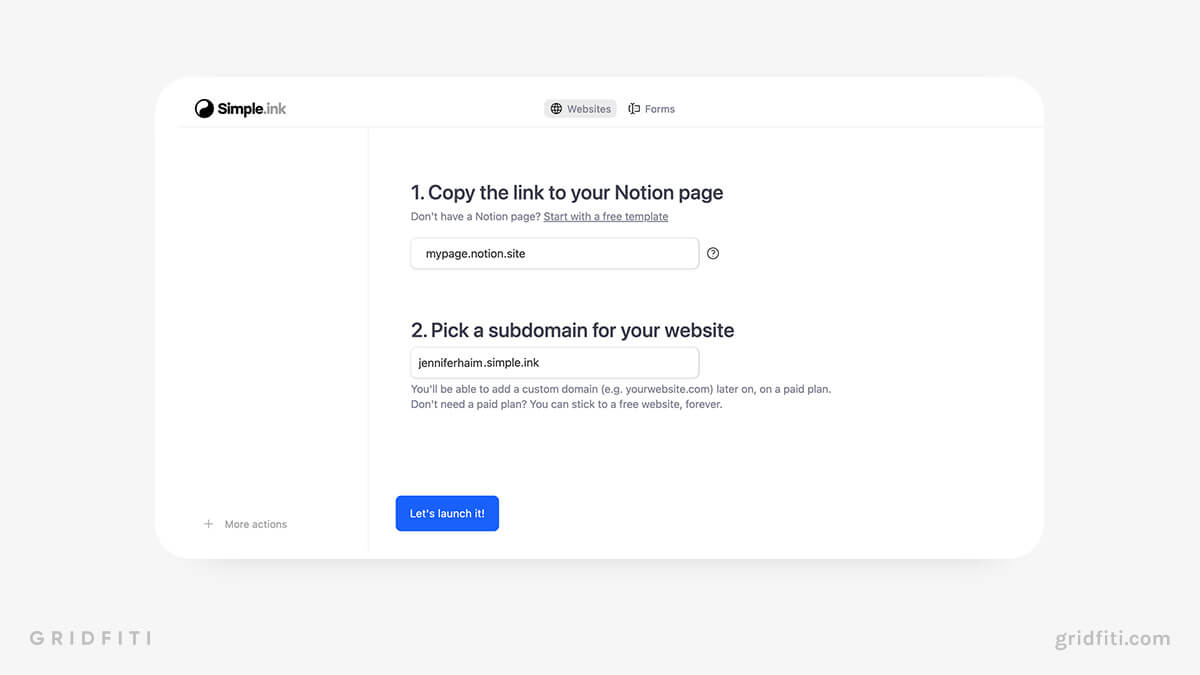
- On the next page, add your subdomain, then click Let’s launch it!. (You can set a custom domain later once you’ve upgraded to a paid plan.)
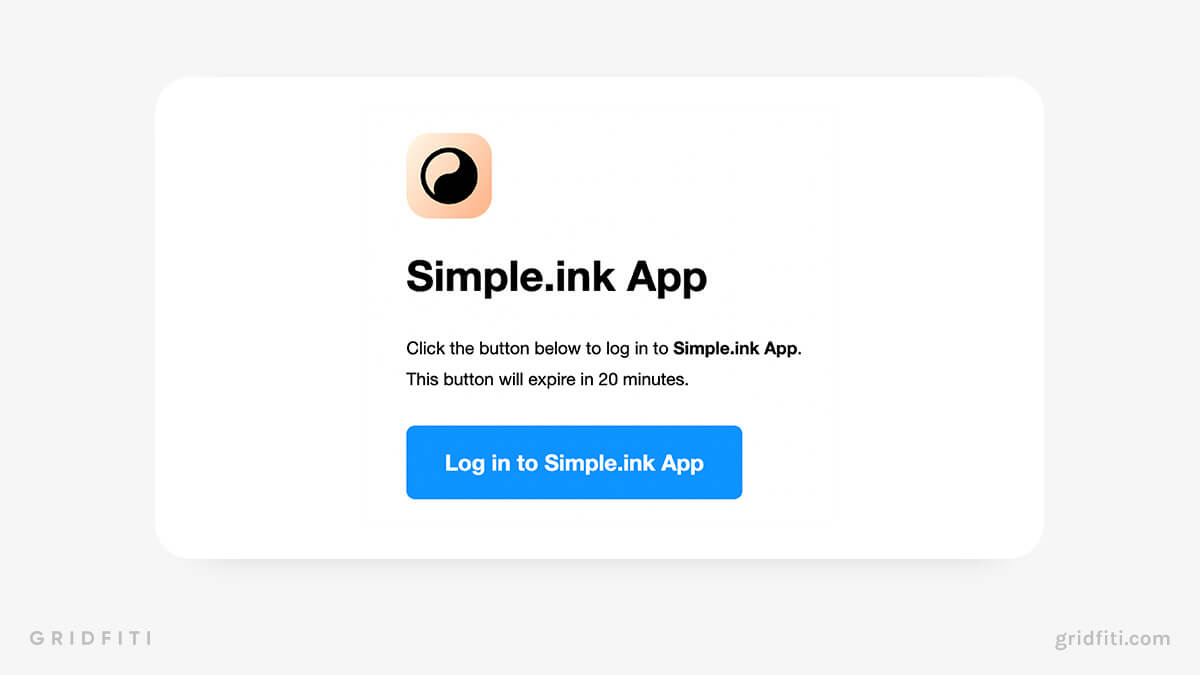
- In the pop-up window, input your email address to save your progress.
- Head over to your email inbox, open the email from simple.ink, and click Log in to Simple.ink App.
- Go back to simple.ink. Then, scroll down to Have a custom domain? and click Let’s add it →

- If you haven’t already upgraded to a paid plan, click Upgrade for this feature on the next screen.
- Choose your billing preference — annual ($99) or monthly ($12) — then click Upgrade.
- Finalize your payment.
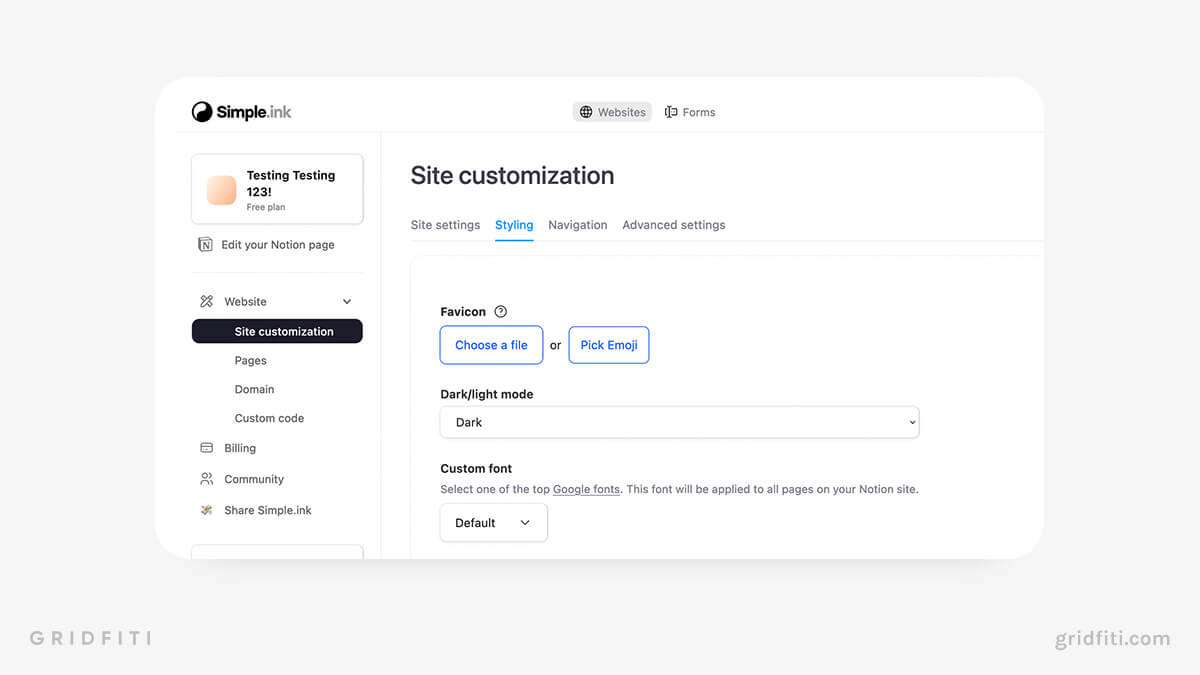
- Start building! In the left-hand sidebar, click the Website dropdown, then explore the options to customize your site.
Notionlayer
Notionlayer is one of the best website builders to use with Notion because it integrates with Google Analytics — perfect for Notioneers who want to track engagement on their site. Plus, it’s one of the cheaper options, with plans starting at just $5/month. Here’s how create a website from a Notion page using Notionlayer.
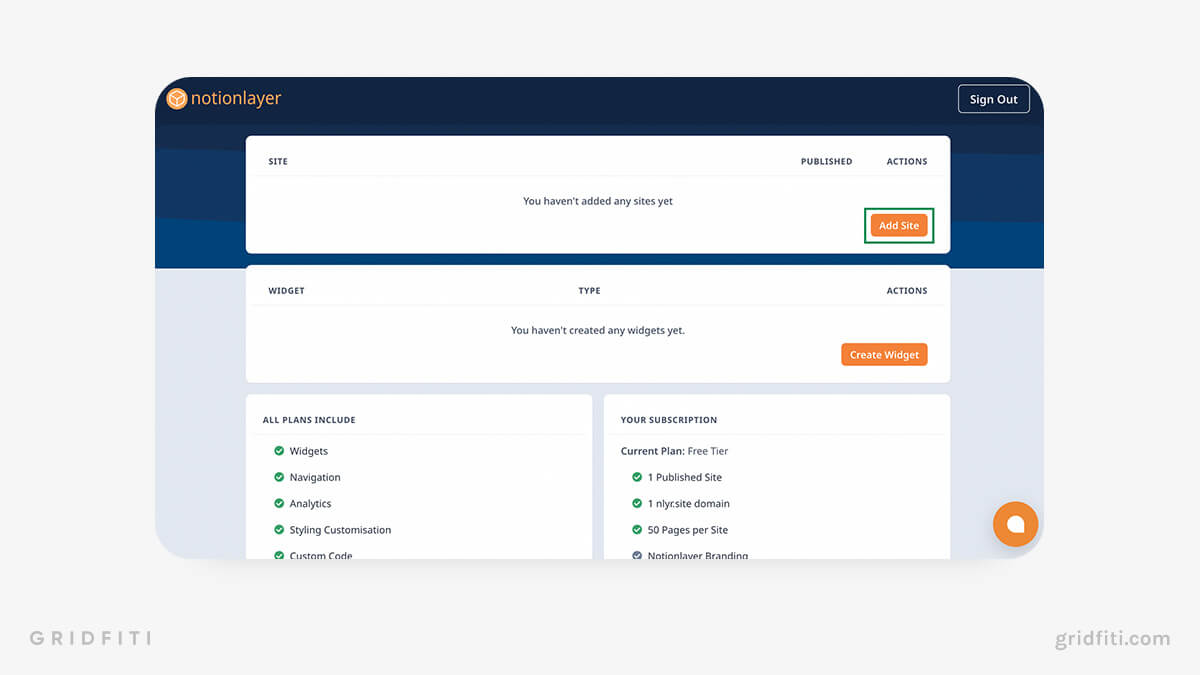
- Head over to Notionlayer.com and click Start for free.
- Create an account using your preferred sign-up option: email, Google, Github, Notion, or Twitter. (We chose to sign in with Notion for simplicity’s sake. If you choose this option, you’ll need to select the Notion pages you’d like to share with Notionlayer, then click Allow access.)
- On your Notionlayer dashboard, click Add site.
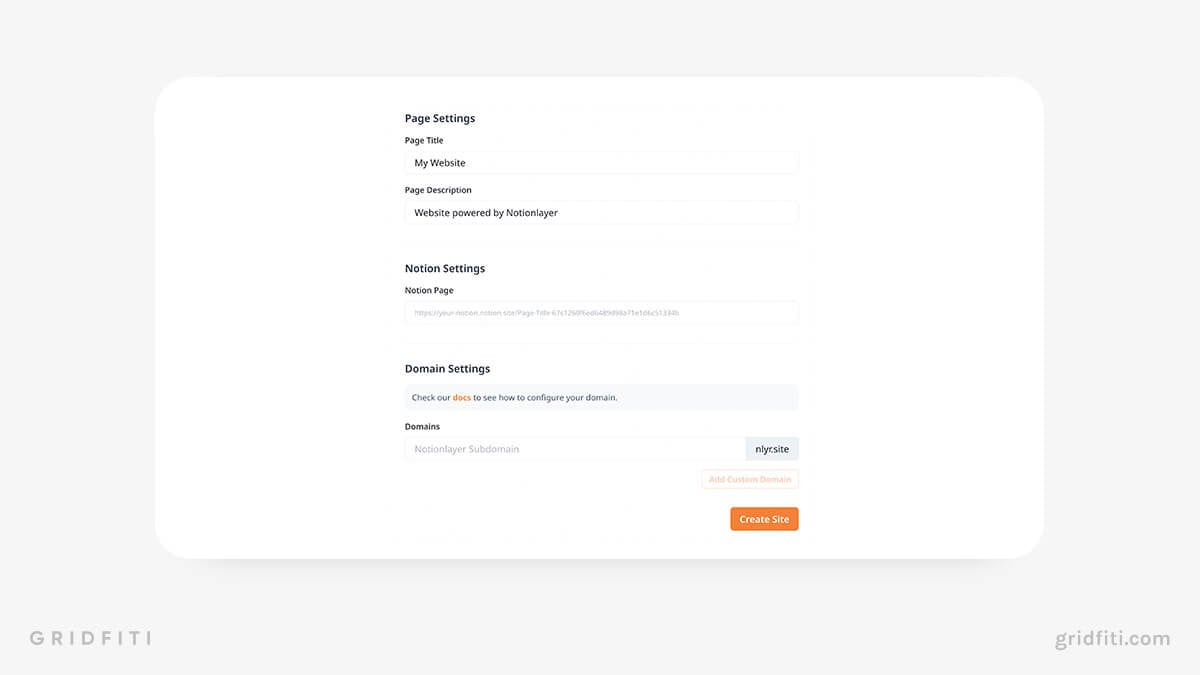
- On the next page, configure your site settings, including the Page Title and Page Description. Paste the public web link to your Notion page, then choose a Subdomain. (You can choose a custom domain once you’ve upgraded to a paid plan.) When you’re finished, click Create Site.
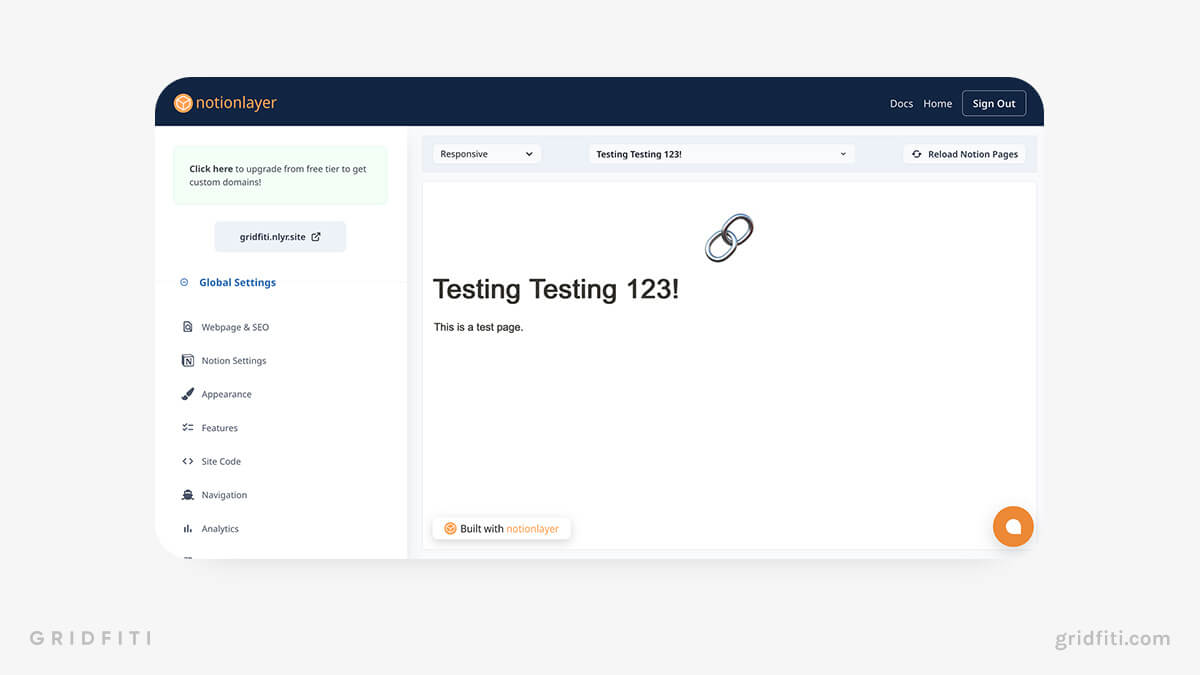
- Start building! Explore the options in the left-hand sidebar to update your website’s fonts, colors, and more. At the top of the sidebar, click the link to get your custom domain.
Whew! That wraps up our super in-depth guide to building a website with Notion using a custom domain and third-party website builders. Which one is your favorite? Got a question about this tutorial? Let us know in the comments!
Gridfiti is supported by its audience – when you buy something using the retail links in our posts, we may earn a small commission at no additional cost to you. Read more about our affiliate disclaimer.