Using Notion to study? A flashcard database is a must for reviewing and retaining material. We’ll walk you through how to set up a basic flashcard database in Notion, hacks for taking it to the next level, and some free flashcard templates. Let’s dig in!
Looking for more productivity tips and tools? Subscribe to The Flow — our quick, snappy, value-packed focus and recharge newsletter. Also, don’t miss our several other Notion template round-ups and guides!
 Get the all-in-one Life OS template, the only Notion template you’ll ever need — with over 25 integrated templates built in.
How to Create Flashcards in Notion
The best way to create flashcards in Notion is to use a Gallery or Board view, but a Table or List could work too. For our walkthrough, we’ll use a Gallery view, but feel free to experiment with different layouts to see what works for you!
Step 1: Create a new Gallery database view in Notion
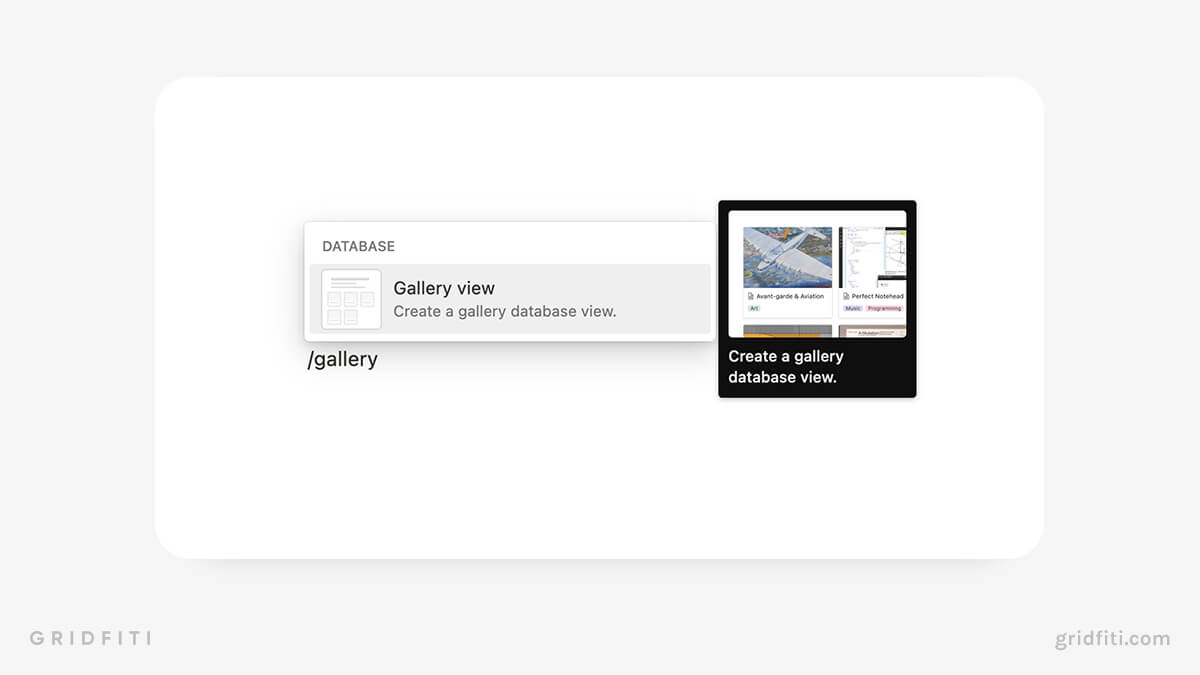
Click anywhere in an empty page in Notion and press the slash key (/) to open up the block menu. Type “gallery”, then select “Gallery view”.
It’s a good idea to create a separate database specifically for your flashcards. If you’re using a digital library or study tracker template, you can relate your Flashcards database to those for accurate tracking.
Step 2: Set up your database properties
We recommend adding the following properties to your database (feel free to tweak the property names as you see fit!):
- Front of card (Title property) — The question or topic you want to study.
- Back of card (Text property) — The plain-text version of the answer.
- Reveal (Checkbox property) — Used to reveal the answer via the formula below.
- Answer (Formula property) — Use this formula — if(prop(“Reveal”), replace(replace(prop(“Back of card”), “.[(]”, “”), “[)].“, “”) + “\n “, “”) — to automatically reveal the answer (pulled from the “Back” property) when you click the “Show me the answer” checkbox (Source: Red Gregory)
- Status (Status property) — Shows you which cards you haven’t studied yet, which ones you’re working on or need to study, and which concepts you’ve memorized or mastered.
- Last reviewed (Date property OR Last edited property) — Shows you when you last reviewed the card. A Date property will let you manually add a date. The Last edited property will update automatically when you click the “Show me the answer” checkbox. (Note that the Last edited property will update any time you make a change to the card.)
Optional properties
The properties listed above are just the basics. You might also want to add a Select property if you have multiple decks of flashcards for different subjects. You can also set up relations to other databases — particularly useful if you have a digital library or study session tracker in Notion that you’d like to link your cards to.
If you want to take your flashcards to the next level, you can also add formulas for spaced repetition or a Select property to indicate your level of recall. (We’ll cover spaced repetition and active recall in more depth later in this post.)
Step 3: Toggle on your “Reveal” and “Answer” properties in your main Gallery view
Make sure your “Reveal” and “Answer” properties are visible in any view you’re using to study your cards. We recommend placing your “Reveal” Checkbox property above the “Answer” Formula property. Here’s a quick clip showing you how to do it, followed by written instructions:
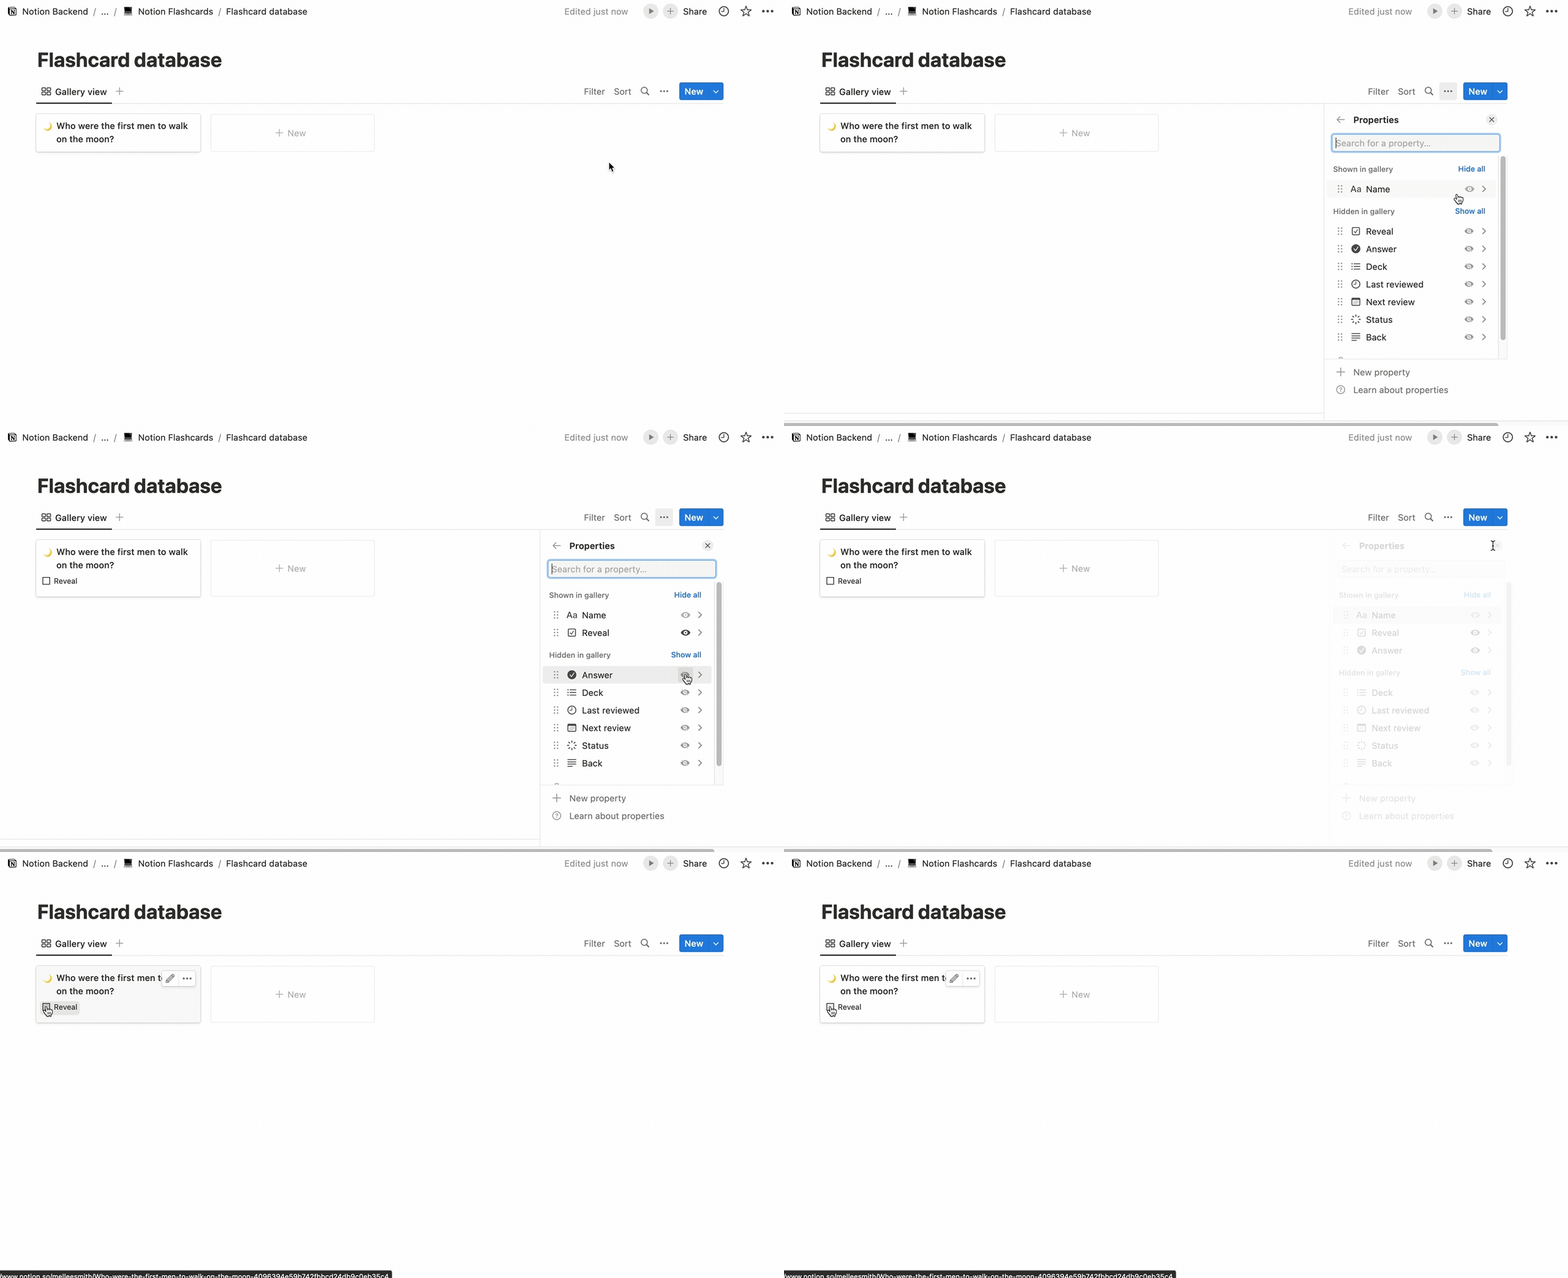
- In the top right-hand corner of your database, click the menu icon (⋯).
- Click Properties.
- Click the eye icon next to the “Reveal” and “Answer” properties. (Make sure the “Back” property is hidden.)
- Click and drag the block handles (⋮⋮) to the left side of each property to reorder them.
- Click the “Reveal” checkbox in the card to reveal the answer!
Step 4: Hide the correct properties in your database pages to ensure maximum focus
Remember how we showed you that nifty formula in step 2 that keeps the answer hidden until you click the “Reveal” checkbox?
You’ll want to ensure that you don’t accidentally see the answer if you ever open the card in center peek, side peek, or as a full page.
To do that, you’ll want to set the “Back” text property to Always hide. Similarly, set the “Answer” Formula property to Hide when empty.
Here’s a quick clip showing you how, plus what each flashcard will look like with these settings applied:
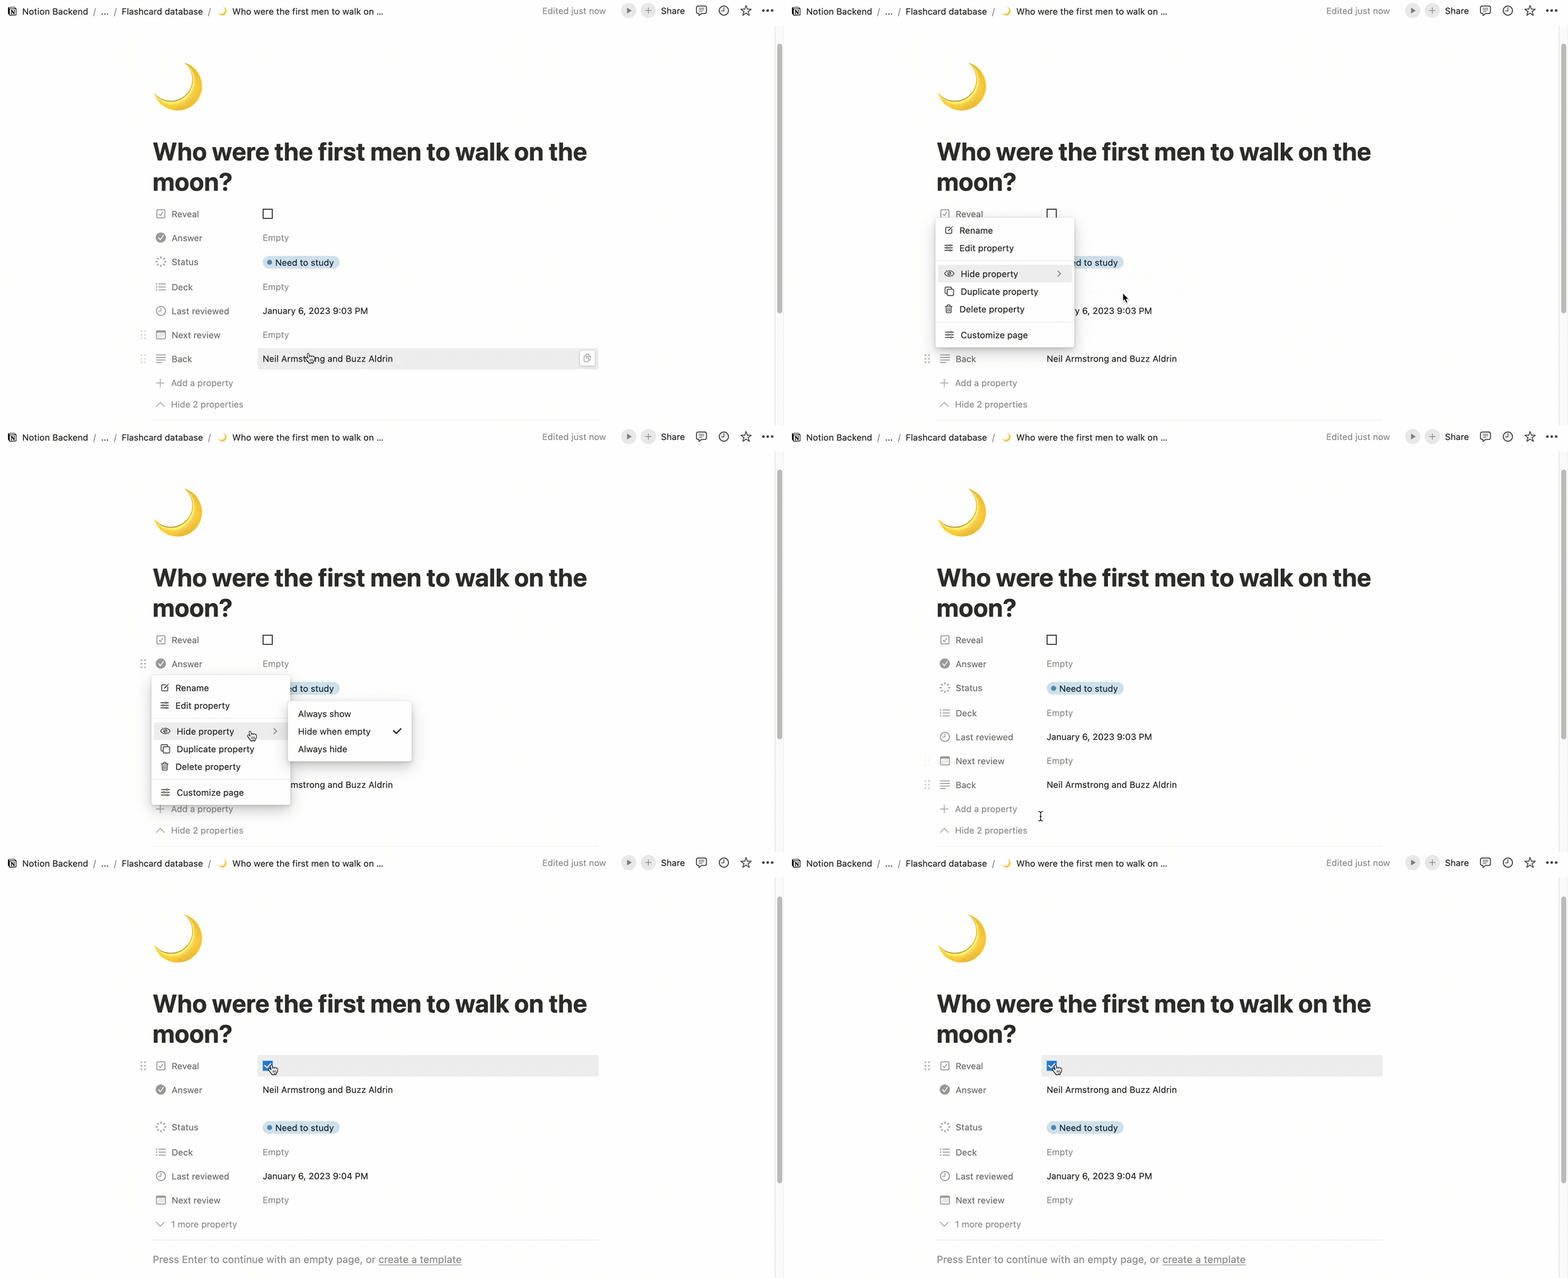
As you can see, you won’t be able to see the answer with the card open as a full page unless you tick the “Reveal” checkbox (or you click “Show all properties” at the end of the properties list).
Step 5: Create a new database template and start adding your flashcards
Now that you’ve built your flashcard database, it’s time to start adding cards! If you’d like to add a custom icon or page properties, create a database template first, then create your cards using that template for a uniform look. (We’ll cover how to make your cards visually pleasing later in this guide.)
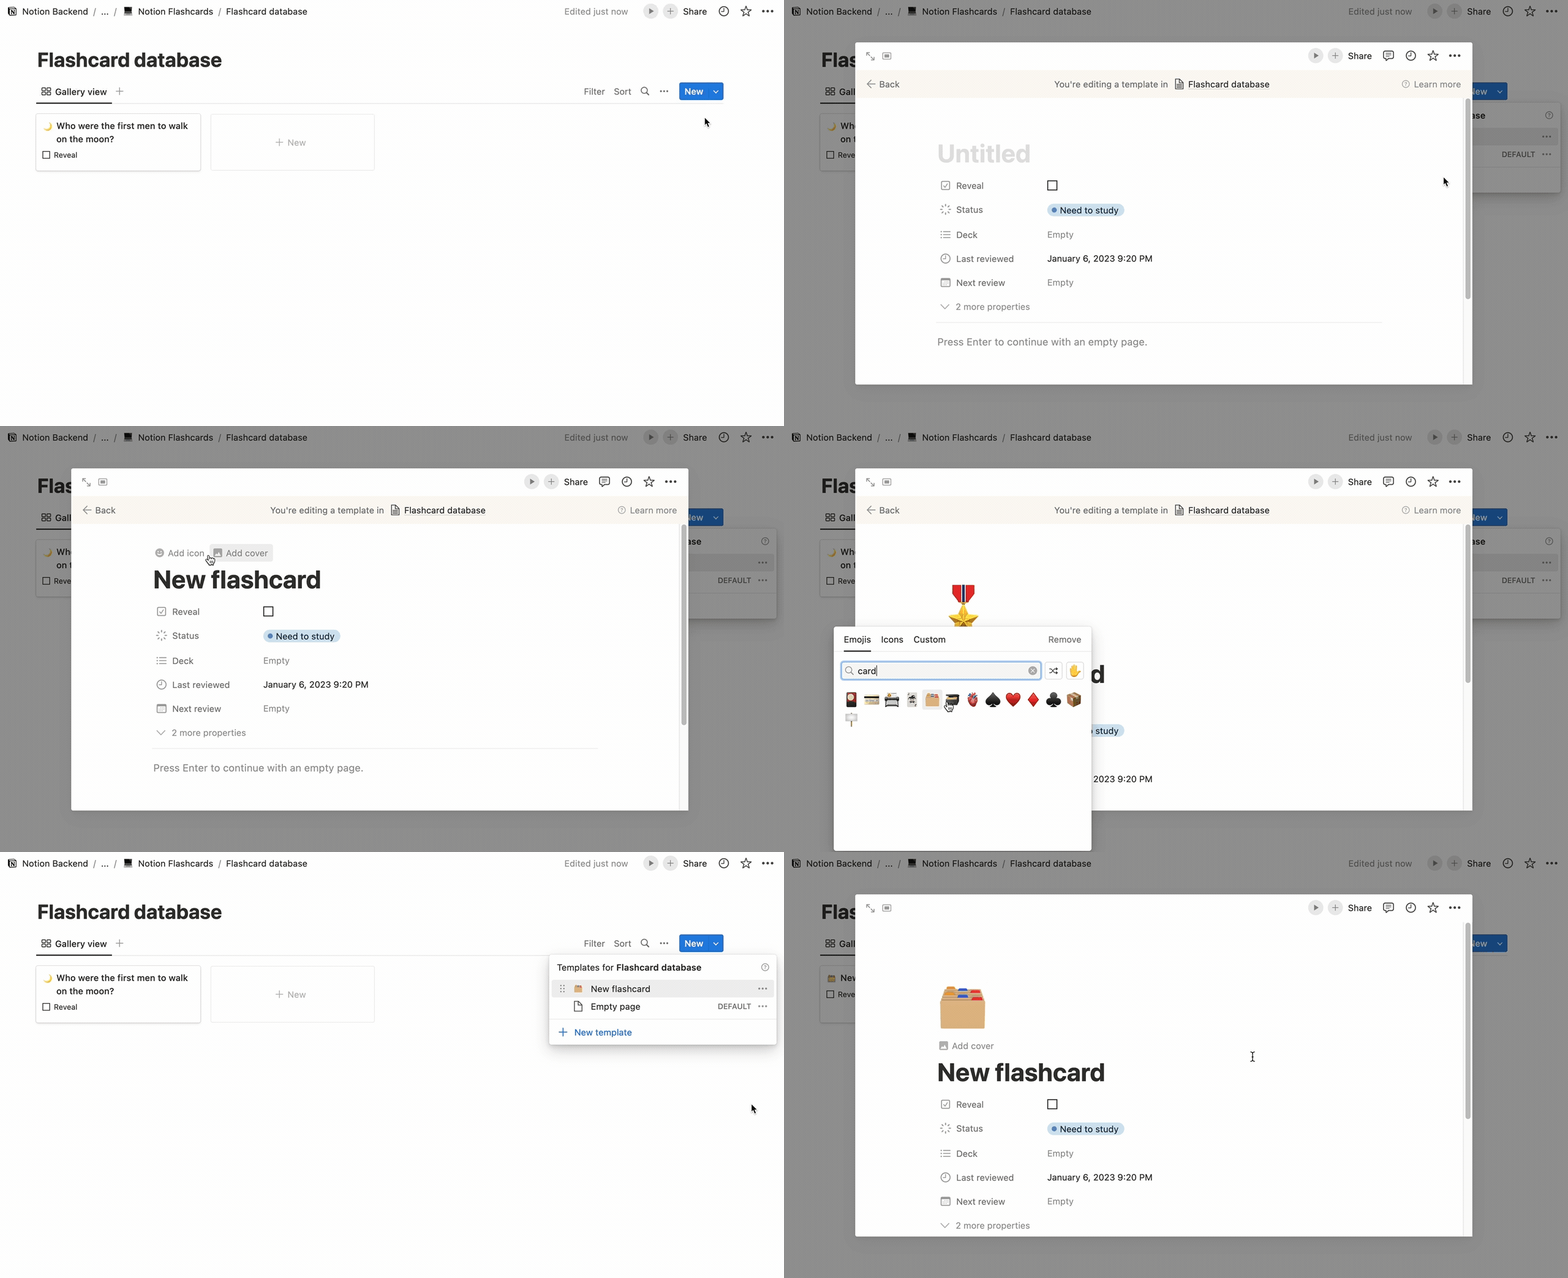
To create a new database template:
- Click the drop-down arrow next to the blue “New” button in your database.
- Click New template.
- In the editing screen, set your preferred emoji, and update any properties you’d like to automatically populate whenever you create a new card.
Sure, you could create cards individually and manually. But if you’re importing a lot of information from another source, like Google Docs, into Notion, we’ll show you a handy trick for adding new cards in bulk!
Step 5: Create filtered views to see the cards you want (optional)
Now that you’ve got your basic database set up and some cards filled in, it’s time to create different filters.
While this is technically an optional step, you’ll likely end up creating filter views as you add more cards and study them regularly.
How you set up your views is totally up to you. For example, you might want to see all the cards you need to study in one view. Here’s how to do that (assuming you set up your database with the properties in Step 2):
- Click the plus sign in the row of tabs at the top of your gallery to add a new view.
- Select the type of view you’d like. (We recommend Gallery or Board.)
- Name your view, set an icon, and adjust your settings (optional).
- In the top right corner of the toolbar, click “Filter”.
- Search the pop-up for your “Status” property, then click “Need to study”.
Voila! Now you can see all the cards you need to study in one spot.
You’ll also want to ensure your “Reveal” and “Answer” properties are always toggled on in any views you create for quick and efficient studying. You can also toggle on other properties, like your Status property.
Hacks for Leveling Up Your Notion Flashcards
Now that you’ve got your basic database and cards, it’s time to take them to the next level. Here are a few of our favorite Notion flashcard hacks!
Spaced Repetition
The spaced repetition technique helps ensure the newest and most difficult material gets reviewed more often than concepts you’ve already mastered. For example, if you add a new card to your database, spaced repetition methods will ensure you review that new material again the next day.
There are several methods for incorporating spaced repetition in your Notion flashcards database. Most approaches use a combination of Formula and Date properties to calculate when the next review is due.
Many templates featuring spaced repetition also rely on the principles of active recall, which indicates how confidently and quickly you recalled the correct answer. A few examples of active recall include:
- Incorrect recall: You got the answer wrong
- Correct recall: You got the answer right
- Hesitant recall: You hesitated to answer the question because you weren’t sure
Add Cards in Bulk
If you’ve got a long list of questions to review, there’s a super easy way to add them to Notion all at once rather than creating cards one by one.
First, you’ll need to create a “New flashcard” template in your flashcard database. (See step 5 in the walkthrough above.)
Here’s how to create multiple flashcards in seconds:
- Create a new database template in your flashcard database. Be sure to give it a name — something like “New flashcard” will work.
- Paste the questions you’d like to review into Notion. (Each question should be a separate Text block.)
- Highlight your Text blocks.
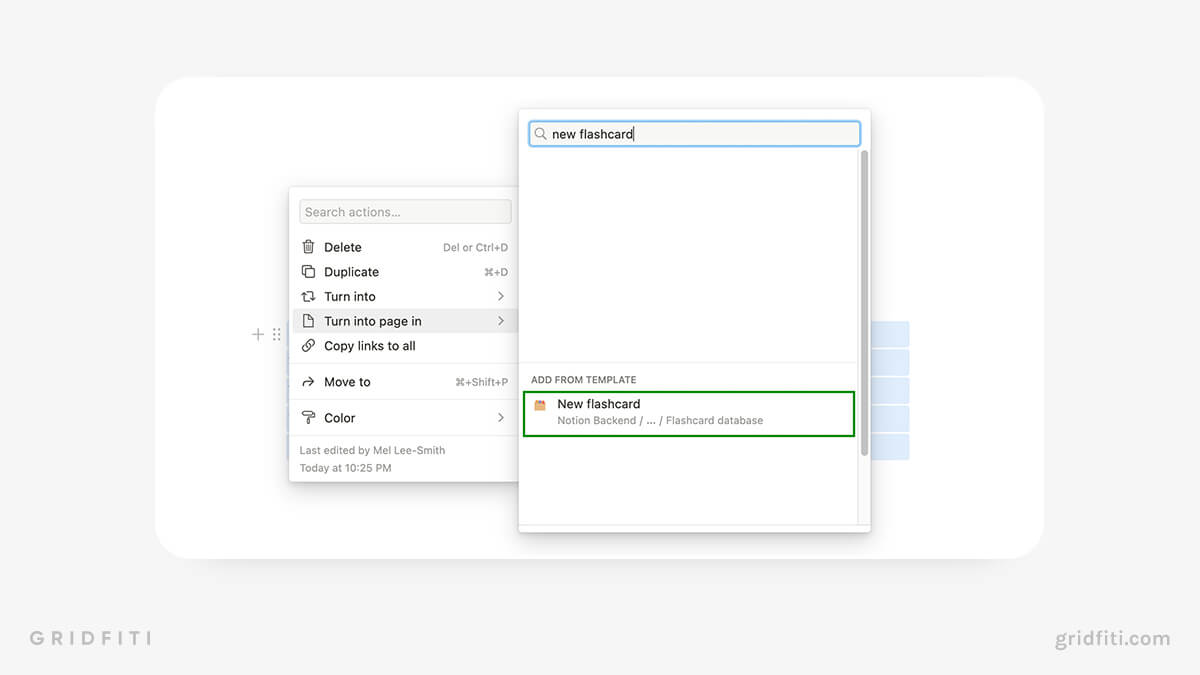
- Click the block handles (⋮⋮) to the left of the text blocks, then hover over Turn into page in.
- In the search box that appears, type in the name of your database template.
- Scroll down until you see “Add From Template”.
- Click the name of your database template.
Voila! All your flashcards are now in your database. You’ll need to add the answers, though — but that’s a simple step too. Simply create a new table view, toggle the “Back of card” property on, and paste the answers into the cells.
How to Make Your Notion Flashcards Aesthetic
Notion’s clean interface is perfect for minimalists — but what if you’re the type who likes lots of color and visuals? We’ll show you how to customize your cards and make them a little more aesthetically pleasing!
Page Covers
To make your Gallery views really pop, add page covers to each card. Adding your covers is a matter of personal preference. Here are a few ideas:
- Create different database templates with different cover photos for each card deck. For example, your “New astronomy flashcard” template might feature the same photo of an astronaut.
- Add page covers to individual cards manually. This is best for those who want a unique cover image for each card. However, it is a little time-consuming!
To see your cover photos in your Gallery view, ensure the Preview option (under Layout in your view settings) is set to Page cover. Here’s how:
- In the top right-hand corner of your database, click the menu icon (⋯).
- Click Layout.
- Click Preview.
- Select Page cover.
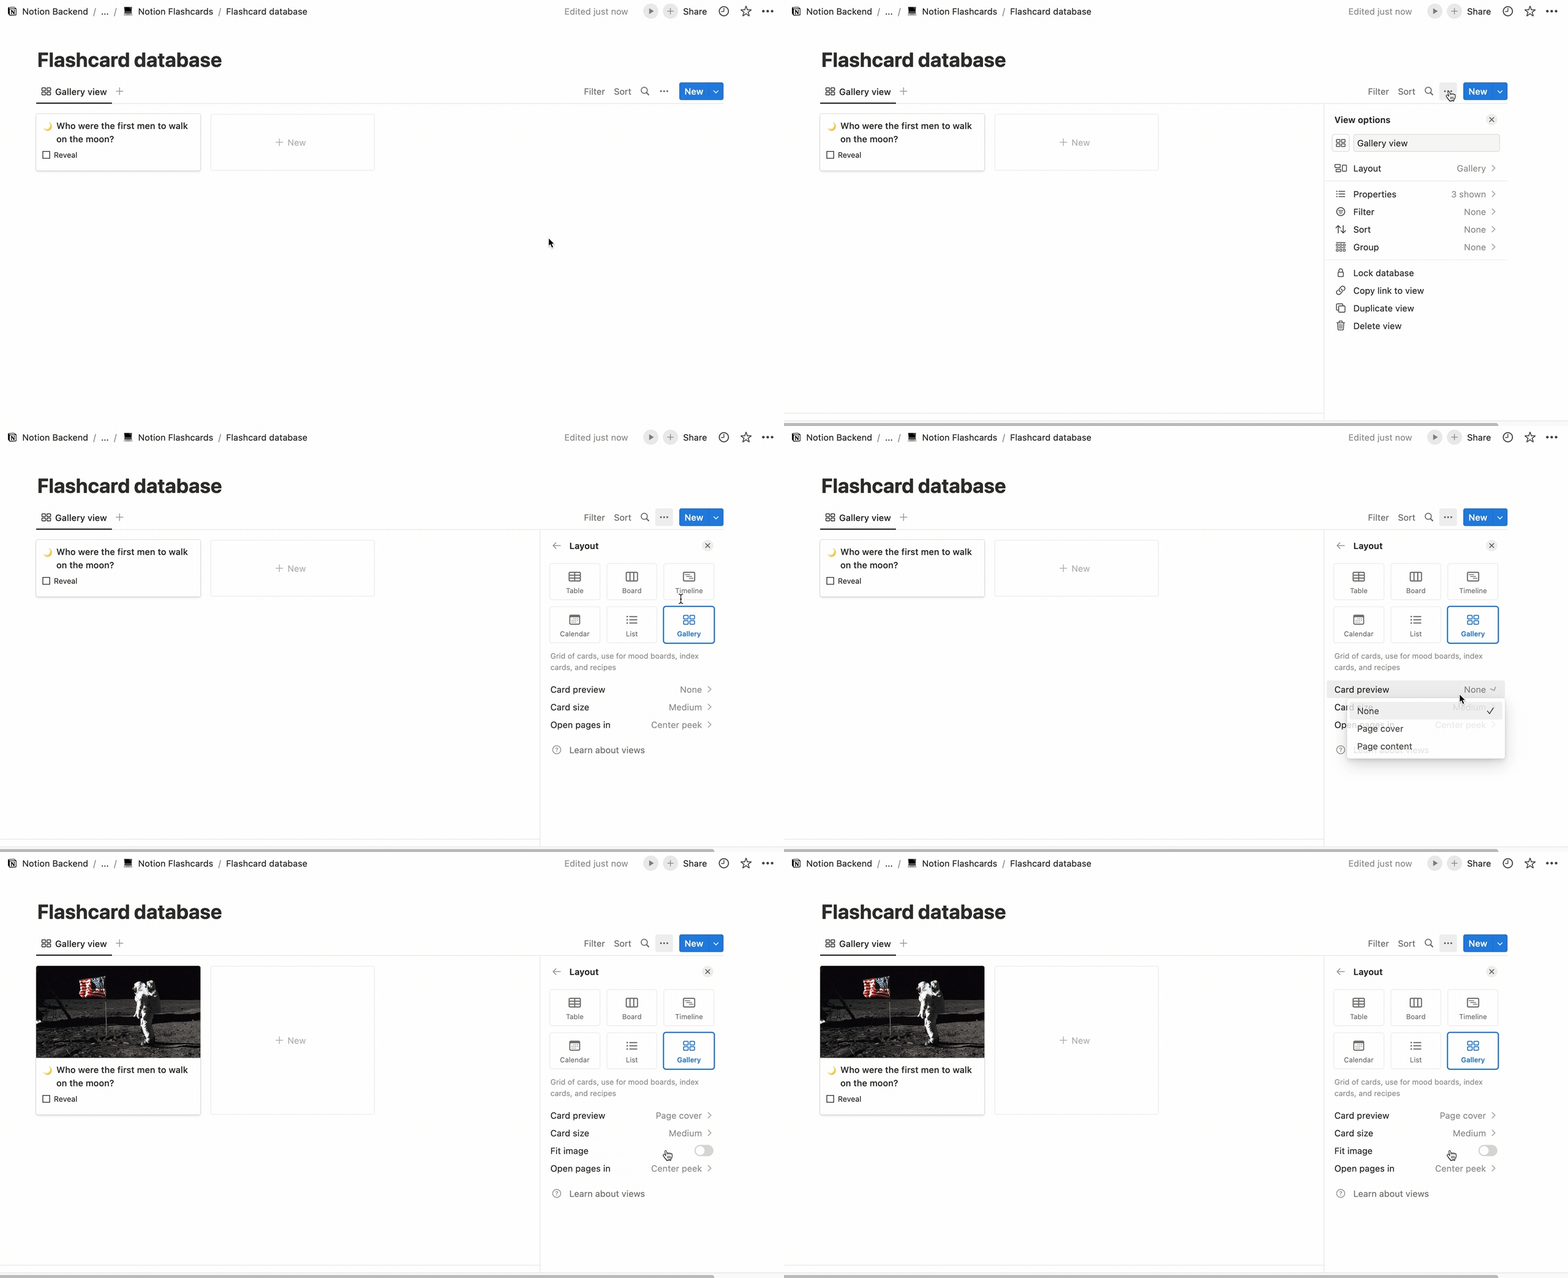
From here, you can also change the card size and set whether you’d like to fit the image to the card.
Fancy Font Generators
Clicking that “Reveal” checkbox to show the answer is a nifty trick — but is there a way to make your answers bigger and bolder? Yes! All you need is a free fancy font generator.
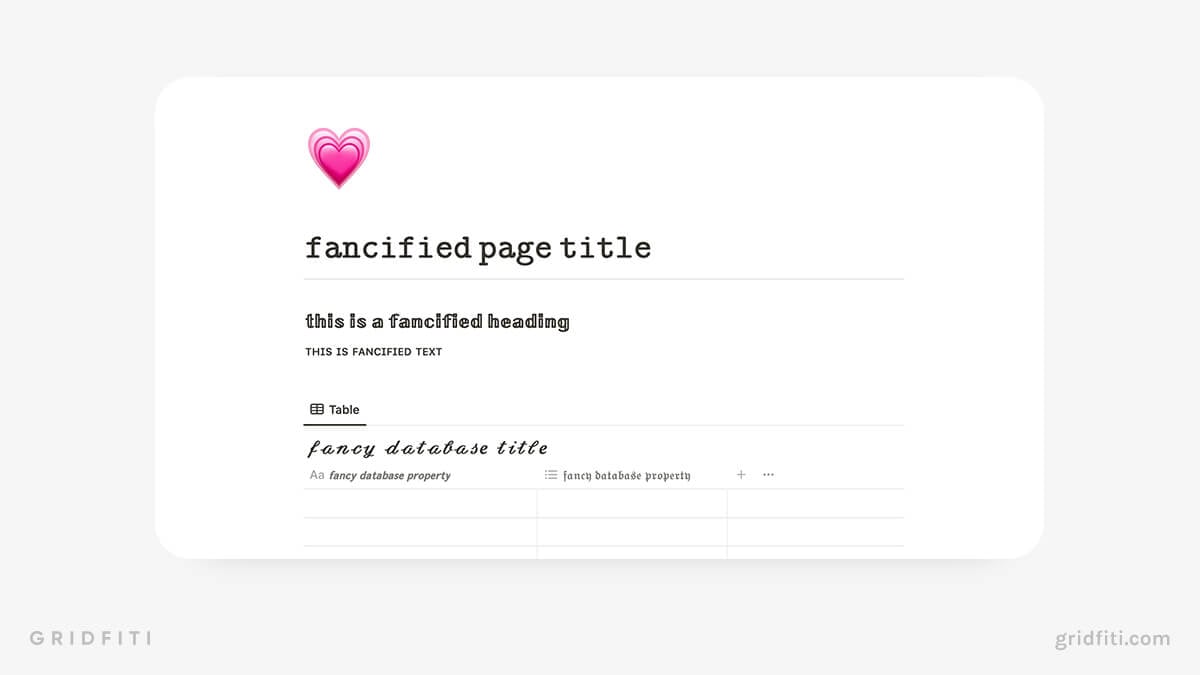
Compare these 2 cards to see an example of what fancy text looks like in Notion. The left card shows Notion’s default text, while the card on the right is a bold italic font copied from a fancy text generator (CoolSymbol, to be specific).
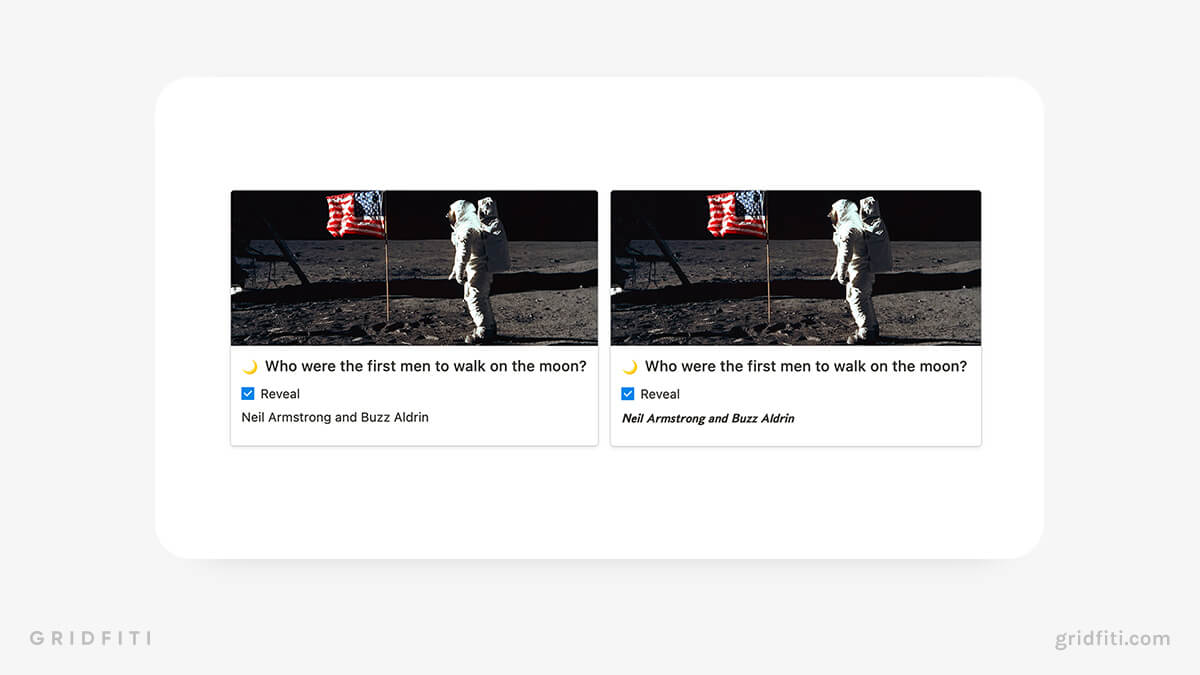
You can use fancy text to update virtually any text in Notion, including text blocks and page and database titles. Here’s a snapshot showing you the range of options available:
Emojis and Icons
Use emojis in your flashcards, database views, and Status properties to add a pop of color. You can also customize the icons of your database views and properties for a more visually pleasing layout.
![]()
Notion Flashcard Templates
Can’t be bothered to create your own Notion flashcard templates and want a done-for-you option instead? We’ve got you covered! Check out some of our favorite flashcard templates.
All-in-One Student OS with Flashcards
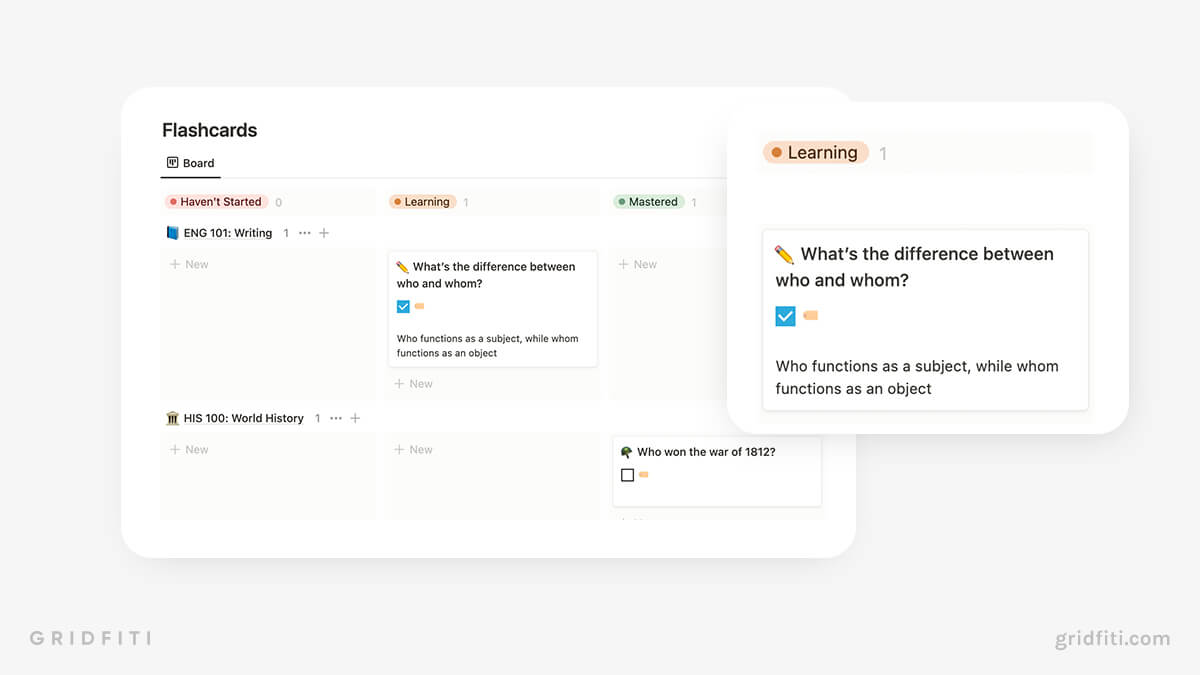
Student OS is the ultimate all-in-one workspace for everything you need for your academic career – with 15+ templates into a centralized dashboard! In the Study Hub section, you’ll find everything you need to prepare for exams — like a flashcards template organized by learning status, upcoming exams widget, built-in customizable Pomodoro timer widget, and more.
Flashcards by Ranikins
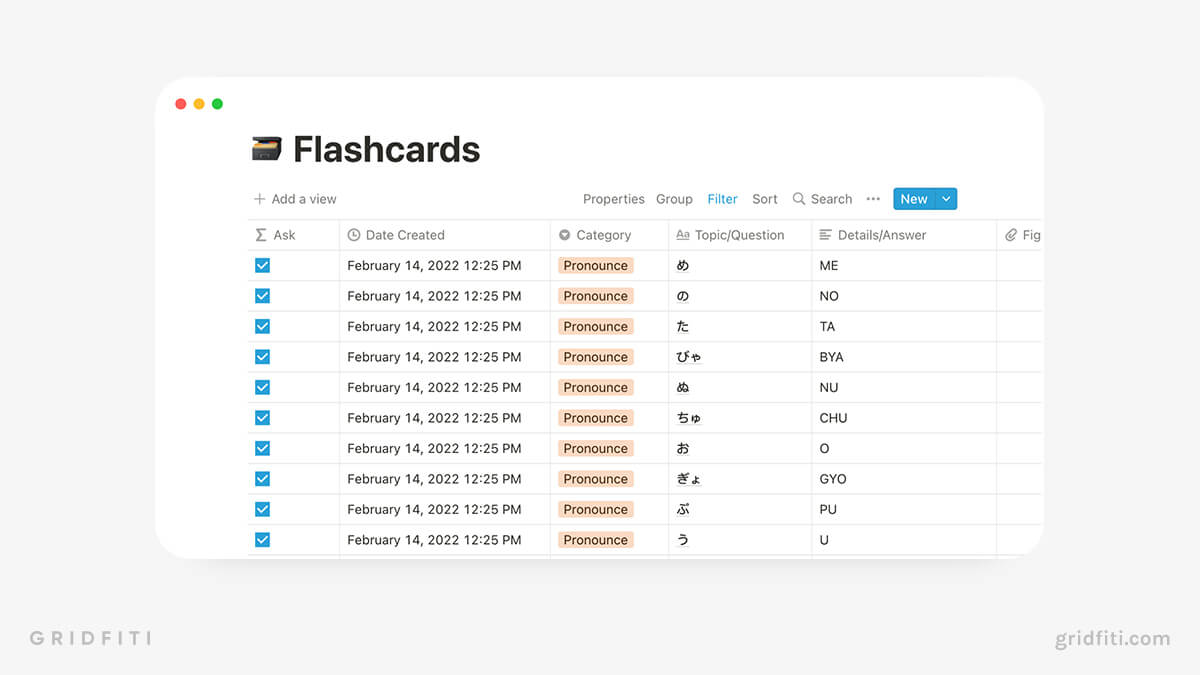
This simple flashcard template takes things to the next level with spaced repetition features, hints to help you discover the answer, and so much more.
Total Recall — Dynamic Spaced Repetition Learning
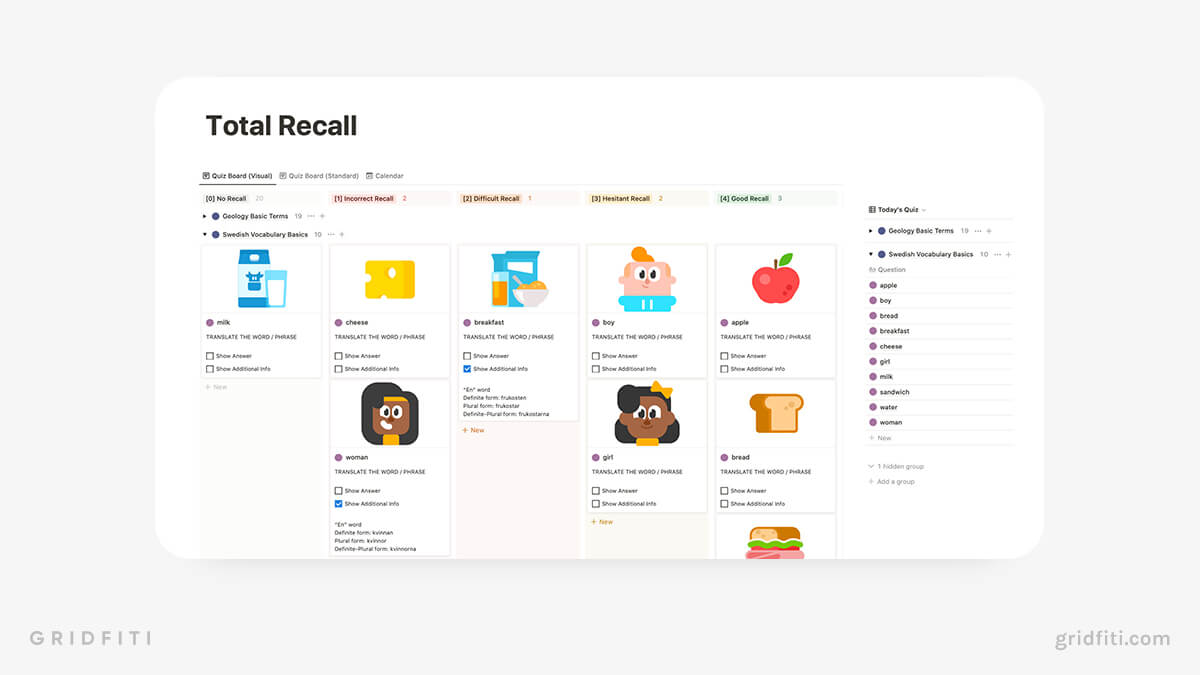
The Total Recall system features a built-in system for studying material based on how well you’re able to recall it. For example, cards with an “Incorrect Recall” tag will automatically queue up for review in 1 day. Nifty!
Flashcard Template with Spaced Repetition
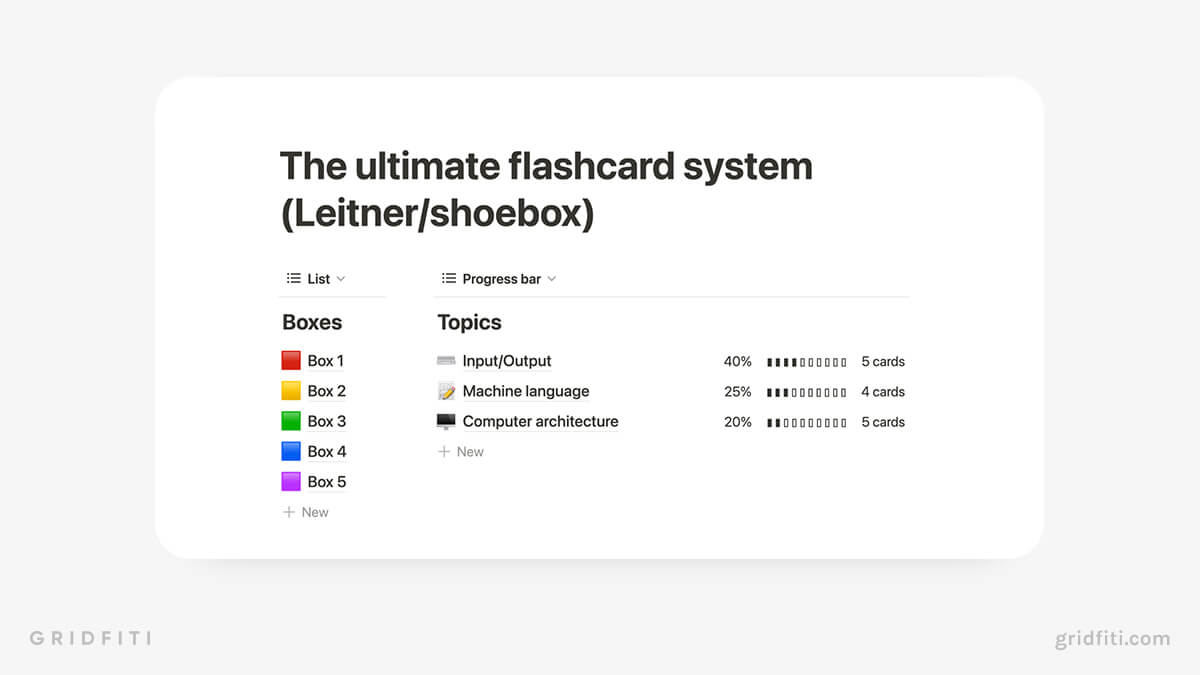
Calling all database lovers! If you want to use Notion as a digital library, this free flashcard template includes relation properties to a “Topic” database where you can link cards to topics. Complete with emojis and custom progress bar, this template is great for visual learners.
Got questions about this tutorial? Want to show off your own setup? Talk to us in the comments!
Gridfiti is supported by its audience – when you buy something using the retail links in our posts, we may earn a small commission at no additional cost to you. Read more about our affiliate disclaimer.