Google Docs is packed with handy features, but let’s face it — the standard look and feel can be a bit boring. Ditch the drab and create an aesthetic Google Doc with these nifty hacks! We’ll cover everything from changing the page color and background to creating word art and custom tables.
Subscribe to The Flow — our free quick, snappy, value-packed focus and recharge newsletter, for a balanced approach to productivity:
Table of Contents
- Page Orientation
- Page Colors
- Page Background
- Fonts
- Images, GIFs, and Videos
- Tables
- Drawings
- Shapes
- Word Art
- Headings
- Aesthetic Google Docs Templates
Page Orientation
Portrait orientation is the standard in Google Docs, but you can also switch to landscape or even go pageless.
To change your page orientation, click File in the top menu of your document, then click Page setup. Toggle the “Landscape” option to switch from portrait to landscape. From here, you can also update your page margins, paper size, and page background color (more on that in just a sec).
To go pageless, click Pageless at the top of the Page Setup pop-up box. Set your page background color, then click OK.
The pageless option is a great choice for an aesthetic Google Doc. When you switch to a pageless view, the gray areas you typically see on the left and right side of your document will disappear. You also won’t see any breaks between pages.
In your pageless document, you can also create more space for text, images, and other elements on the page by changing the text width. To do that, click View in the top menu of your document, then hover over Text width. Choose between Narrow, Medium, Wide, and Full.
Page Colors
Did you know you can change the page color in Google Docs? No need to stick with the boring default white page!
How to change the page color in Google Docs in 3 easy steps:
- In the top menu, click File.
- Click Page Setup.
- Under Page color, click the dropdown box to select the page color.
If you’re not using a browser extension like Dark Reader, changing the page color is a great way to use Google Docs in dark mode.
Page Background
Want to create a gradient background, or use multiple background colors in Google Docs? You can, using two different methods. Let’s take a closer look at each one.
Method #1: Paste Your Image
For this method, you’ll need to create your image in another app (like Canva), then upload it to Google Docs.
Here’s how to use an image as the page background in Google Docs:
- Create your page background image in another app, like Canva or Procreate.
- Upload your image to Google Docs by copying and pasting it into the page. (Alternatively, click Insert from the top menu, then hover over Image and choose an option.)
- Resize your image so it fills the page completely.
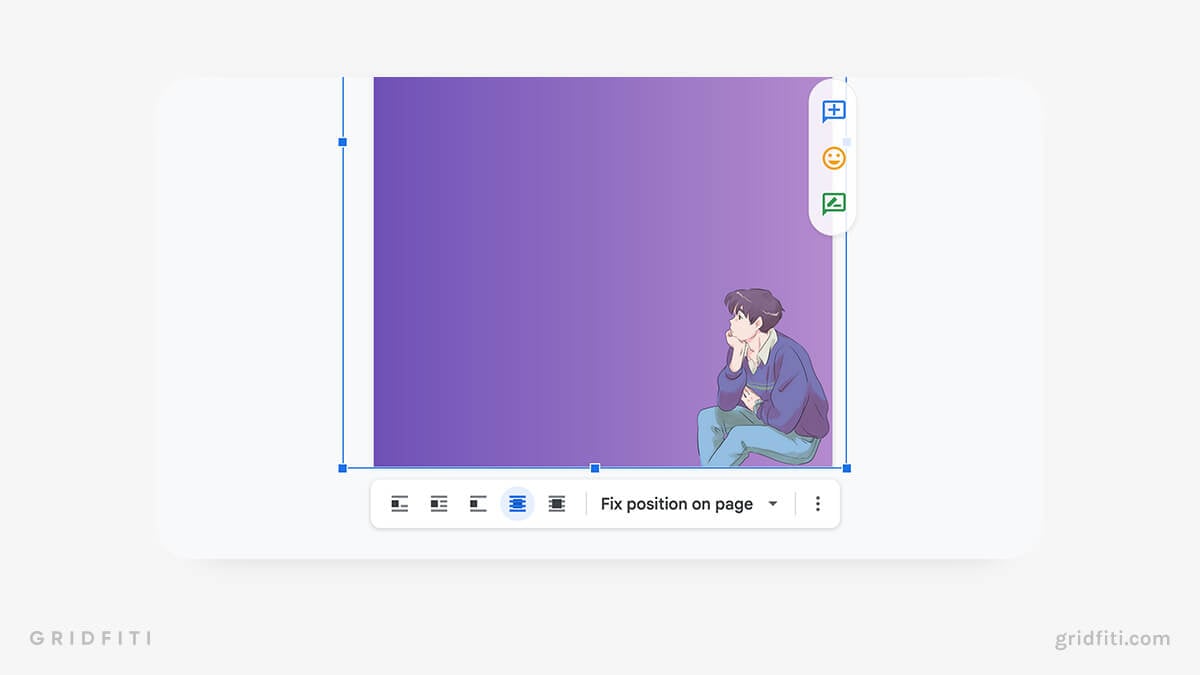
- Click the image, and set the text align to Behind text.
- To the right of the text align options, click the drop-down box, and set the page position to Fix position on page.
Method #2: Add a Watermark
If you use the first method, you’ll notice that your background image won’t “lock”, which means that you might accidentally move it around when adding text or reformatting your document.
Adding a background image using Google Docs’ watermark option is a good way to ensure your image doesn’t move around when you’re working.
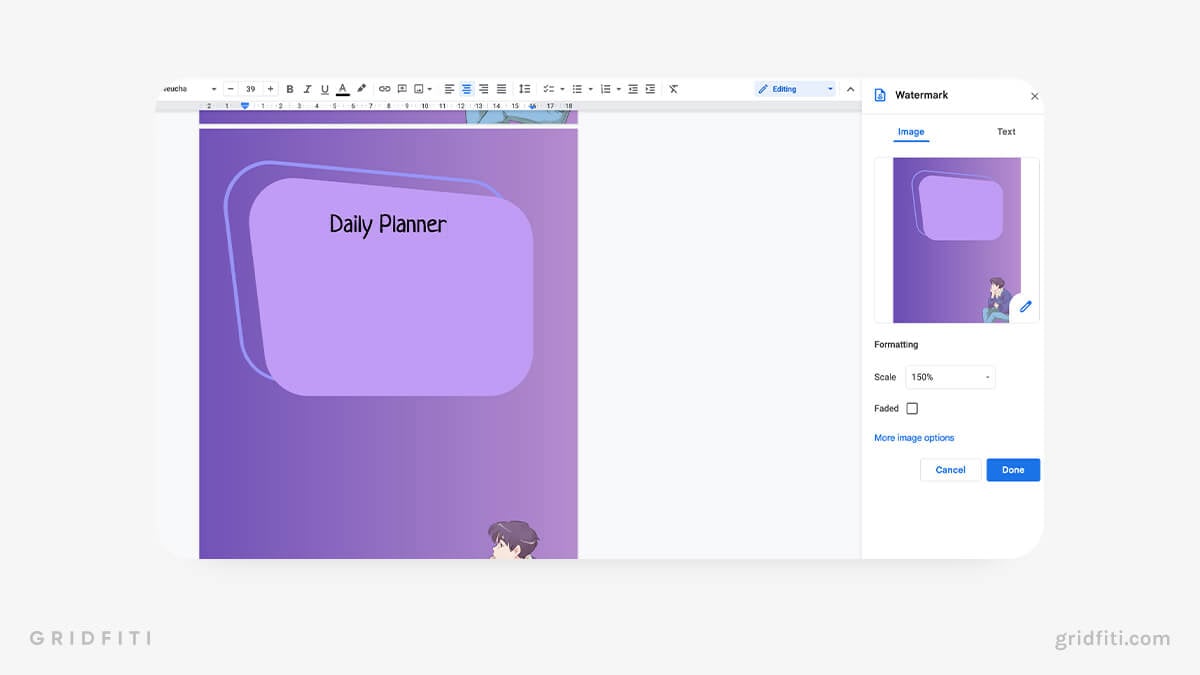
How to add a background image to a Google Doc using a watermark:
- In the top menu of your document, click Insert.
- Click Watermark.
- In the right-hand sidebar that appears, click Select Image.
- Upload the image you want to use as your page background.
Additional watermark customization options:
Once you’ve uploaded your watermark, you can customize your image to your liking in the right-hand sidebar. Here are your options:
- Set the image scale (how big you want your background image to be).
- Choose whether you want your image to be faded or not.
- Click More image options to:
- adjust the size and rotation
- set the image position
- recolor the image
- adjust the transparency, brightness, and contrast
Fonts
Fonts are an obvious way to make your Google Docs aesthetic.
Can you use custom fonts in Google Docs? Unfortunately, no — you can’t upload your own font files to Google Docs. (However, there is a handy workaround to this issue, which we’ll cover in the next section.)
Even though you can’t upload custom fonts, Google Docs offers hundreds of free fonts in a variety of styles, so there’s a good chance you’ll find what you’re looking for.
To see all of Google’s fonts, click the font box in the top formatting ribbon, then click More fonts. From here, you can filter fonts by script and style (display, handwriting, monospace, serif, and sans serif). You can also sort fonts to see them in alphabetical or chronological order, or sort by popularity and trending.
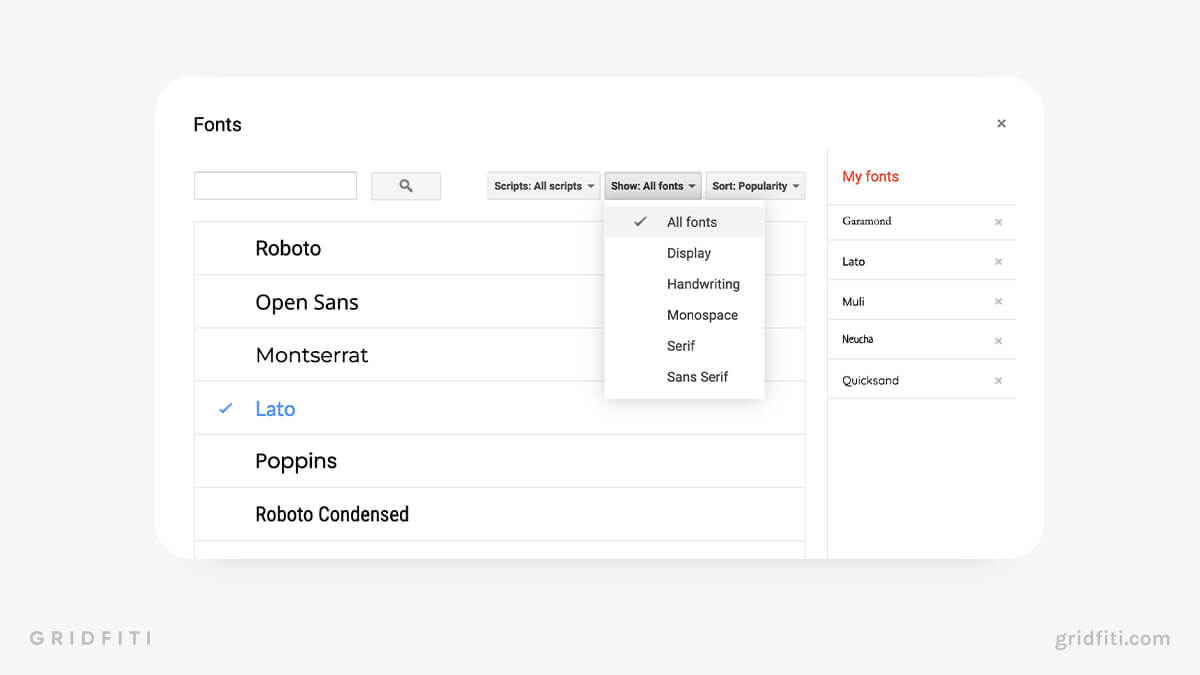
We recommend checking out the handwritten and display fonts to see all the aesthetic options. Monospace fonts are also a great choice for a gamer-inspired or cyberpunk aesthetic.
How to Use Custom Fonts in Google Docs
As we mentioned, there is a workaround for using custom fonts in Google Docs. You can use a third-party design app, like Canva, to type the text you want to appear in your custom font. Then, simply download the image with a transparent background and paste it into Google Docs!
Here’s how to use custom fonts in Google Docs in 4 easy steps:
- Create an image in a third-party app, like Canva or Procreate.
- Select the font you want to use, then type your text and choose your text color.
- Save the image with a transparent background.
- Paste the image into Google Docs.
For the example below, we created an image in Canva using the Sensei font, which is not available in Google Docs. Check it out:
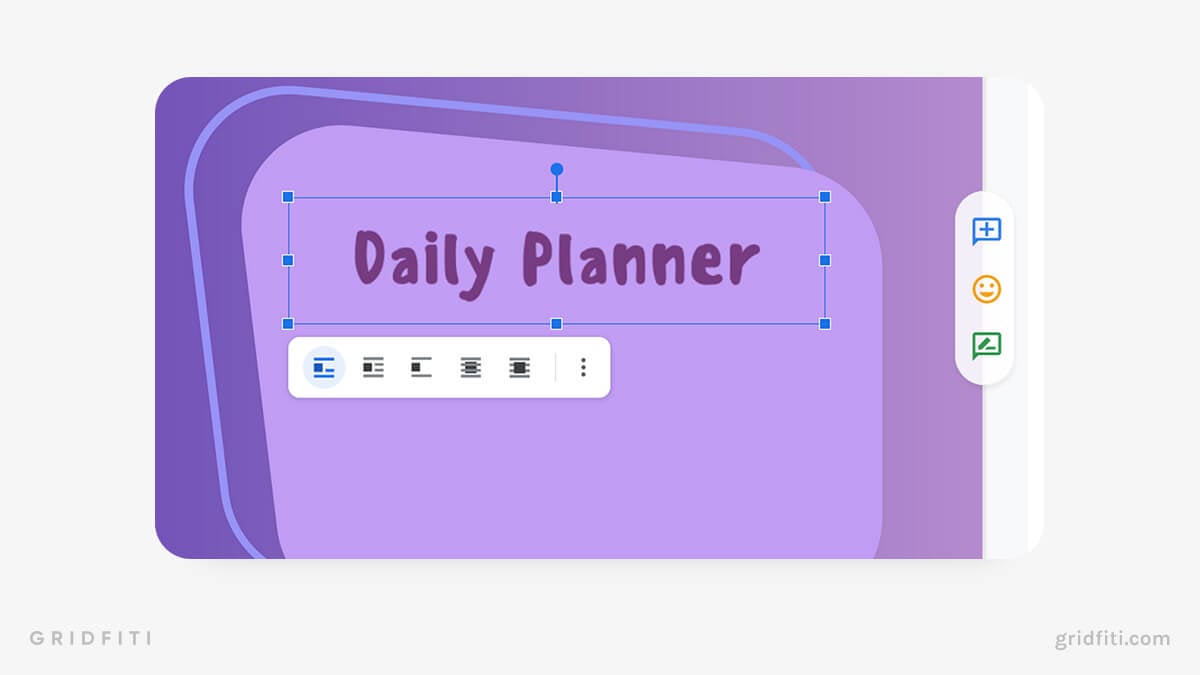
That’s it! Depending on the amount of text or formatting elements you’ve added to your doc, you may need to crop your image or change the text positioning to get it where you want it.
Images, GIFs, and Videos
Unless you’re going for a minimalist aesthetic in your Google Doc, you’ll likely add some images to your document.
We’ve already covered some of the things you can do with images in Google Docs, but here are a few more nifty tricks for adding aesthetic images (and GIFs!) to your documents.
Search for Images Right in Google Docs
Did you know you can insert images from Google Image Search? In the top menu of your doc, click Insert, then hover over Image. Then, click Search the web and enter your query in the right-hand sidebar that appears.
Note that the results may not be as vast as regular Google Image Search, but it’s a handy way to save yourself a few clicks and keystrokes!
Add GIFs to Your Aesthetic Google Doc
Did you know you can add GIFs to Google Docs? While you won’t be able to upload them from your computer, you can add GIFs from a URL. Here’s how to do it:
- In the top menu of your doc, click Insert, then hover over Image.
- Click By URL.
- Paste in the URL of the GIF you want to add.
- Click Add image.
Add YouTube Videos to Google Docs
You can’t upload a video to Google Docs from your computer, but you can insert a YouTube video preview from a URL.
To add a video preview to Google Docs, simply paste in the URL of a YouTube video anywhere in your doc, then type a space after it to turn it into a hyperlink. Click the hyperlinked URL to open a small pop-up, then click Open preview.
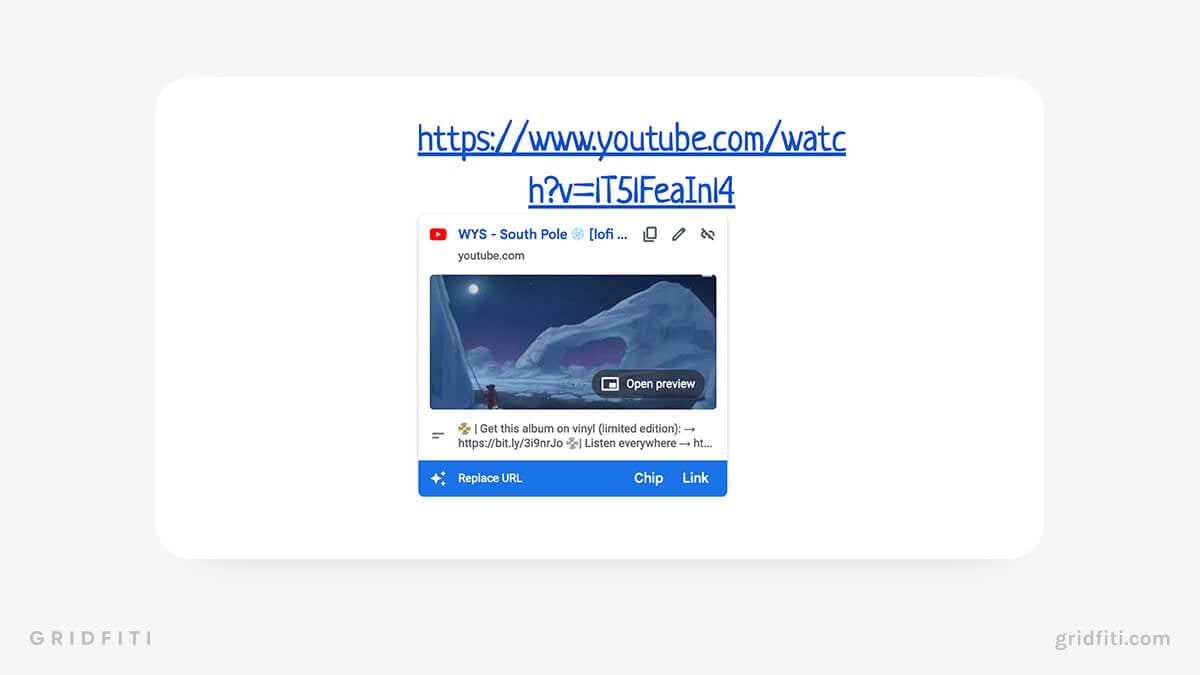
This will not add the video into your document itself — instead, it will show the video in the bottom corner of your document, picture-in-picture style. You can resize the preview by clicking and dragging the dots in the top left corner of the preview window. The full video will play from the preview window.
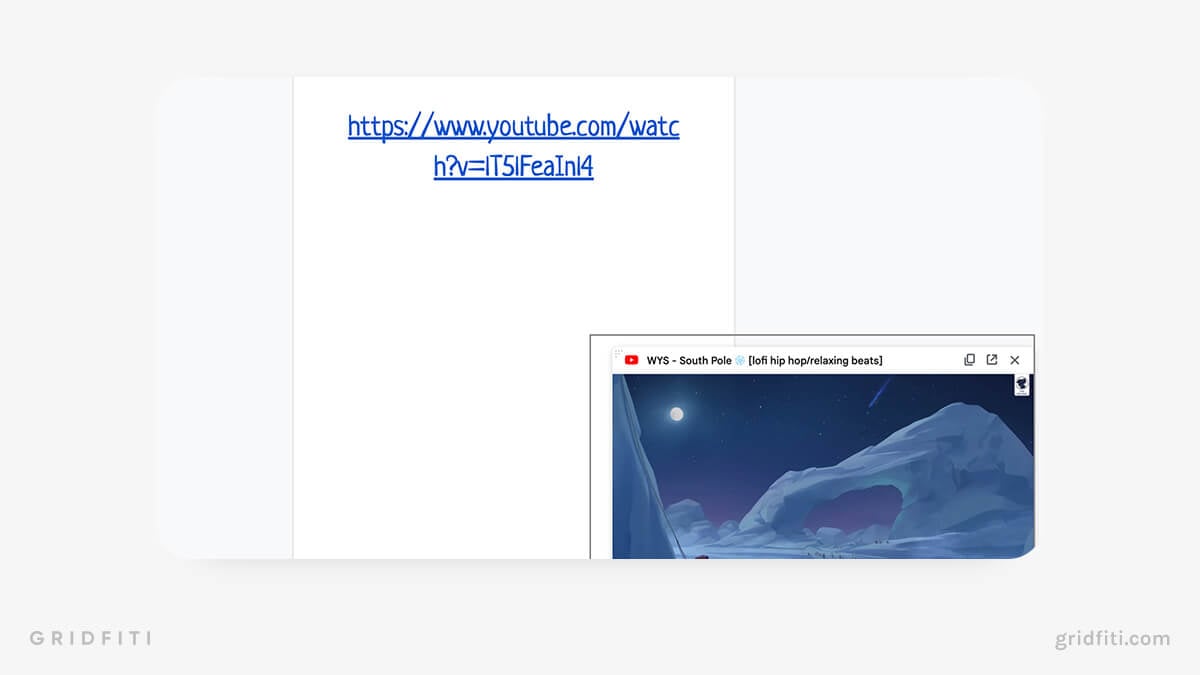
Once you’ve added the video preview, you can safely erase the link you pasted in your doc earlier, and the preview will still be there until you close it. However, you can only preview one video at a time.
Recolor Your Images and GIFs
Recoloring an image in Google Docs will convert all the colors of an inserted image or GIF to the same shade of the color you choose. Recoloring is a great way to ensure a matching aesthetic and is especially handy for those who don’t want to use another app to alter their images.
Here’s how to recolor images in Google Docs:
- Insert the image or GIF you want to recolor.
- Click Image options in the top formatting toolbar.
- Click Recolor in the sidebar that appears on the right.
- Choose the color you want.
This method will only let you choose from a limited number of colors — you can’t add your own colors or HEX codes. If Google doesn’t offer the color you want, try using an app like Canva or Procreate to recolor your image instead.


Tables
Using tables is a great way to make Google Docs aesthetic. Tables are especially handy for Google Docs planner templates, letting you track everything from habits and tasks to nutrition and sleep.
The cells of tables in Google Docs have a transparent background by default. To change the background color of the cells in your table:
- Right-click anywhere in your table.
- Click Table properties.
- Click Color.
- Click the drop-down box to choose the background color.
From the Table properties menu, you can also change the color and width of your table border.
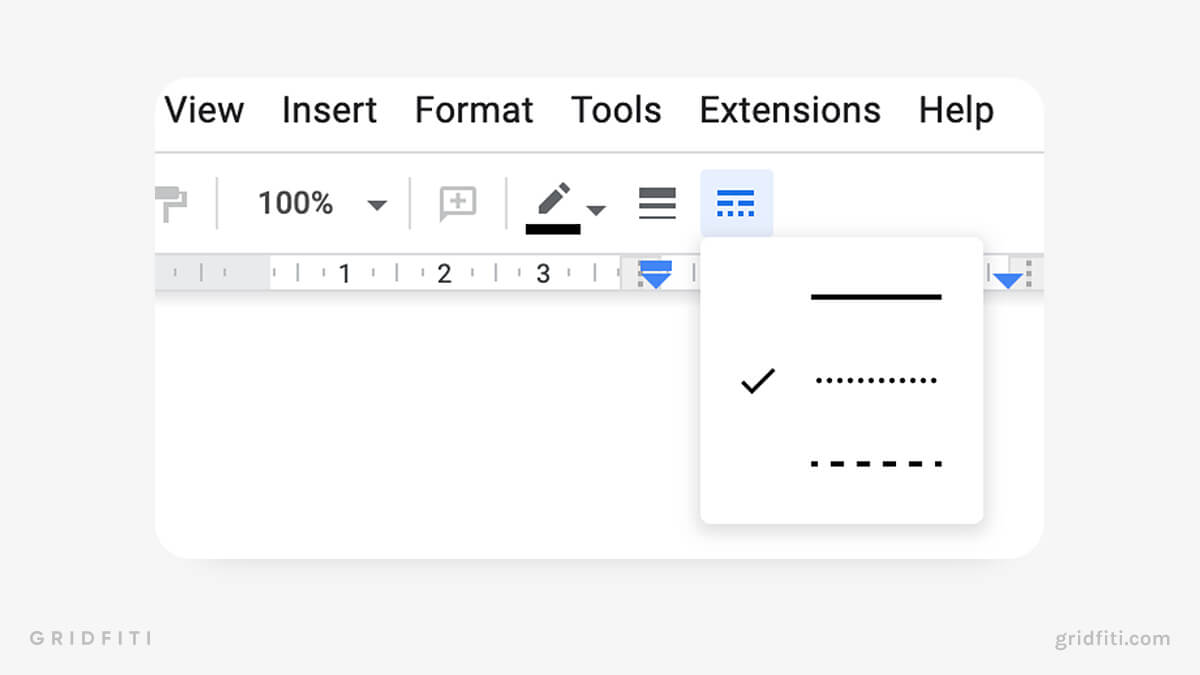
How to Update the Border of Individual Table Cells in Google Docs
In addition to changing the color and width of the border of your entire table, you can also update the color, width, and dash style of individual cell borders. Simply click the border you want to change, then adjust the border width and style from the formatting menu:
Drawings
Did you know you can draw in Google Docs? Here are just a few things you can do with Google Docs’ Drawing feature:
- Write things down in your own handwriting.
- Add lines and shapes.
- Create Word Art with multi-color gradient fill and custom text borders.
- Add text boxes.
How to Draw in Google Docs Using an iPad and Apple Pencil
Unfortunately, there’s currently no way to create a new drawing from the Google Docs mobile app. So if you want to draw using your tablet and stylus, you’ll need to use a workaround.
For this walkthrough, we’re using an iPad, a Macbook Pro, and an Apple Pencil. Apple lets you mirror or extend your display to your tablet, which is how you can draw in Google Docs using your iPad and Apple Pencil.
- On your Mac, open System Settings, then click Displays. Make sure your iPad is nearby.
- In the top right-hand corner, click the drop-down next to the + sign.
- Under Mirror or extend to, click your iPad.
- On your Mac, open your aesthetic Google Doc in a new browser window. (Before moving on to step 5, you may want to zoom out of the Google Doc window to ensure you can see the full drawing canvas.)
- Drag the window over to your iPad.
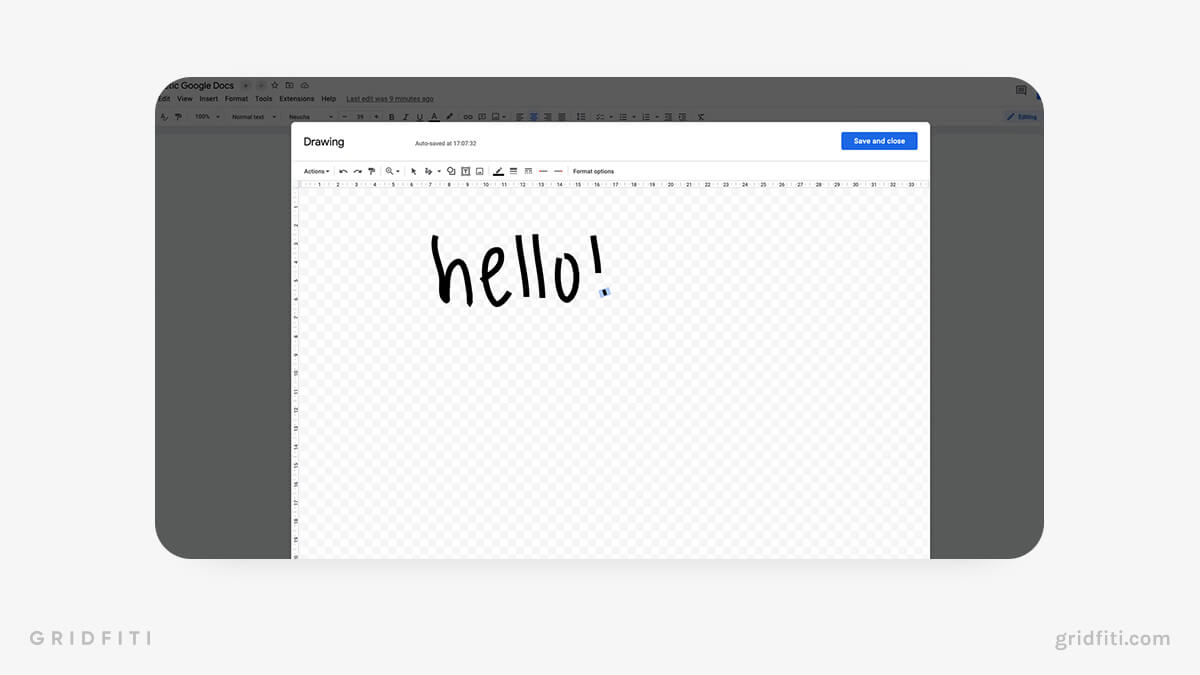
- On the Google Doc open on your iPad, click Insert, then Drawing, then New.
From here, you can use your Apple Pencil to add lines or scribbles, which let you write in your own handwriting. (To add a scribble, tap the line icon next to the mouse icon in the Google Docs Drawing window, then tap Scribble at the bottom of the drop-down.)
You can adjust the color and width of your scribbles to your liking. As you can see from our iPad screenshot of the extended Mac display, the scribbles aren’t as neat as those you’d get in Apple Notes and Freeform, even with the Apple Pencil.
When you’re finished with your drawing, tap Save and close in the top right corner of the drawing window.
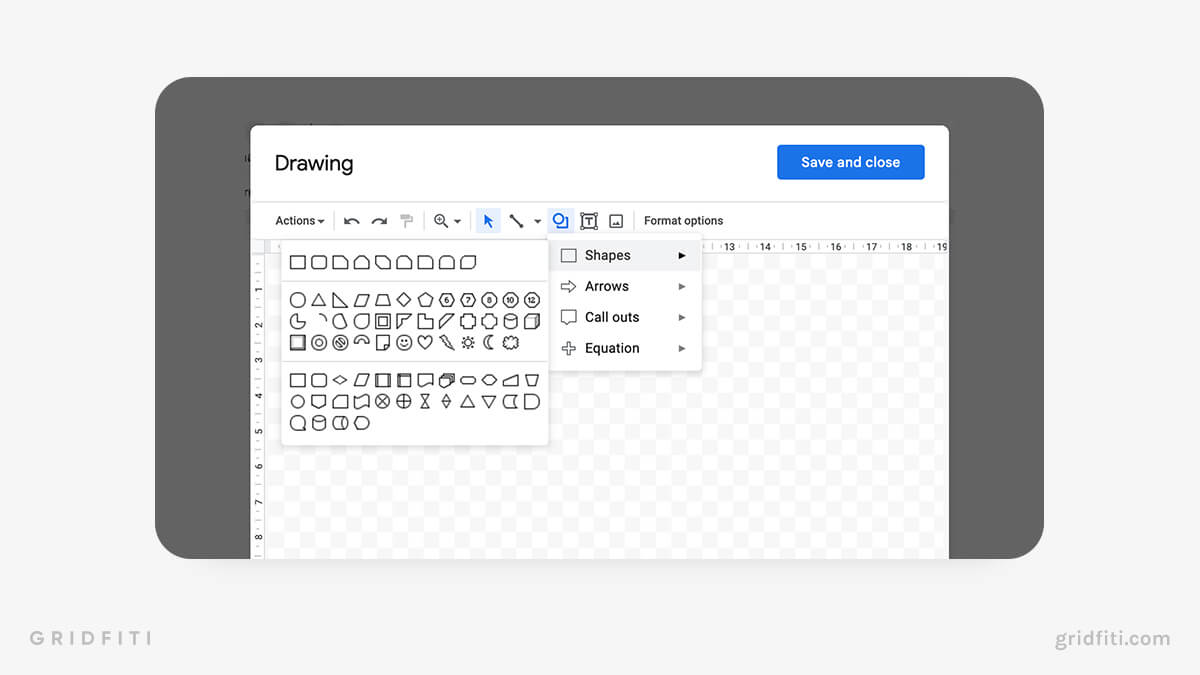
Shapes
We briefly talked about shapes in the previous section, but we wanted to expand on them since there’s so much you can do with them.
Shapes let you add aesthetic backgrounds to your text in Google Docs. To add a shape, you’ll first need to create a new drawing by clicking Insert > Drawing > New.
In the pop-up window, click the circle and square icon in the top menu, then hover over each option to see all shapes in that category.
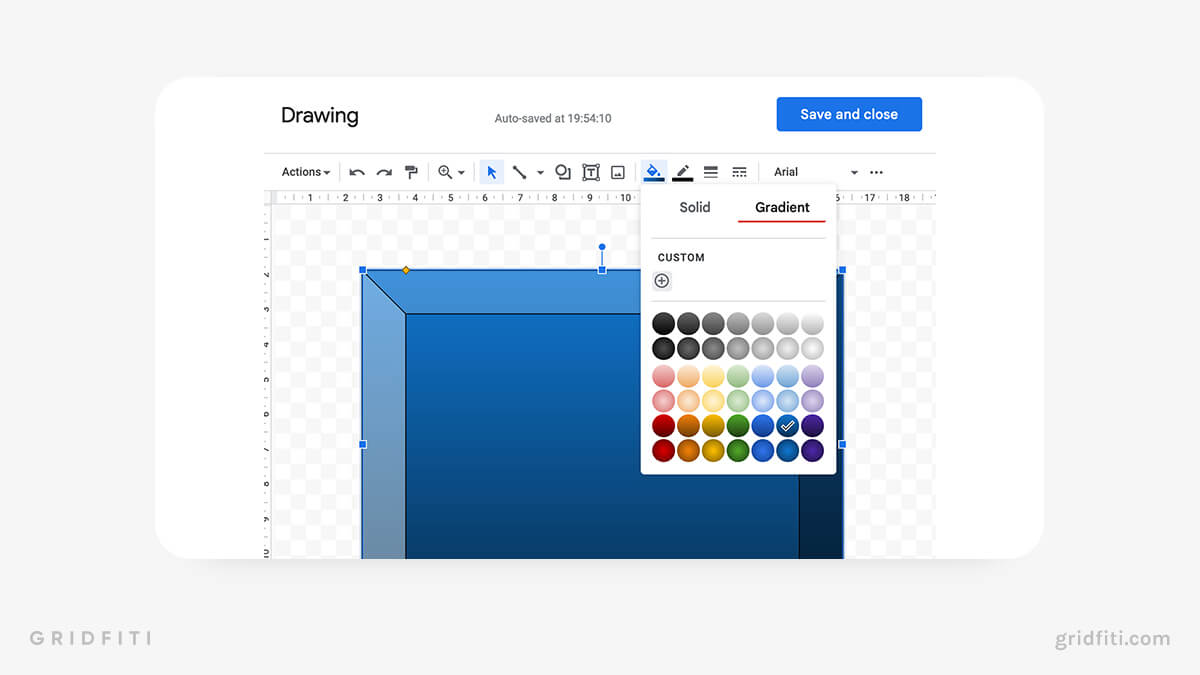
Once you’ve chosen your shape, click and drag your cursor on the canvas to create it. Using the formatting options in the menu at the top, you can change the fill and stroke color of the shape, as well as the border style and width.
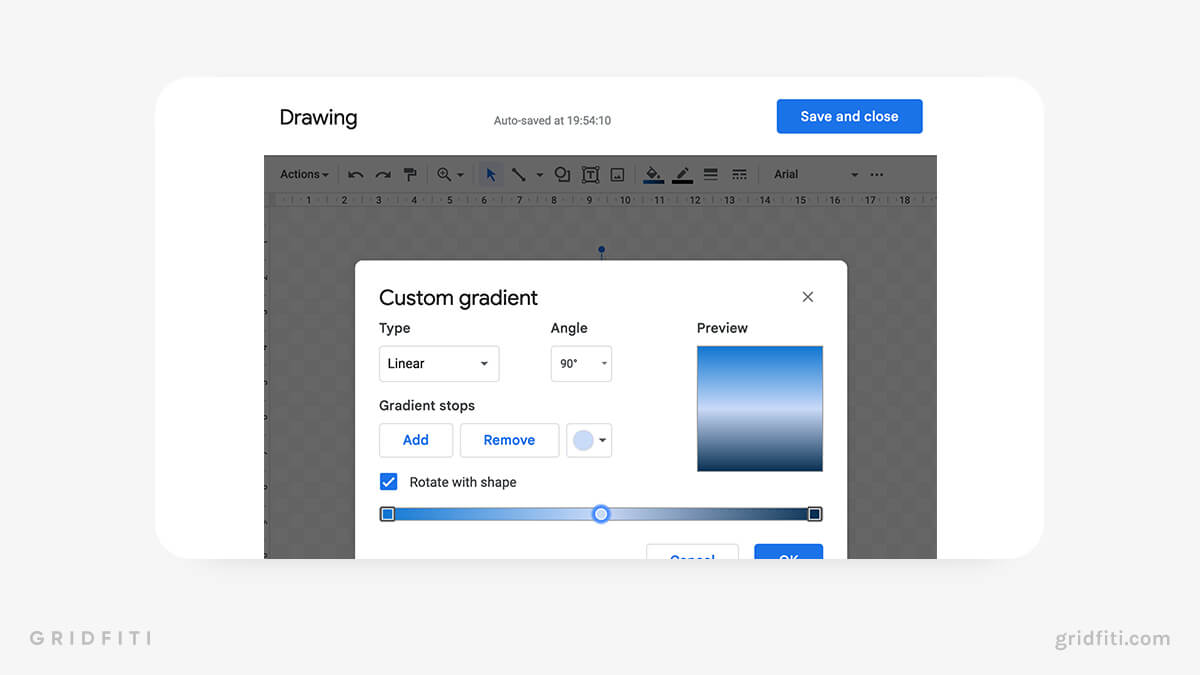
You can even add a multi-color gradient fill to a shape. To add a custom gradient, click Gradient, then click the + to customize your gradient. You can add or remove colors from your gradient, and you can also change the angle gradient and type.
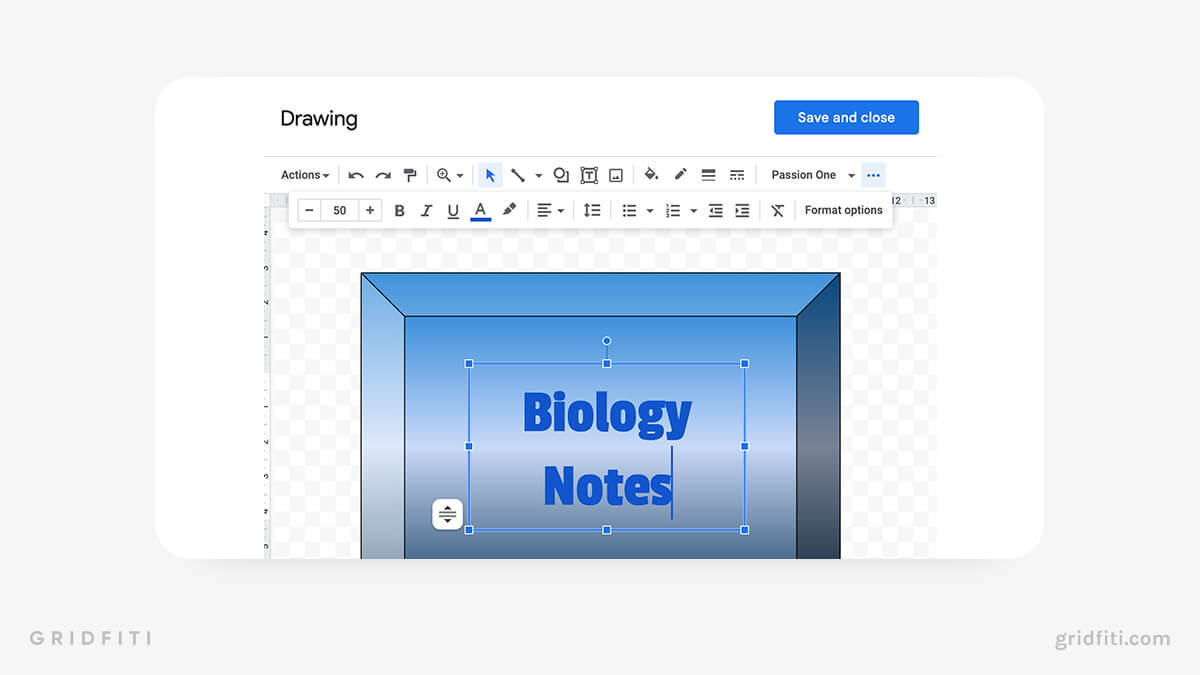
You can add a text box over a shape to make your text pop. Once you’ve created your shape, simply click the text box icon to the right of the shape icon to add your text box. Highlight the text, then use the formatting toolbar to change the font, alignment, text size, and text color. (Hint: You may need to click the menu icon [⋯] at the end of the toolbar to see all of the formatting options.)
Once you’ve customized your shape, click Save and close to add it. To edit your shape, simply double-click it.
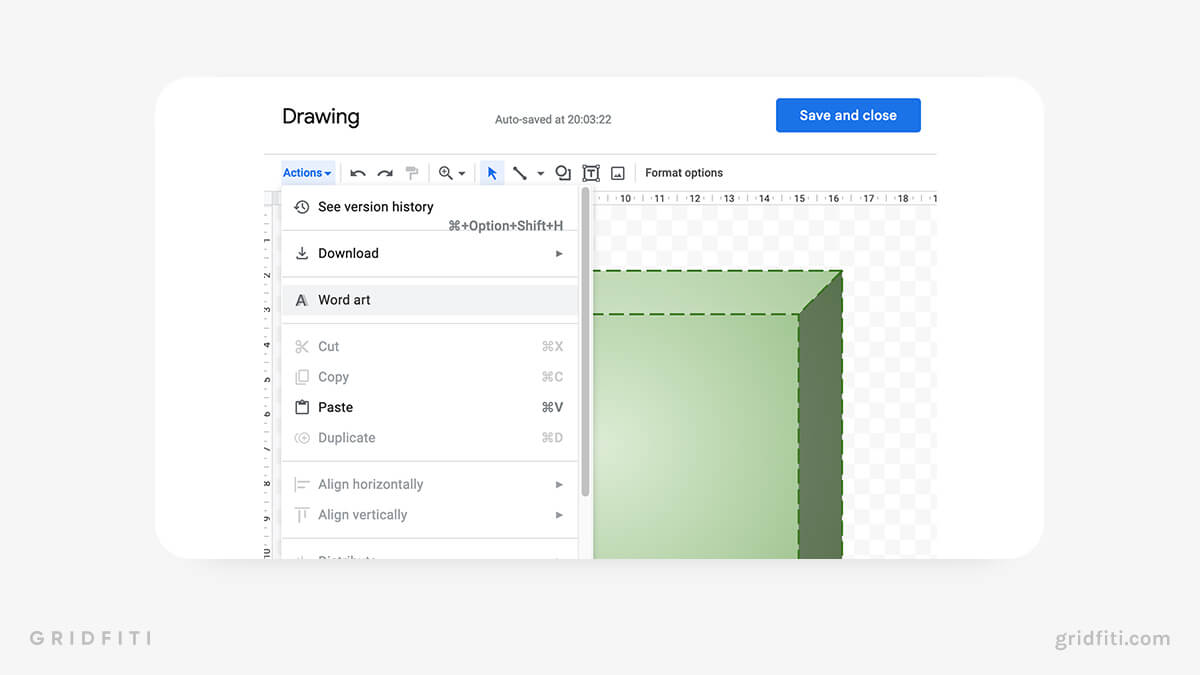
Word Art
Using Google Docs’ drawing tool, you can also create word art! This lets you add a fill color and stroke to your text
Create a new drawing by clicking Insert > Drawing > New. Or, double-click an existing drawing to edit it. To add word art to Google Docs, click the Actions drop-down box on the far left of the formatting toolbar. Then, click Word art.
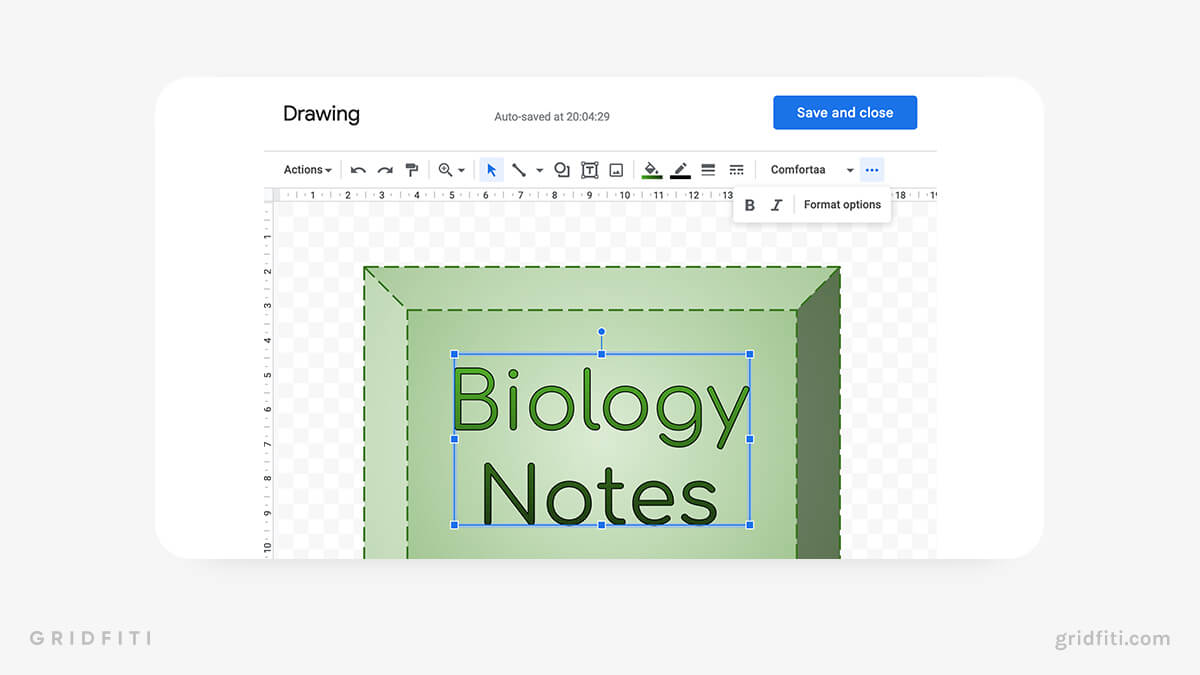
Type the text you’d like to appear in your word art, then type Enter. If you want to add a line break, hold down your Shift key, then press Enter in the text editing window to create a line break.
Use the formatting toolbar to edit the font, text size, text color, stroke color, and stroke style of your word art. (Pro tip: You can even add a gradient fill to your word art!)
Click and drag a corner of the word art box to resize the text. This may cause it to stretch — if you don’t want to stretch the word art, hold down your Shift key when resizing to keep the text width and height the same.
You can also move your word art to ensure it’s perfectly aligned in the center of your shape. Just drag it the box until you see two intersecting red lines that end at the edges of your shape.
When you’re finished adding your word art to your Google Doc, click Save and close. To edit it, double-click the shape to reopen the drawing screen.
Headings
Headings make it easy to navigate a long document. To create a heading in Google Doc, simply type some text, highlight it, then click “Normal text” in the formatting menu of your doc. Then, just select the heading you want from the drop-down box.
Alternatively, you can use keyboard shortcuts to create a new heading:
- Cmd + Option + 1: Create or turn text into a Heading 1
- Cmd + Option + 2: Create or turn text into a Heading 2
- Cmd + Option + 3: Create or turn text into a Heading 3
To change the font family, size, color, and formatting of a heading, simply highlight your heading, then update the formatting to your heart’s content. Once you’re finished, with the text still highlighted, click the heading menu again. Hover over the heading style you’ve applied to your highlighted text, then click Update heading to match.
Now, whenever you create that type of heading, your formatting changes will automatically be applied.

Symbols and Emojis
Add symbols and emojis throughout your Google Doc to truly complete your aesthetic. Here are a few hacks for using special characters and emojis in Docs.
Symbols
There are 2 main ways you can use symbols in Google Docs: inserting them from Google’s “Symbols” menu, or by copying and pasting your symbols from a fancy text generator. Here’s a quick look at how to do both.
Symbols in Google Docs
To insert a symbol in Google Docs, click Insert from the top menu of your document, then click Special characters. This will open up a pop-up box of all Google’s symbols. Alternatively, you can draw your own symbol.
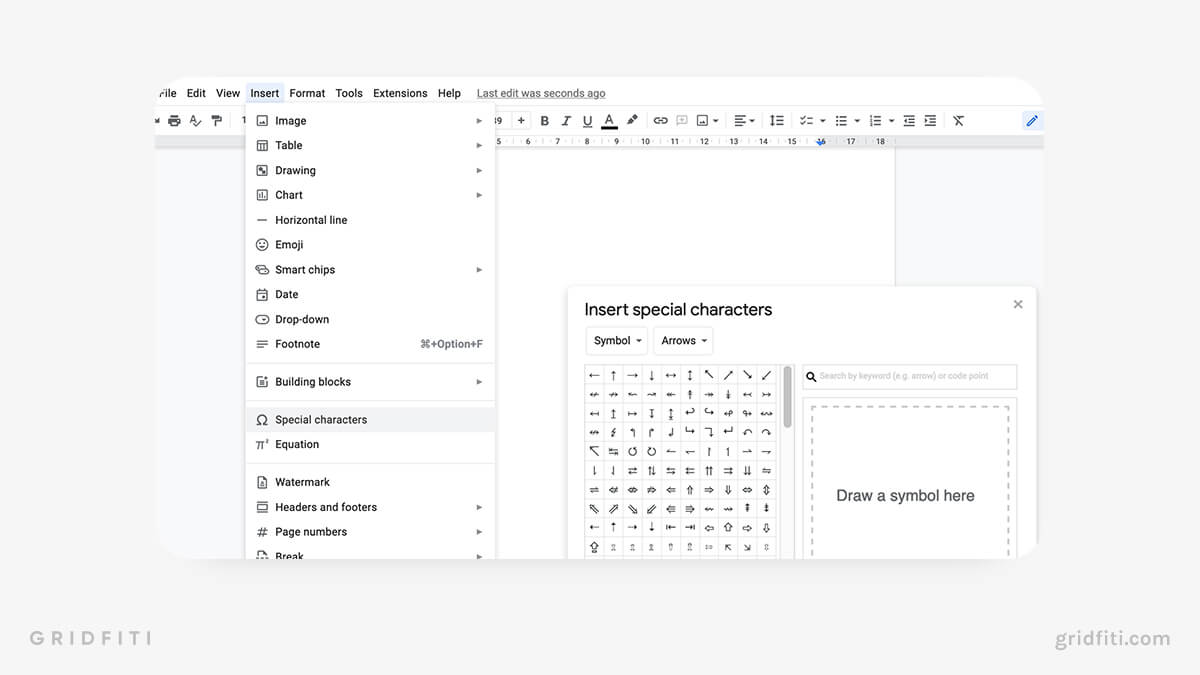
The left drop-down box in the symbols pop-up lets you choose from symbols, emojis, punctuation, or different types of scripts (like Middle Eastern or Han). The right drop-down box lets you filter all of Google’s symbols and emojis by category, showing you everything from arrows and emoticons to currency and math symbols.
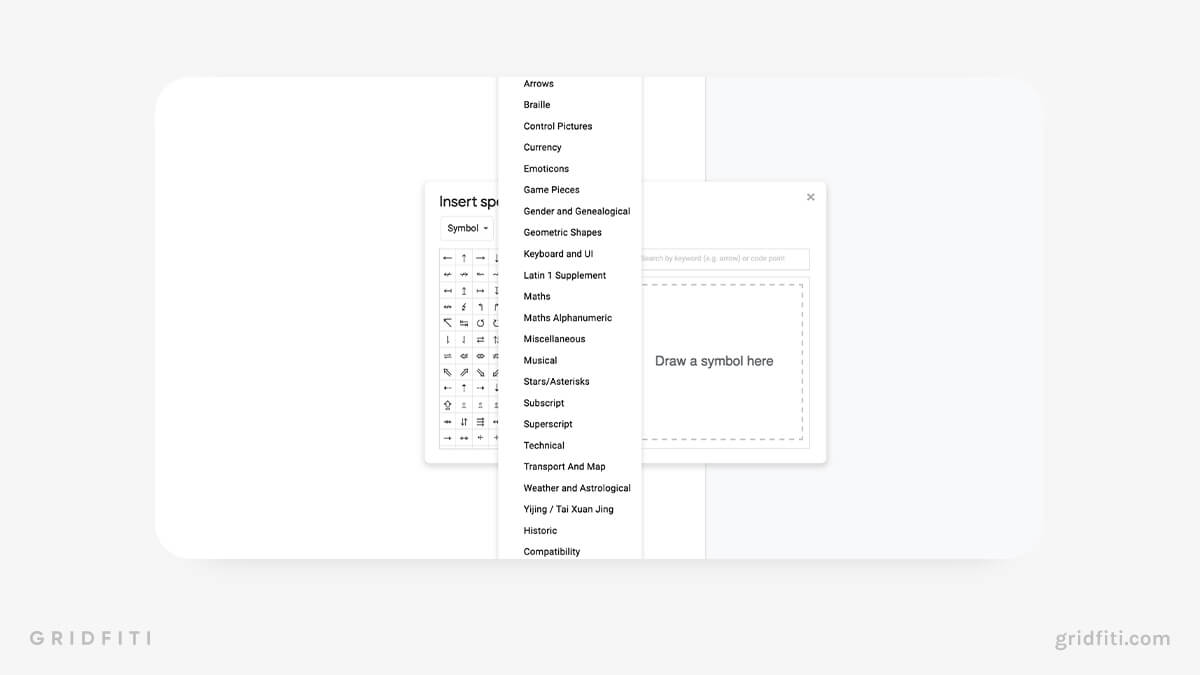
For an aesthetic Google Doc, we recommend checking out the symbols in these categories:
- Arrows
- Musical
- Stars/Asterisks
- Historic
- Miscellaneous
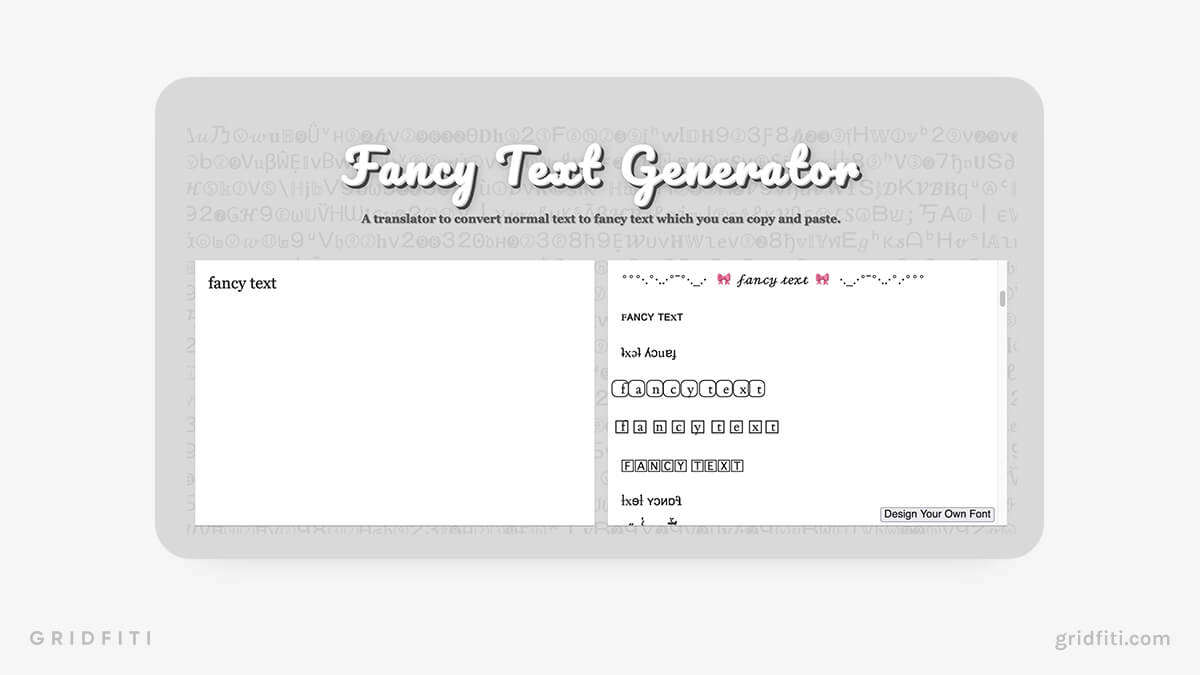
Fancy Text Generators
The other way to add symbols that Google Docs doesn’t offer is by copying and pasting them from a fancy text generator, like LingoJam.
Simply type your text, then copy the option you like best. Some of these options come complete with borders featuring special characters.
Aesthetic Google Docs Templates
Sure, you could spend hours creating your own aesthetic Google Doc. Or you could take a shortcut and download a pre-made template instead! Check out some of our favorite templates below.
For more templates, check out our full round-up of 20+ aesthetic Google Docs templates!
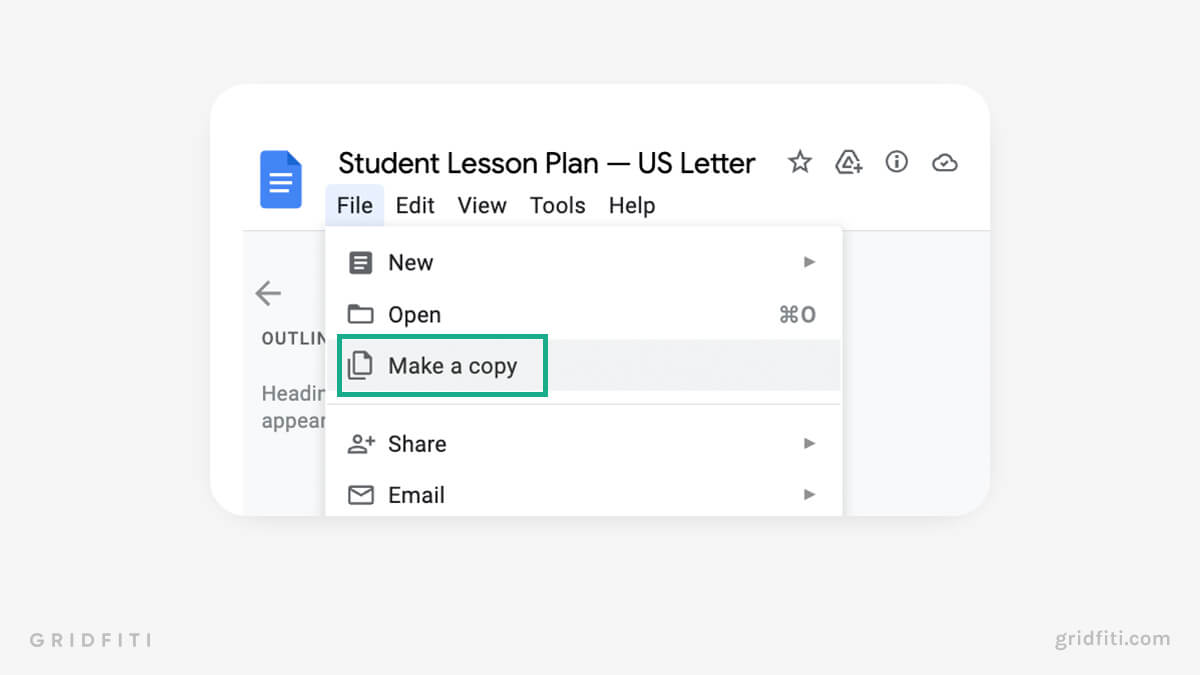
Ready to make these templates your own? Let’s do this! To get started, simply head to the top left corner and select “File”. From there, choose “Make a copy” and voila! You can now give your document a personalized name and choose where you want it saved. Time to get creative!
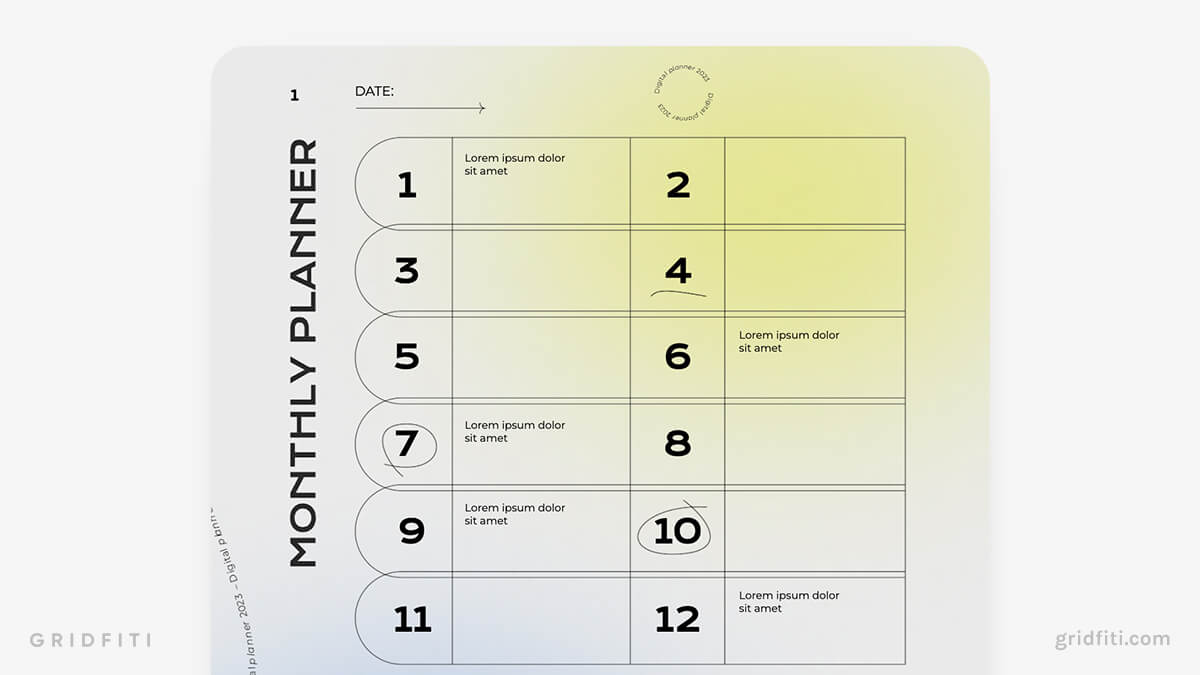
Gradient Digital Planner
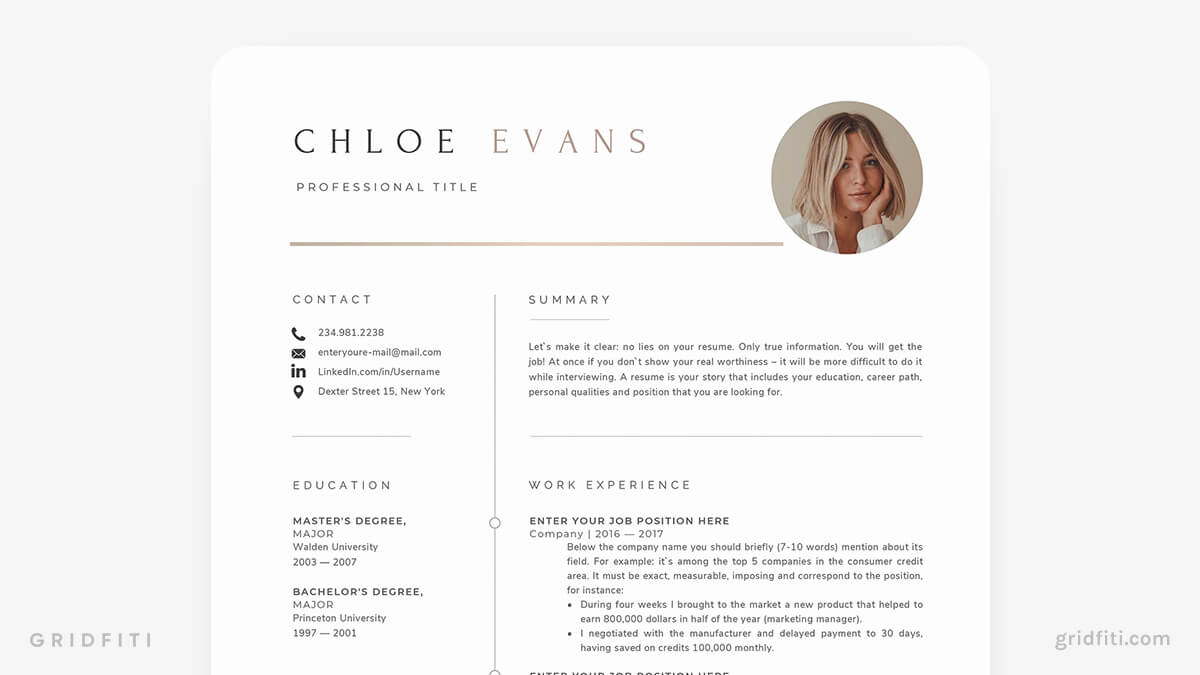
Sophisticated Photo Resume Template
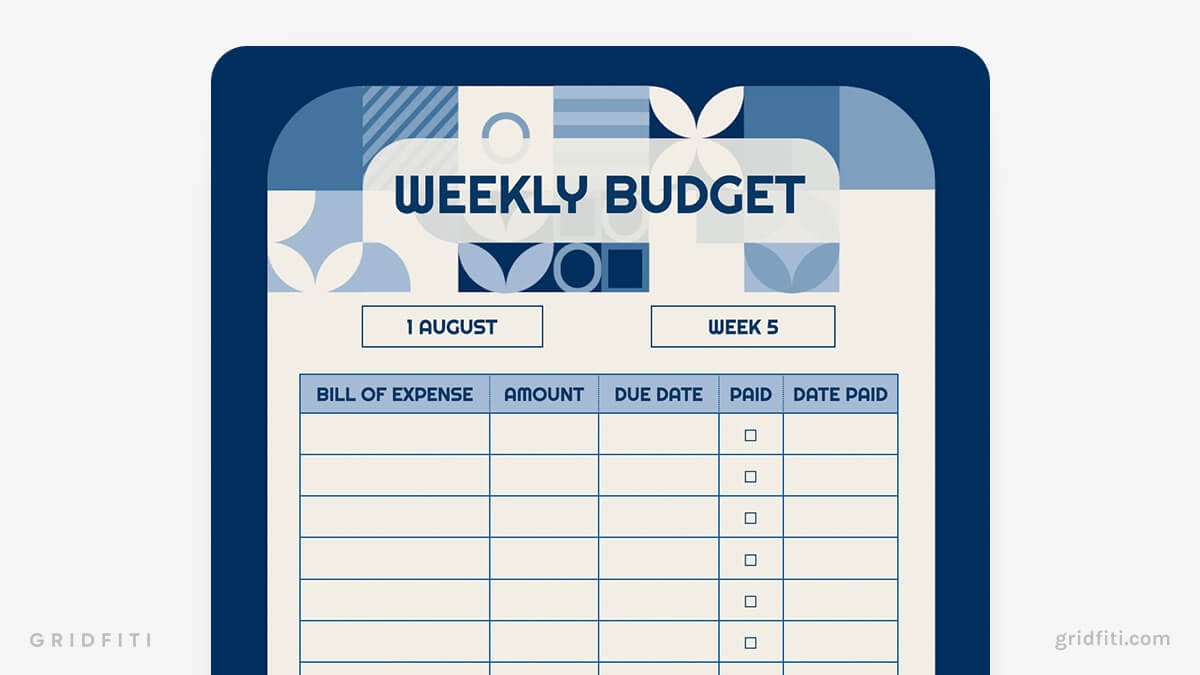
Blue Aesthetic Weekly Budget
Have you used any of these Google Docs hacks to create your own aesthetic document? Share your favorite tips in the comments with us below!
Gridfiti is supported by its audience – when you buy something using the retail links in our posts, we may earn a small commission at no additional cost to you. Read more about our affiliate disclaimer.